Creative Grids Square on Square Quilt Block Tutorial
|
The Creative Grids Square on Square Trim Tool makes it easy to create accurate Square on Square quilt blocks. Instead of trying to sew every triangle perfectly and hoping your finished block comes out square, you build the block in rounds and use the ruler to trim each round to the correct size.
My tutorial walks you through the process shown in the photos below, step by step.
The most important thing to remember: Match the centers when you sew, then let your trim tool create accuracy when you cut.
After making a few blocks, you’ll quickly find your rhythm, and the process will go much faster. Caution: These blocks are addicting! |
| |
 |
What You Will Need:
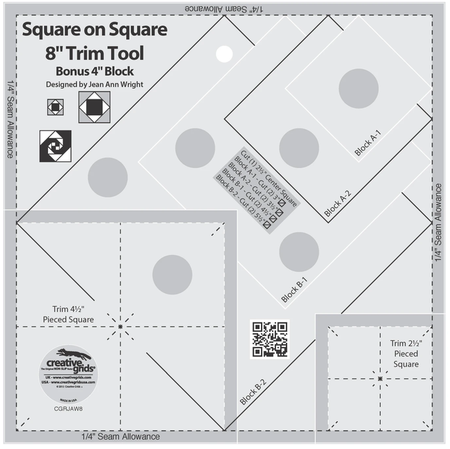
You will need your Creative Grids Square on Square Trim Tool, a rotary cutter and cutting mat, quilting fabric for the center square and surrounding triangles, pins, thread, and an iron.
The Creative Grids Square on Square Trim Tool has markings for the different stages of the block. Follow the cutting measurements printed on your tool or the instructions for the block size you are making.
For this tutorial, I am making an 8 1/2" unfinished block, listed as an 8" finished block in the Creative Grids instructions. |
| |
| |
 |
Step 1: Cut Your Fabric Pieces
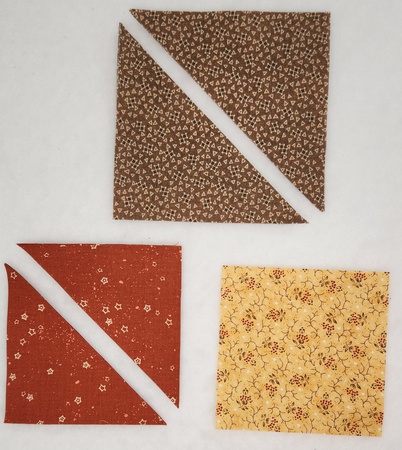
- Begin by cutting the center square and the squares needed for your surrounding rounds.
- The surrounding squares that will become triangles are cut once diagonally from corner to corner. This gives you the triangles needed to surround the center square.
- In the photo, the yellow floral fabric is my center square. The burnt orange fabric will make my first round, and the brown fabric will make my second round.
Tip: Keep the pieces of each round together so you don't accidentally mix up your triangles. |
| |
| |
 |
Round One
Step 2: Find the Centers
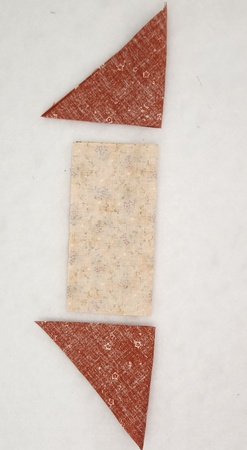
- Fold each triangle in half along its long edge and lightly finger-press the fold. This little crease marks the center of the triangle.
- Gently fold the center square to find the midpoint of each side.
Finding the centers makes positioning the oversized triangles much easier. |
| |
| |
 |
Step 3: Match and Pin the Centers
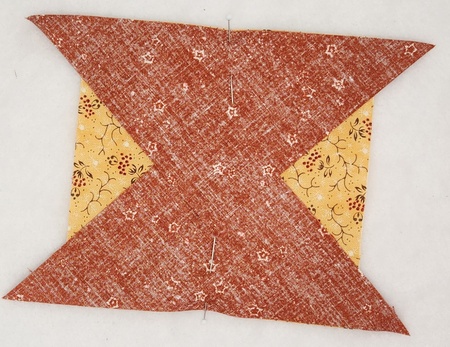
- With the right sides together, match the center crease of the triangle to the center of one side of the square.
- Repeat on the opposite side of the square with the second triangle.
Don't worry if the triangle extends beyond the square at both ends. That extra fabric is intentional and will be trimmed later. |
| |
| |
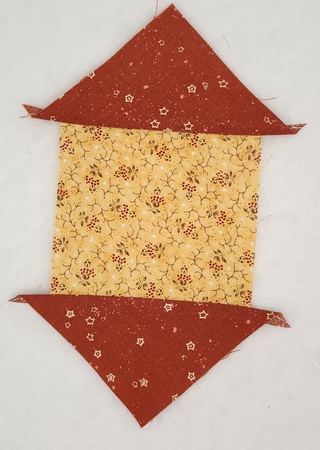 |
Step 4: Sew the First Two Triangles
- Sew both triangles to the center square using an accurate 1/4 inch seam allowance.
- Press the triangles away from the center square.
Your unit will look a little oversized and uneven at this point. That's exactly what we want!
(Read to the bottom for an ironing tip to avoid my fabric "bowing" oops.) |
| |
| |
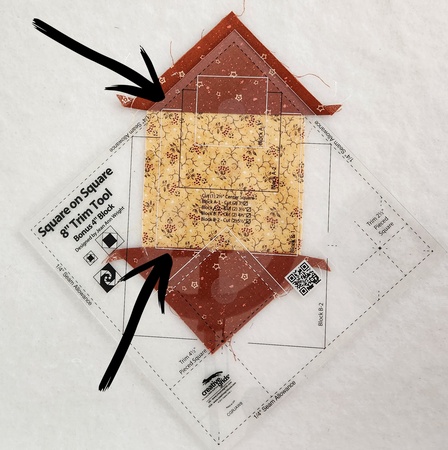 |
Step 5: Do a Quick Seam-Placement Check
- Place the Creative Grids Square on Square Trim Tool over the unit and align the appropriate markings for the size of block you are making.
- Pay particular attention to the places where the ruler markings meet the seams, as indicated by the arrows in the photo.
This quick check confirms that your seams are sitting where they need to be before you add the next pair of triangles. If they are not, you need to increase or decrease your seam allowance.
You are NOT trimming the block yet! You are simply using the trim tool as a guide to confirm your seam allowance accuracy. |
| |
| |
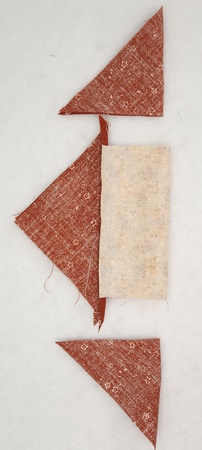 |
Step 6: Find the Centers for the Next Two Sides
- Now add the remaining two triangles.
- Again, fold each triangle along its long edge to find the center.
- Find the center of the remaining sides of your pieced unit as well.
|
| |
| |
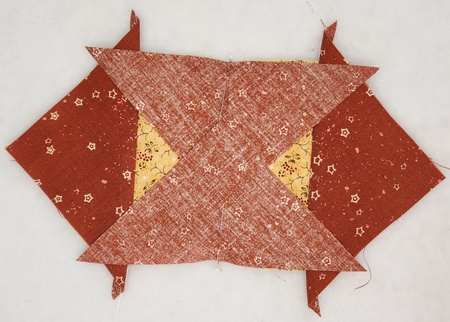 |
Step 7: Match the Centers and Pin
- Match the center of each triangle to the center of the corresponding side of the block.
- Pin at the centers first.
- Add additional pins, as needed.
Matching the centers rather than the corners is one of the keys to getting a balanced Square on Square quilt block. |
| |
| |
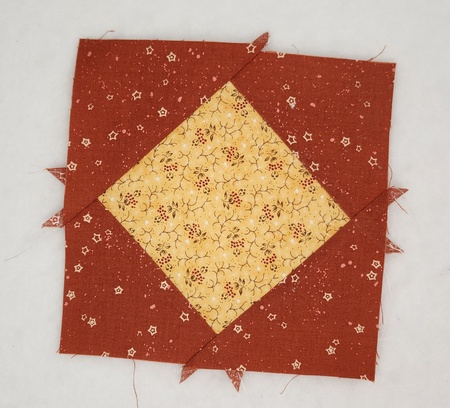 |
Step 8: Sew and Press
- Sew both triangles with a 1/4 inch seam allowance.
- Press the triangles away from the center.
All four sides of my yellow center square are now surrounded by the burnt orange fabric. |
| |
| |
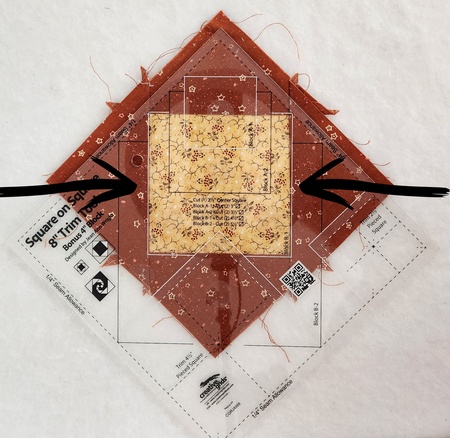 |
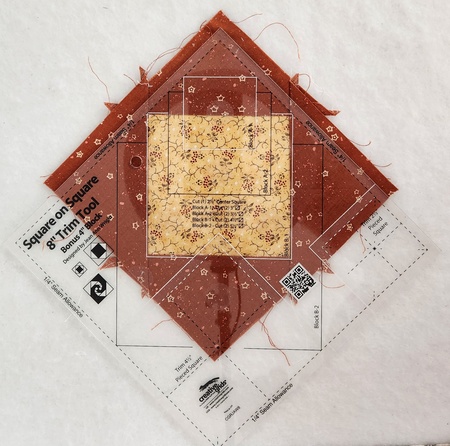
Step 9: Check the Seams Again
- Place the Creative Grids Square on Square Trim Tool over the block and line up the appropriate markings.
- Check both sides before trimming.
- Check the seam intersections of the fabric points on both sides.
The goal is to make sure you will have a proper 1/4 inch seam allowance beyond the points when the block is trimmed. Protecting those points now means they won't disappear when the block is sewn into a quilt. |
| |
| |
 |
Step 10: Trim the First Round
Now the trim tool does the precision work!
- Position the ruler using the markings for the first round of your block. Make sure the center and seam lines are aligned correctly.
- Trim the first two sides.
- Rotate the block and trim tool as directed, realign the markings, and trim the remaining sides.
Don't try to make the block square by eye! Let the trim tool markings determine exactly where you trim. |
| |
| |
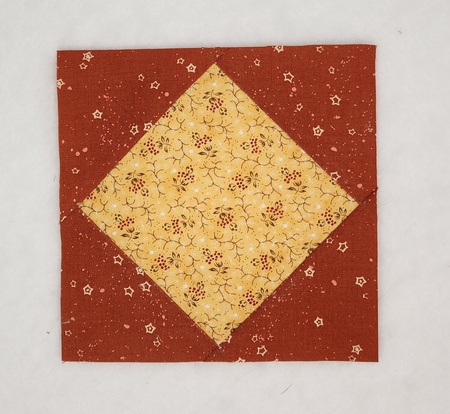 |
Step 11: Round One is Complete
After trimming, you should have a neat square with the center fabric appearing as a diamond.
Notice how much cleaner and more accurate the block looks after trimming. This is the big advantage of an oversized-and-trimmed construction method. |
| |
| |
Round Two
The second round is made in much of the same way. Repeating the same process makes this trim tool especially easy to use once you have completed your first round. |
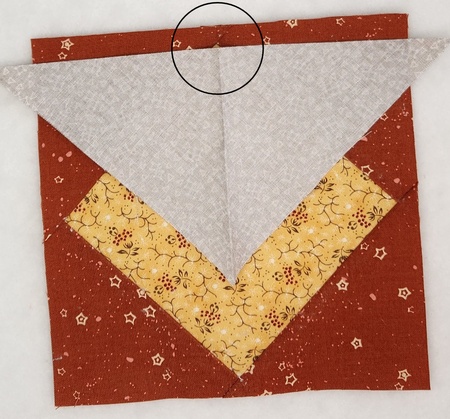 |
Step 12: Find the Center and Position the Next Triangles
- Fold the long edge of your round two triangles to find its center.
- This time, use the points of the center square as an easy visual reference for finding the center of each side of your pieced block.
- Match the center fold of the triangle with the center point of the block.
|
| |
| |
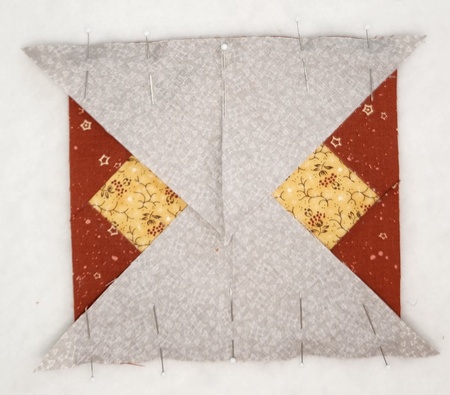 |
Step 13: Pin and Sew the First Pair
- Pin the triangles in place on opposite sides.
- Sew using a 1/4 inch seam allowance.
- Press the triangles outward.
|
| |
| |
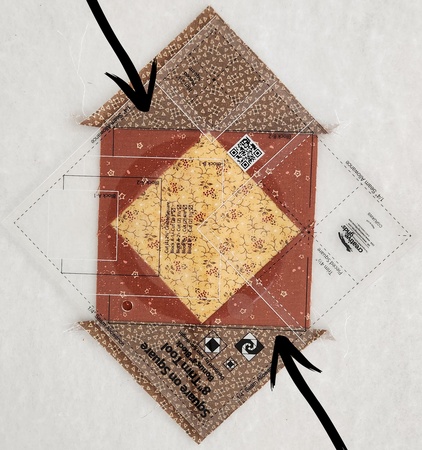 |
Step 14: Check the Seam Placement
- Position the Creative Grids Square on Square Trim Tool over the block using the markings for this stage.
- Look closely at the seam intersections indicated in the photo.
You are not trimming yet! This is another quick opportunity to confirm that everything is positioned correctly before the final two triangles. |
| |
| |
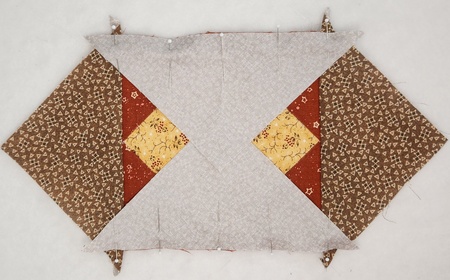 |
Step 15: Add the Final Two Triangles
- Find the centers of the remaining two triangles.
- Match those centers to the centers of the two open sides of the block.
- Sew with a 1/4 inch seam allowance.
- Press the triangles outward.
At this stage your quilt block will once again look oversized. That's exactly what should happen. |
| |
| |
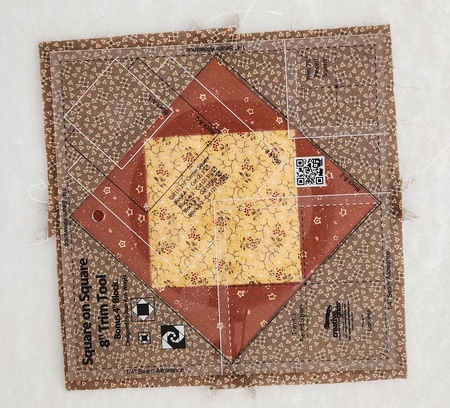 |
Step 16: Trim All Four Sides
- Place the ruler over the completed unit and align the markings for the finished stage of your quilt block.
- Check the center square, diagonal lines, and seam intersections before trimming.
- Trim two sides, rotate and realign the trim tool, and then trim the remaining two sides.
Take your time with this step. Accurate alignment before you cut is more important than cutting quickly. |
| |
| |
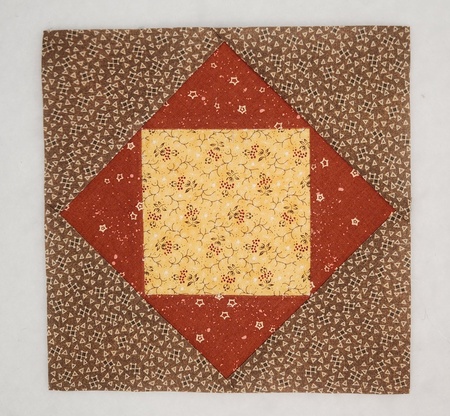 |
Step 17: Your Square on Square Block is Finished
That's it!
You now have a beautifully sized Square on Square Quilt Block with an evenly centered middle and consistent points. |
| |
| |
The Secret to Success with the Creative Grids Square on Square Trim Tool
If you are using this ruler for the first time, remember these three things:
- Center First: Fold the triangles to find their centers and match those centers to the block rather than trying to line up the ends.
- Sew Oversized: Do not worry about excess fabric extending beyond the block. The extra fabric gives you room to correct small variations in your piecing.
- Trim with the Trim Tool: After each round, carefully align the appropriate ruler markings before trimming. The trimming step is what produces the crisp, accurate finished quilt block.
- It is also worth taking the few extra seconds to do the seam placement checks shown in the photos. Those checks help ensure there is enough fabric beyond each point for a proper 1/4 inch seam allowance.
|
| |
Why I like This Method
Square on Square Quilt Blocks can be surprisingly tricky when they are made by trying to match triangle corners perfectly. A tiny sewing variation can shift the center or leave you with a block that is not square.
The Creative Grids Square on Square Trim Tool changes the process: Piece first, trim for accuracy second. That makes the technique much more forgiving and much easier to repeat when you are making several blocks for a quilt.
Once you have made the first one, the rhythm becomes simple:
Find the centers - pin - sew - press - check - trim - repeat.
Before long, you will have a stack of accurate Square on Square quilt blocks ready for your quilt.
Happy Sewing! |
| |
| |
 |
PS.
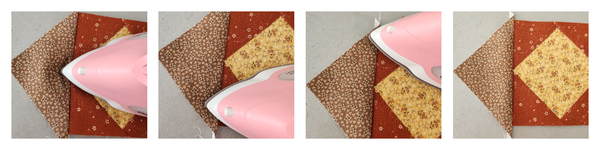
A Quick Pressing Tip: Notice in the Step 4 image above that my burnt orange fabric is slightly bowed. I was not careful in my pressing and stretched the fabric a little out of shape from the seam.
Here is an easy way to avoid that:
- Place your iron in the center of the block seam.
- Using the tip of the iron, gently press straight out toward the opposite edge.
- Then return the iron to the center and press straight out toward the opposite edge.
- Give the complete seam a final press to set.
If the fabric is "rolled" or "pushed" unevenly, it can stretch and create that slight bow.
I hope that little tip helps! |
| |
 |