Honeysweet Table Topper


Article Archive

+  2024 (37)
+  2023 (37)
+  2022 (27)
+  2021 (16)
+  2020 (16)
+  2019 (32)
+  2018 (15)
+  2017 (9)
+  2016 (3)
+  2015 (23)
-  2014 (37)
+  2013 (2)


Welcome!

Hello and thank you for stopping by. We hope you will find this blog site full of great tutorials and creative ideas for your upcoming projects.

Bear Creek Quilting Company

2023 Maywood Studio Maker
I am a 2023 Maywood Studio Maker!
Posted by Shari on January 28th, 2014


♥♥♥  Honeysweet Table Topper Tutorial  ♥♥♥

Need something sweet to spice up your Valentine's Day? 

How about a Valentine inspired table topper! 

We have teamed up with Paula from The Sassy Quilter to show us
how to create an easy table topper, in just one weekend.
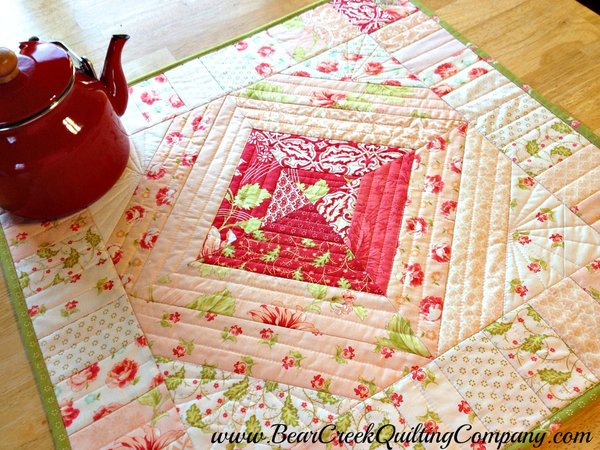
Honeysweet Table Topper


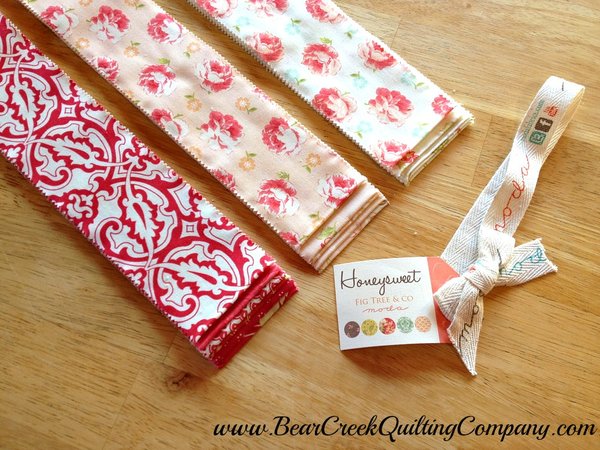
She used a Honeysweet  jelly roll by Fig Tree & Co. for Moda to whip up this
easy project.  It measures 24 inches x 24 inches and is perfect for the top of any table
or you can use it as a wall hanging.

Here is what you need to get started:
Honeysweet Table Topper


Open up that jelly roll and pull out the red, pink/peach and cream colored
strips.  You will need only four of each color.
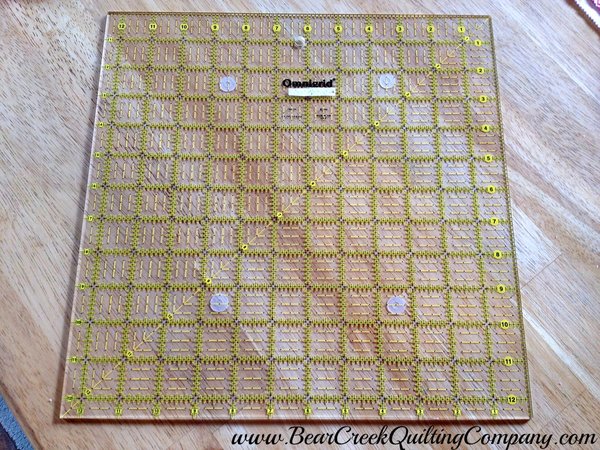
 

Square Ruler


You will also need a 12 1/2 inch square ruler.

Here we go...
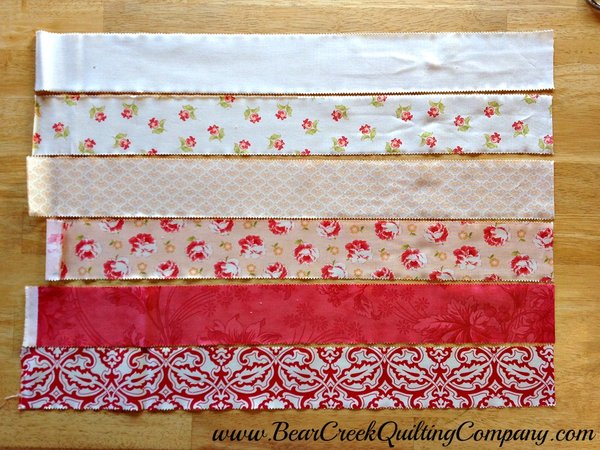
Honeysweet Stripset


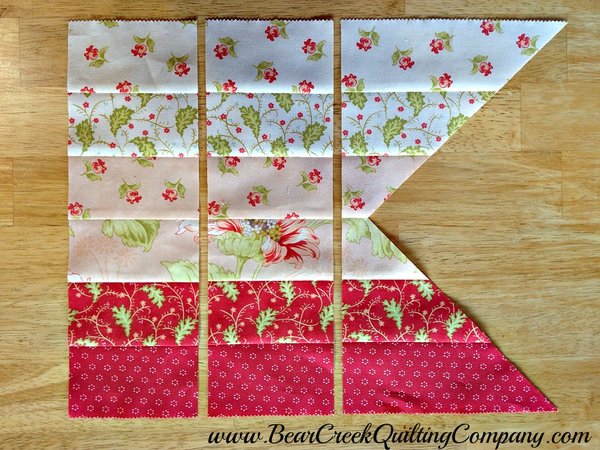
Cut all of your strips in half on the fold and layout a strip set that includes
2 cream, 2 pink and 2 red.
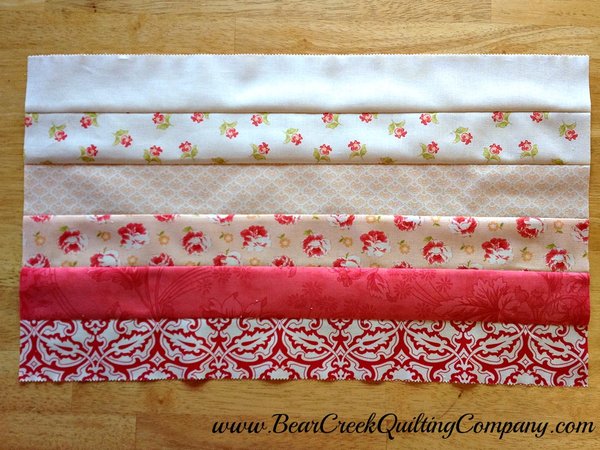
 

Honeysweet Stripset 3


Now join all your strips together into one big strip set.  I suggest sewing
in groups of two and then sew those together. 

Press carefully, making sure not to distort the strips, and square off one
end so it's straight.
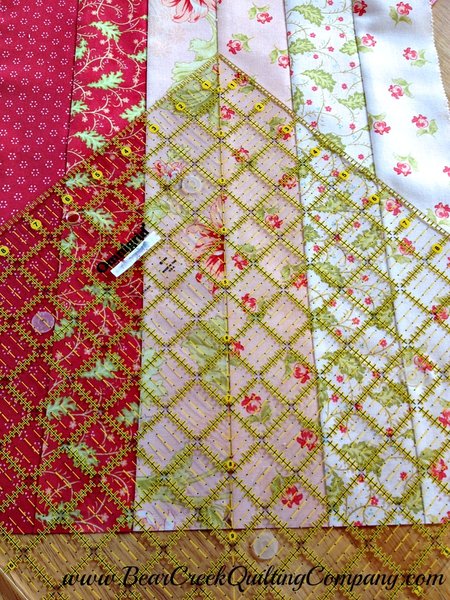
 

Squareup 1


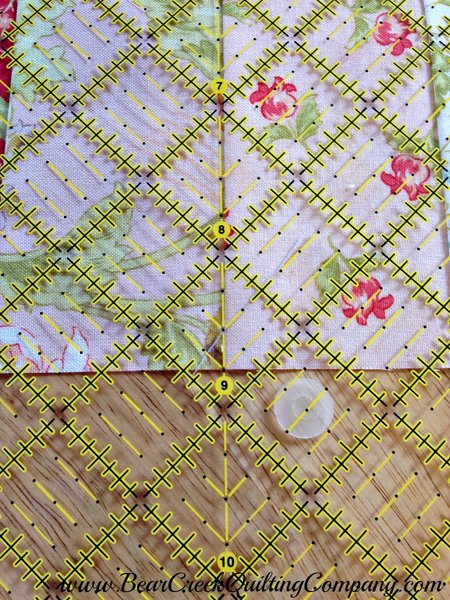
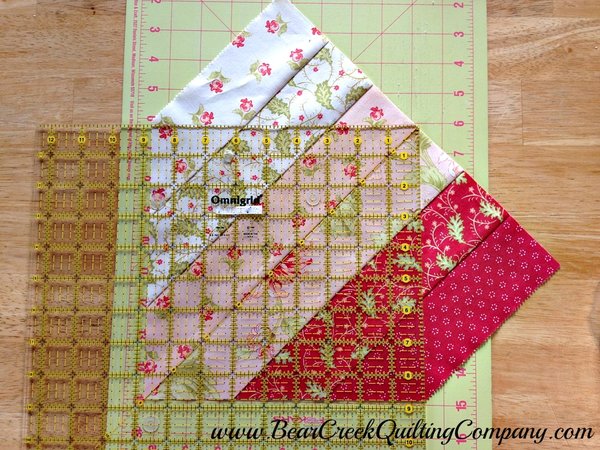
Place the diagonal line along the seam between your two pink strips
with the 8 3/4 inch mark at the very end of the fabric.
 

Squareup 2


Here's a close up...Now, use your rotary cutter and trim along the
top two sides of the ruler.
 

Squareup 3


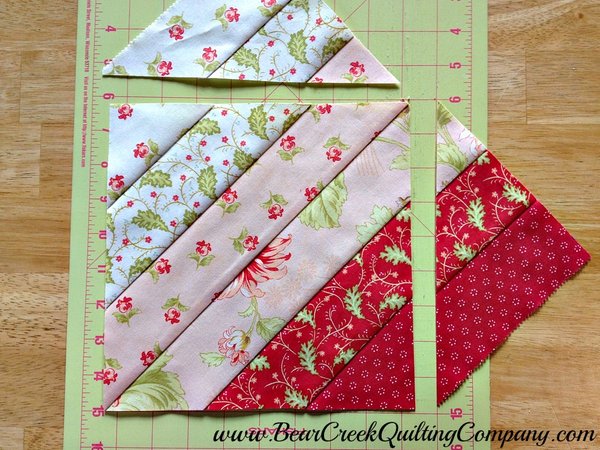
Rotate your strip set, line up the two sides you just cut with the 8 3/4 inch
markings on your ruler.  Trim the two remaining sides.
 

Squareup 4


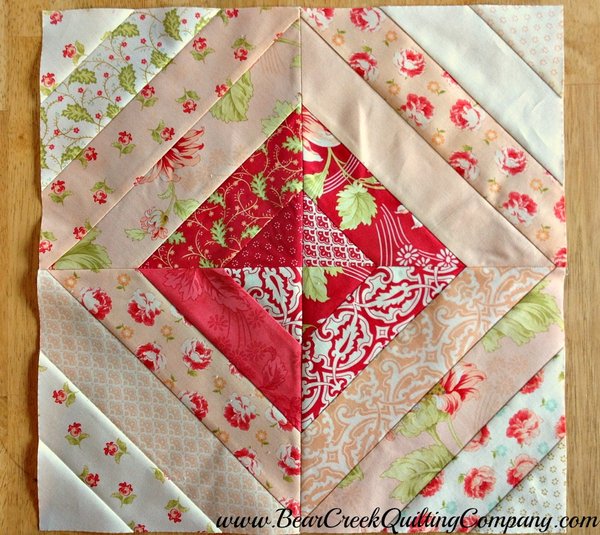
Your block should look like this.


Honeysweet Center


Join the four blocks to form the center.
 

Honeysweet Border Strips


Take the rest of your strip set and cut two - 4 inch strips from each one. 
That will give you eight - 4 inch strips.
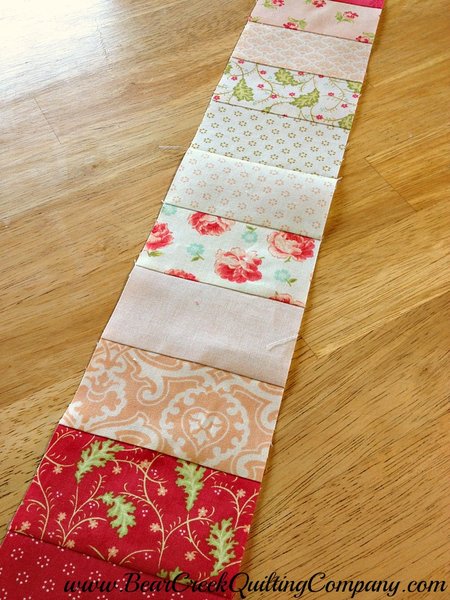
 

Honeysweet Border


Join two of the strips together, matching the cream ends, to form
your border.  Do this for all four sides.
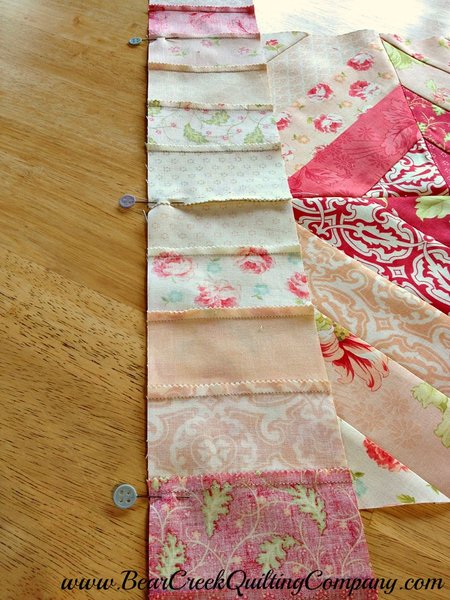
 

Honeysweet Borders Pinned


Line up the center of your border with the center of the top and place
pins as needed.  You will have excess on both ends.  After attaching the
right and left borders, trim the extra so that it is even with the center blocks.
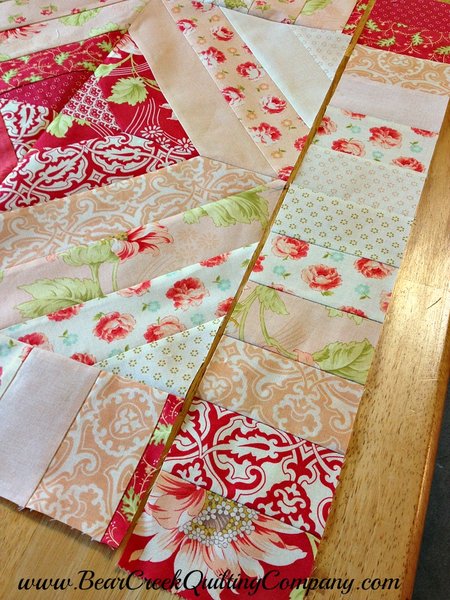
 

Honeysweet Border 2


Repeat for the top and bottom borders.
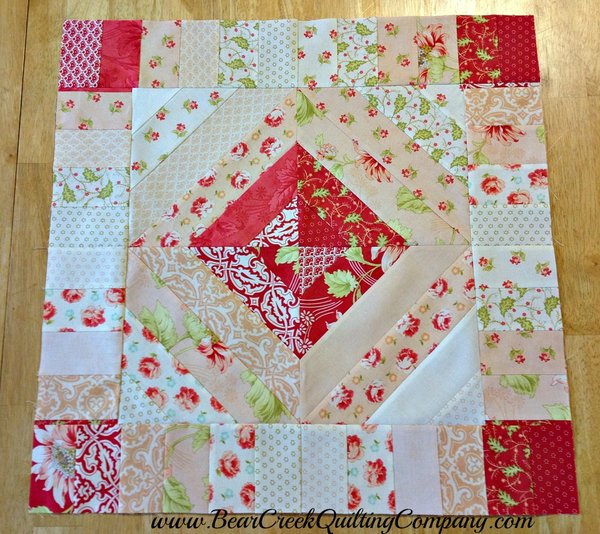
 

Honeysweet Table Topper Top


Voila! You did it!


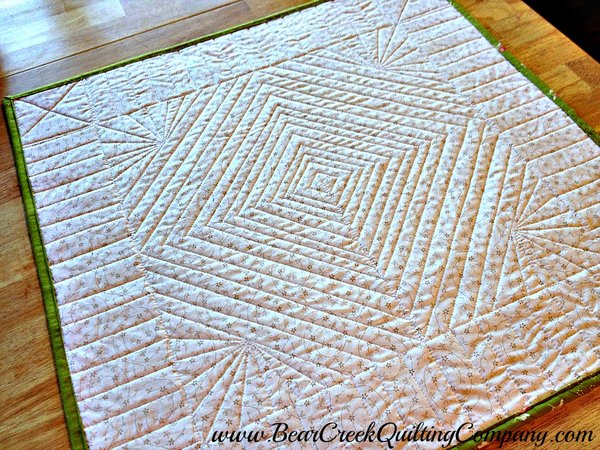
Honeysweet Table Topper back


Layer up your top, batting and some backing and quilt as desired.  I quilted
mine with a walking foot.  Here is the back so you can see the design.
 

Honeysweet Table Topper binding


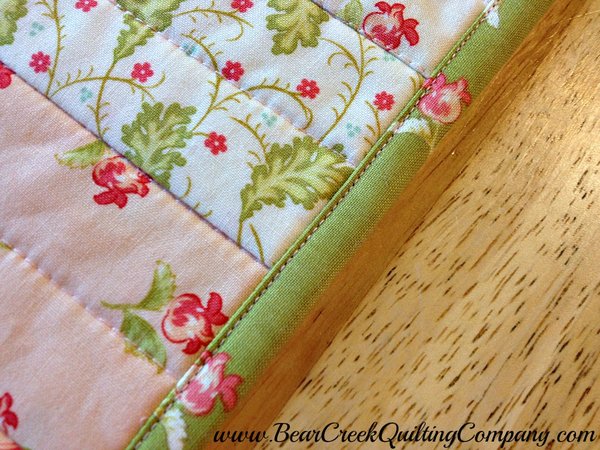
You will need to join three jellyroll strips to create your binding strips. 
I pulled some green ones, but choose what you like!  I finished with a
machine binding.

Hope your Valentine's Day is extra sweet!

Paula

Honeysweet Table Topper was designed and created for Bear Creek Quilting Company by Paula of The Sassy Quilter


 
 
Category: Tutorials

Comments

  • 1. Posted by Connie on April 27th, 2014 at 2:16 p.m.
    Perfect for my tea time of sharing and caring,
  • 2. Posted by Brad on April 14th, 2014 at 10:44 a.m.
    Beautiful!
  • 3. Posted by Ida on March 25th, 2014 at 5:44 a.m.
    Love this pattern, will be trying this pattern soon.
  • 4. Posted by Marti Morgan on February 2nd, 2014 at 11:30 a.m.
    Love this table topper and love the way you quilted it. Hope I can successfully copy it. Thank you so much for sharing your talent!
  • 5. Posted by Debra Kay Neiman on January 31st, 2014 at 12:42 a.m.
    What a wonderful project tutorial...thank you crystalbluern at onlineok dot com
  • 6. Posted by Susan the Farm Quilter on January 30th, 2014 at 1:10 p.m.
    Paula, what a beautiful little table topper!! Great tutorial with very clear instructions. I like the way you use almost all of your strip sets!!! Just perfect :)
  • 7. Posted by Susie on January 30th, 2014 at 11:31 a.m.
    Such a pretty table topper! It's so fresh and happy! And you've given us a great tutorial! I
  • 8. Posted by Esther f. on January 30th, 2014 at 10:53 a.m.
    Hi Pauka, This is a wonderful idea!!! I will give this a go! Thanks
  • 9. Posted by Christine Sherman on January 29th, 2014 at 8:24 p.m.
    This is really pretty, thanks for sharing!
  • 10. Posted by Carrie P. on January 29th, 2014 at 11:56 a.m.
    quick, easy and very sweet! thanks for sharing.
  • 11. Posted by Jennifer Creech on January 29th, 2014 at 10:21 a.m.
    So pretty! Great job Paula!
  • 12. Posted by Maggie on January 29th, 2014 at 7:15 a.m.
    Very cute table topper. As always, a great tutorial from the sassy quilter...love her blog!
  • 13. Posted by Susan at Theboredzombie on January 29th, 2014 at 6:54 a.m.
    Very nice Paula! You're style sings through in everything you make. :)
  • 14. Posted by Paula@TheSassyQuilter on January 29th, 2014 at 5:12 a.m.
    Thanks for letting me be your guest:) So fun!