Posted by Shari on July 26th, 2015
| Mistletoe Lane Quilt Tutorial |
| We are happy to have Rebecca from Our Busy Little Bunch back for another great tutorial. You might remember her Laptop Bag Tutorial she dazzled us with the first time. This time she has a simple festive quilt that resembles dancing candy canes! |
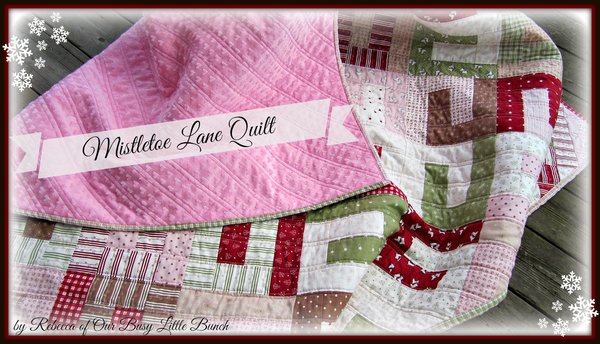 |
| Moda's Mistletoe Lane is a fun new line filled with small-scale prints including ice skates, stars, snowflakes, stripes and plaids. My first inspiration when seeing it was an over sized lap quilt for the couch, and using a smaller scale block to mix up the fabrics. The following tutorial is simple to follow, and the finished quilt has become a quick favorite in our house. It can be made with Mistletoe Lane's fat quarter bundle or a couple jelly rolls. |
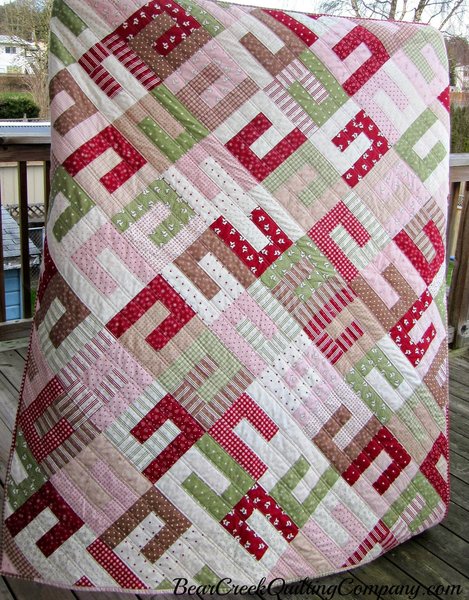
| The quilt I made measures approx 55 inches x 64 inches after washing. The total number of blocks needed is 72. I kept aside a strip of each plaid print to use for a scrappy binding later. |
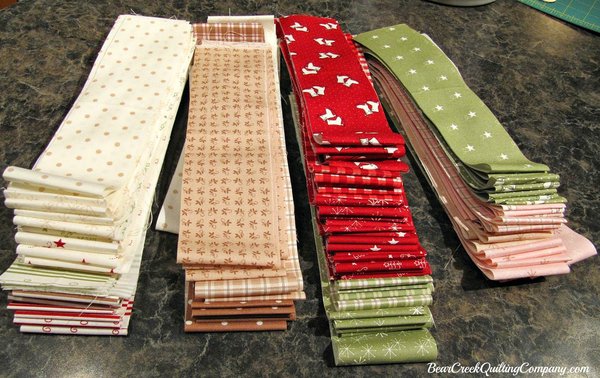 |
| First, you need to cut your fabrics into 2 1/2 inch strips (unless using jelly rolls), and sort by color. |
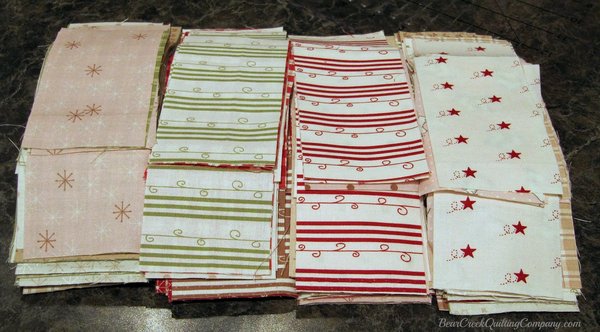 |
| For each block, select two fabrics that contrast each other, and cut each strip into the following lengths: two at 4 1/2 inches and one at 8 1/2 inches. |
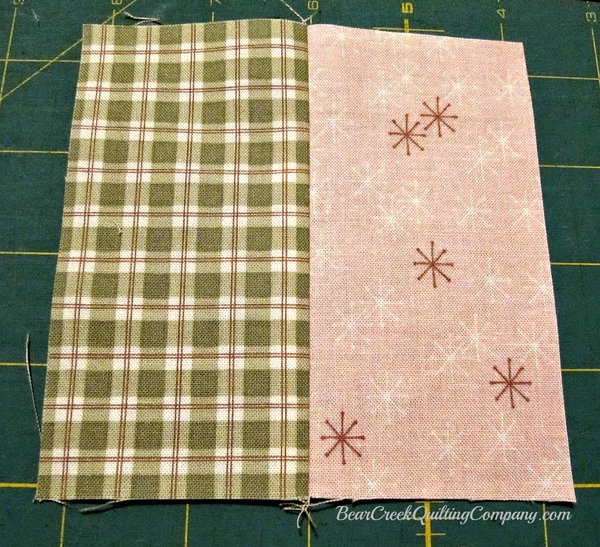 |
| Now before you start chain piecing all these blocks, do a tester blocks with some scrap fabric to test your finished block size. I found that a scant seam allowance was needed and moving my needle a touch to the right on my machine made this easy to accomplish. |
| Stitching up a block requires the following steps: Take two 4 1/2 inch strips, sew and press. |
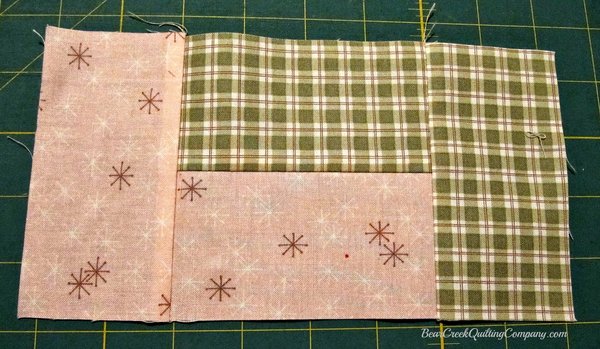 |
| Add a second 4 1/2 inch strip to each end of the first unit, sew and press. |
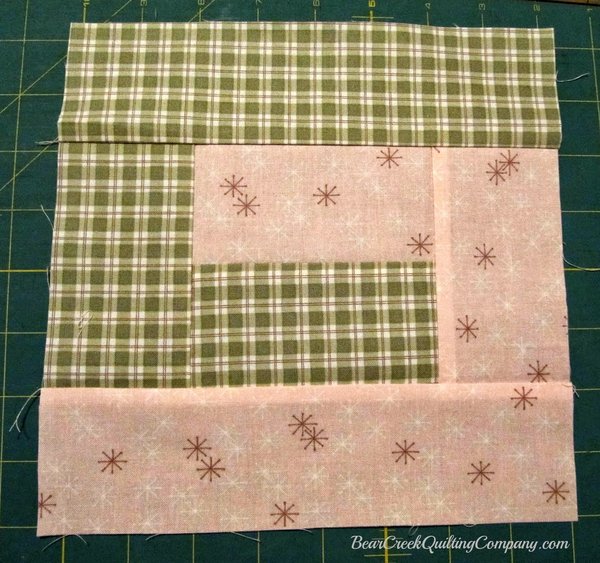 |
| Add the 8 1/2 inch strips to the sides of the unit (be sure to place them as shown below to create the swirl effect), sew and press. Your finished block should measure 8 1/2 inches square. |
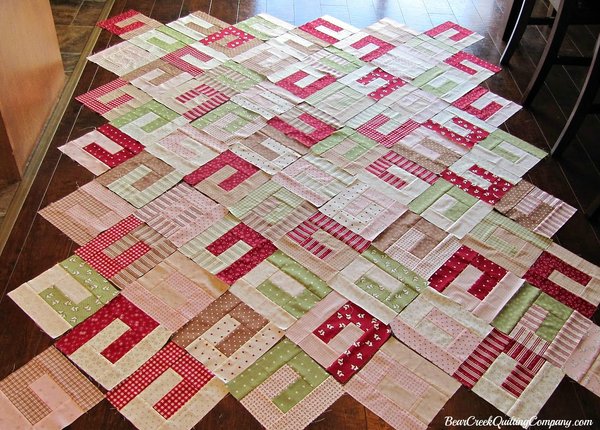 |
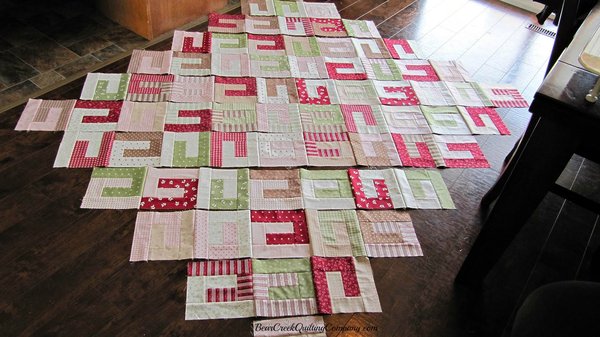
| When you've finished sewing up all your blocks, lay them out in a random fashion, trying not to have two identical prints beside each other. The layout should be 6 blocks wide, by 7 blocks tall. Make sure to lay them out 'on point' as shown below. |
 |
| Sew each diagonal row individually and press. Then sew the rows together, making sure to match up seams. |
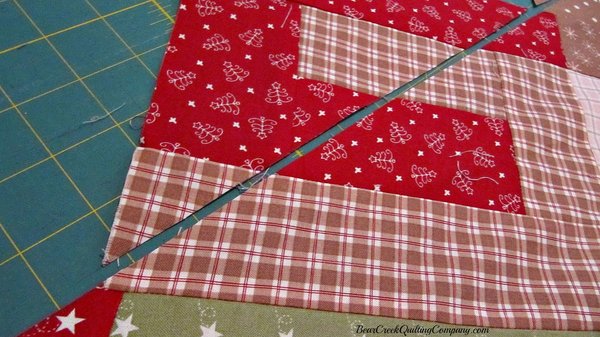 |
| Now you will need to trim the blocks around the perimeter to square up the quilt. Using a ruler and rotary cutter, cut 1/4 inch away from each seam as shown above. |
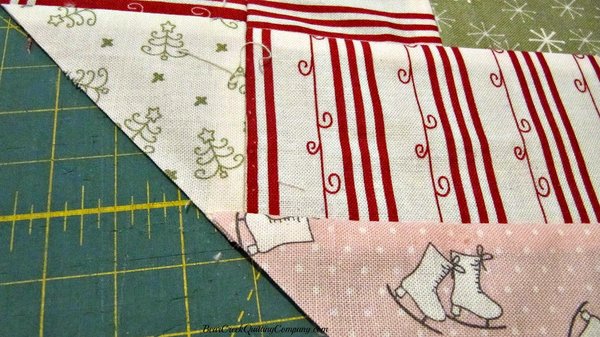 |
| As you can see, your cut should leave you with a 1/4 inch seam allowance around the edge of the quilt. While this does leave you with a nice pile of scraps to make into a coordinating pillow or other project, it also helps all the little points to stay in tact when adding the binding on later. |
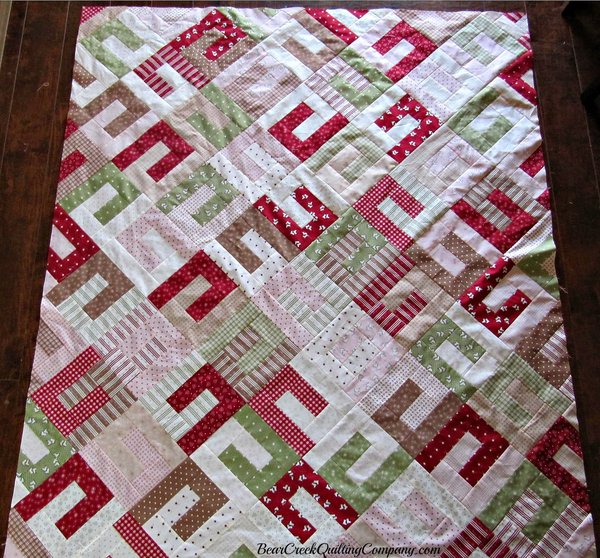 |
| So at this point you should have a squared off quilt top, ready for quilting and binding. |
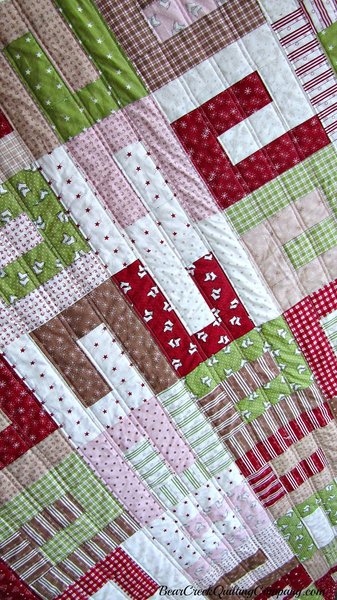 |
| For this quilt, I chose to do straight stitch quilting in one direction only, echoing both sides of each seam. |
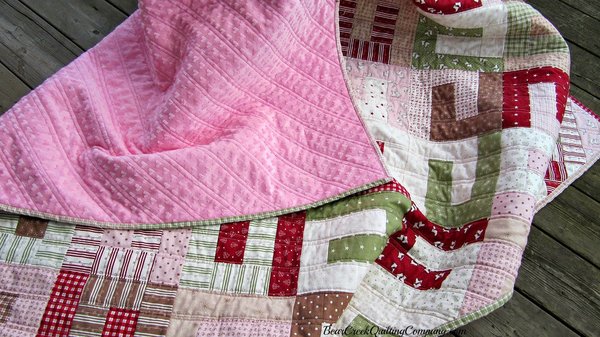 |
| The binding is scrappy, made from the strips of plaid prints that were set aside earlier. For the backing I used a soft minkee in a coordinating color. (Batting is not always needed when using minkee but with the light colors in this quilt, I did and it looks and feels great!) |
 |
| I hope you've enjoyed this tutorial for a fun quilt that shows off the beautiful fabrics in Moda's Mistletoe Lane! Thank-you Bear Creek Fabrics for inviting me to share this with you. |
 |
| "Mistletoe Lane Quilt" Tutorial instructions can be printed here. |
| Mistletoe Lane Tutorial was designed and created for Bear Creek Quilting Company by Rebecca Aikema of Our Busy Little Bunch. |
| Fabric used in this tutorial is from Mistletoe Lane by Bunny Hill Designs for Moda. |
| Do you love free fabric? Do you love to teach? Want to be a contributor on our blog? Send us an email at web@bearcreekquiltingcompany.com to get started! |



Comments