Posted by Shari on April 6th, 2015
| "Nordic Playlist" Free Quilt Pattern |
||||||||||||||||||||||||
| My name is Cheryl Brickey and I am so happy to be back at the Bear Creek Quilting Company with a new quilt pattern! I am an engineer by day, quilter by night and can be found sharing my quilting adventures over on my blog, Meadow Mist Designs and on Instagram as @MeadowMistDesigns. |
||||||||||||||||||||||||
 |
||||||||||||||||||||||||
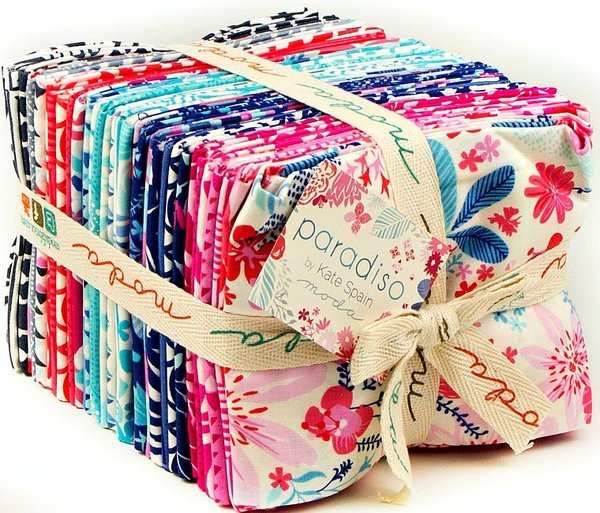
| Bear Creek Quilting Company has such wonderful fabric. I was so excited to have a chance to play with a fat quarter bundle of Paradiso by Kate Spain for Moda. |
||||||||||||||||||||||||
 |
||||||||||||||||||||||||
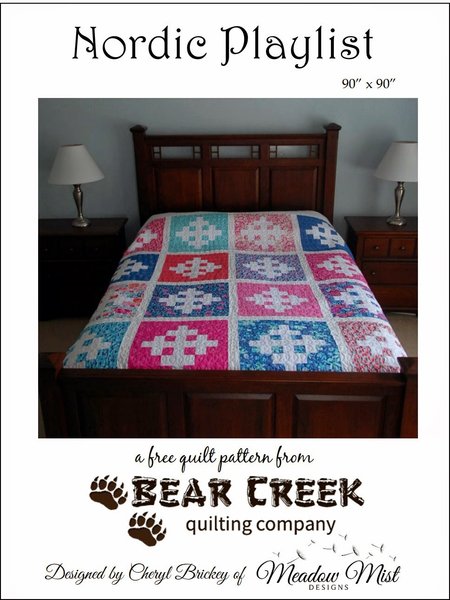
| I used the bundle to create a queen sized quilt called Nordic Playlist, which is now living on my daughter's bed. Nordic Playlist finishes at about 90” x 90”, a nice double/queen size. Each 18” x 18” (finished) block in the quilt uses a fat quarter of a print along with some background fabric, so the size of the quilt is easy to scale up and down. For this pattern, the width of fabrics (WOF) is assumed to be at least 42”, a fat quarter is assumed to be at least 18” x 21”, and a scant ¼” (a thread width smaller than ¼”) seam is to be used throughout the construction of the quilt. |
||||||||||||||||||||||||
| FABRIC REQUIREMENTS: | ||||||||||||||||||||||||
|
||||||||||||||||||||||||
|
STEP 1 – CUTTING FABRICS
|
||||||||||||||||||||||||
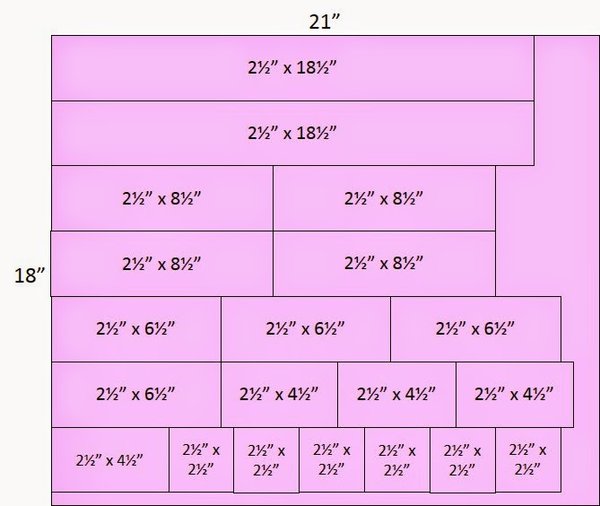
| Print Fat Quarters: Cut each print fat quarter into the following pieces using the cutting table and diagram. You will be using almost all of the fabric in the 18” direction of the fat quarter so please cut carefully. |
||||||||||||||||||||||||
|
||||||||||||||||||||||||
 |
||||||||||||||||||||||||
|
Background Fabric (within blocks):
(Note: if you cut each strip you may have a few extra pieces cut.) |
||||||||||||||||||||||||
|
1. Cut 20 strips (2 ½” x WOF) background fabric
|
||||||||||||||||||||||||
|
a. Sub-cut 6 strips into squares (2 ½” x 2 ½”), 16 per strip, for 96 squares (2 ½” x 2 ½”).
b. Sub-cut 6 strips into rectangles (2 ½” x 6 ½”), 6 per strip, for a total of 32 rectangles (2 ½” x 6 ½”). c. Sub-cut 8 strips into 2 rectangles (2 ½” x 14 ½”) and 4 squares (2 ½” x 2 ½”) for a total of 16 rectangles (2 ½” x 14 ½”) and 32 squares (2 ½” x 2 ½”). |
||||||||||||||||||||||||
|
The combined total of 2 ½” x 2 ½ squares from steps (a) and (c) is 128 squares (2 ½” x 2 ½”).
|
||||||||||||||||||||||||
|
Sashing and Border Fabric:
|
||||||||||||||||||||||||
|
1. Cut 6 strips (2 ½” x WOF) (for sashing between blocks)
|
||||||||||||||||||||||||
|
a. Sub-cut each strip into 2 rectangles (2 ½” x 18 ½”) for a total of 12 rectangles (2 ½” x 18 ½”).
|
||||||||||||||||||||||||
|
2. Cut 6 strips (2 ½” x WOF) (for rows of sashing)
3. Cut 9 strips (6 ½” x WOF) (for borders) |
||||||||||||||||||||||||
|
Binding Fabric:
Cut 10 strips (2 ½” x WOF) binding fabric |
||||||||||||||||||||||||
|
STEP 2 – FORMING THE BLOCKS
|
||||||||||||||||||||||||
|
||||||||||||||||||||||||
 |
||||||||||||||||||||||||
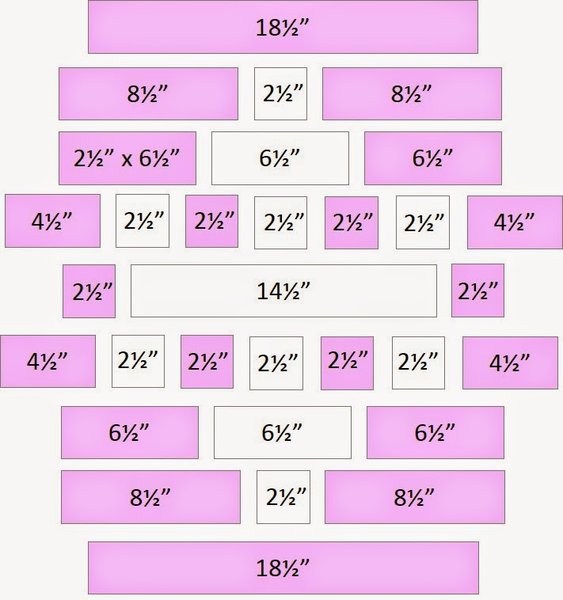
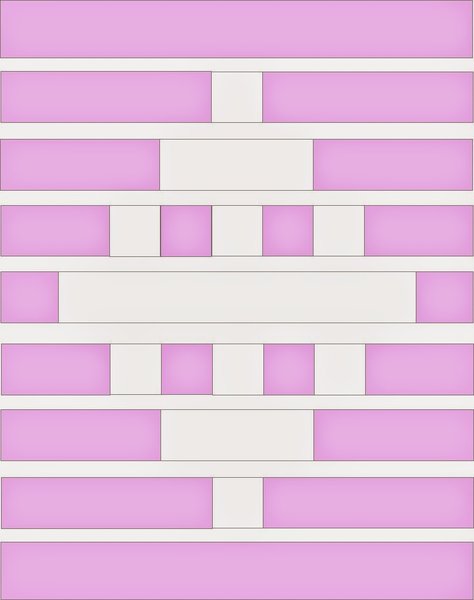
| 1. Arrange the following fabric pieces as shown above. All of the pieces are 2½” high by the number indicated wide. |
||||||||||||||||||||||||
 |
||||||||||||||||||||||||
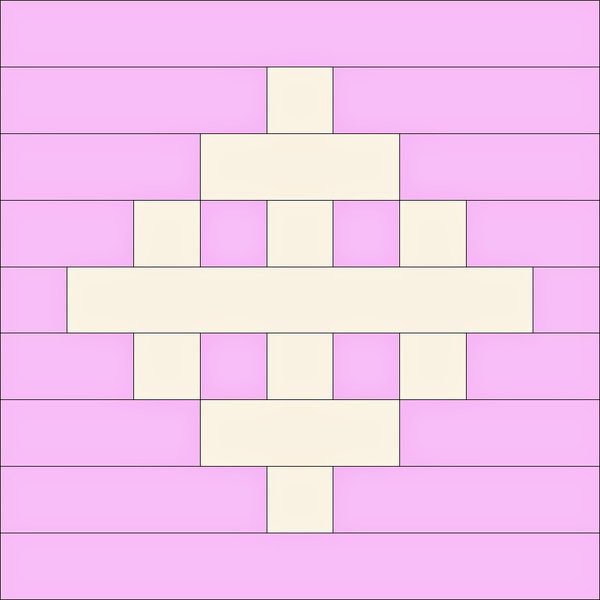
| 2. Sew the pieces into rows, pressing seams towards the print fabric pieces. |
||||||||||||||||||||||||
 |
||||||||||||||||||||||||
| 3. Sew the rows together, pressing seams open. The block should measure 18 ½” x 18 ½” (18” x 18” finished), repeat for 16 blocks. |
||||||||||||||||||||||||
| STEP 3 – QUILT TOP ASSEMBLY | ||||||||||||||||||||||||
 |
||||||||||||||||||||||||
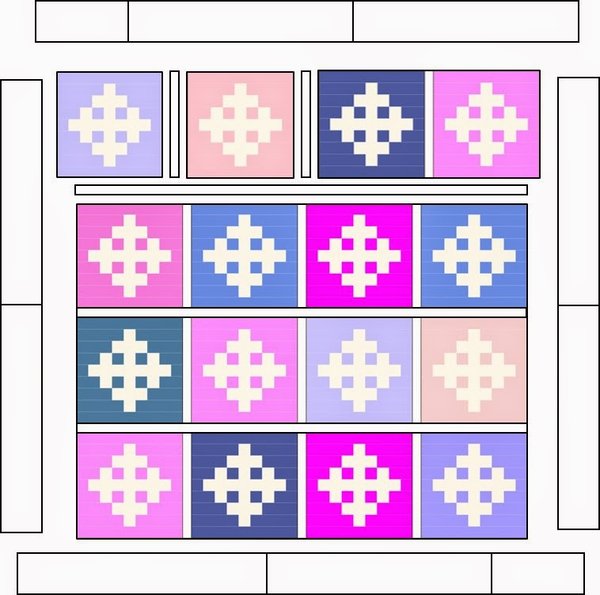
| 1. Lay out the blocks in 4 rows of 4 blocks each. Place a 2 ½” x 18 ½” sashing piece between the blocks within each row (3 sashing pieces per row). 2. Sew the blocks and sashing strips together into rows, pressing towards the sashing strips. 3. Form a row of sashing by sewing 2 full strips (2 ½” x WOF) end to end and trimming to the average length of the rows, approximately (2 ½” x 78 ½”). Repeat to form 3 long sashing pieces. 4. Lay out the sashed block rows, placing a long sashing piece between the sashed block rows. Sew the sashed block rows and long sashing pieces together, pressing towards the long sashed pieces to form the quilt top. 5. Form the side borders by sewing 2 full strips (6 ½” x WOF) of the border fabric end to end and trimming to the average height of the quilt, approximately 78 ½”. Repeat to form 2 side borders. 6. Sew side borders onto the quilt top, pressing seams open or towards the border fabric. 7. Cut 1 strip (6 ½” x WOF) of the border fabric in half to form 2 half strips (6 ½” x 21”). Form the top/bottom borders by sewing 2 full strips (6 ½” x WOF) and 1 half strip (6 ½” x 21”) of the border fabric end to end and trimming to the average width of the quilt top, approximately 88 ½”. Repeat to form 2 top/bottom borders. 8. Sew the top/bottom borders onto the quilt top, pressing seams open or towards the border fabric. |
||||||||||||||||||||||||
| STEP 4 – FINISHING THE QUILT | ||||||||||||||||||||||||
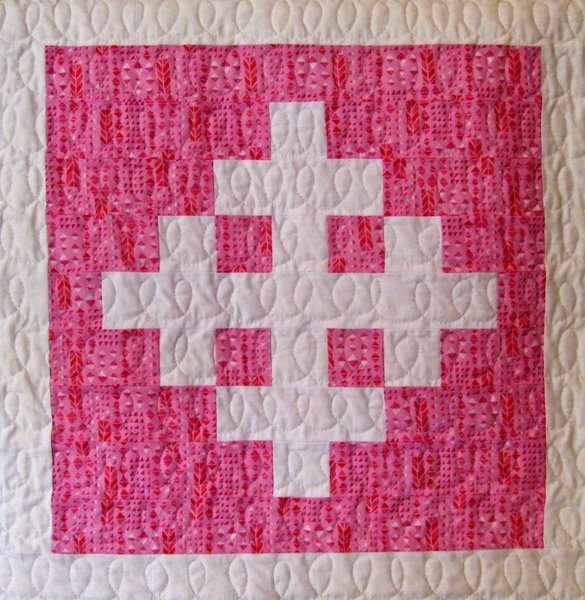
| 1. Cut the backing fabric into 3 pieces (98” x WOF) and sew the pieces together along their long edges. Trim the backing fabric to approximately 96” x 96”. 2. Layer the quilt top, batting, and backing. 3. Baste and quilt as desired. In my version of Nordic Playlist, I quilted rows of loops.4. Form the binding from 10 strips, each 2 ½” x WOF. For my quilt, instead of using yardage, I used 3 extra Paradiso fat quarters, each cut into 7 strips (2 ½” x 21”). 4. Bind and enjoy your quilt! |
||||||||||||||||||||||||
 |
||||||||||||||||||||||||
 |
||||||||||||||||||||||||
| We hope you are enjoying the tutorials and articles our blog contributors are bringing to you. Each designer invests their time to design and create new project ideas. Your comments are a wonderful show of appreciation and support. |
||||||||||||||||||||||||
| "Nordic Playlist" Tutorial instructions can be printed here. | ||||||||||||||||||||||||
| "Nordic Playlist" Free Quilt Pattern was designed and created for Bear Creek Quilting Company by Cheryl of Meadow Mist Designs. | ||||||||||||||||||||||||
| Fabric used in this tutorial is from Paradiso by Kate Spain for Moda. | ||||||||||||||||||||||||



Comments