Posted by Shari on June 25th, 2025
Creative Grids Flying Geese Tutorial |
| Make Flying Geese units quickly, easily and accurately, four at a time! You never cut a single triangle, but with the Creative Grids Ultimate Flying Geese Template and Quilt Ruler, you end up with perfect triangles in your finished blocks every time. Create eight sizes from 1 inch x 2 inch up to 4 inch x 8 inch finished blocks - the cutting requirements for each size is printed right on the ruler! Or, use your favorite flying geese method to create over-sized units...then trim them down to perfection. There are at least three methods for creating flying geese units that I'm aware of—possibly more. For this tutorial, I am going to show the Two-Square Flying Geese Method to create a 2 1/2 inch by 4 1/2 inch unfinished Flying Geese unit. I followed Deb Heatherly's add-on instructions and fell in love with this method! Main instructions come with your Creative Grids Ultimate Flying Geese Template and Quilt Ruler and can also be found on the Creative Grids website. The finished block size fabric cutting instructions are printed right on the tool. Remember, Creative Grids lists their information as a finished block size. If you are incorporating this technique with a quilt pattern, don't get confused by unfinished and finished sizes. I have made several practice blocks too large and too small while I was learning to read quilt patterns not adapted for using the specialty ruler. |
 |
For a 2 1/2 inch by 4 1/2 inch unfinished block/2 inch by 4 inch finished block, you will need:
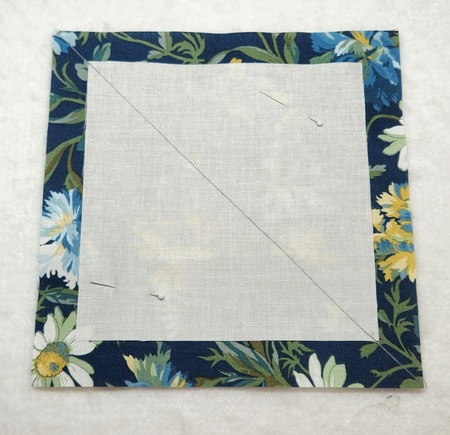
1. Place the squares right-sides-together, centering the smaller square on the larger square. 2. Draw a diagonal line across the squares. 3. Pin in place so it doesn't shift. |
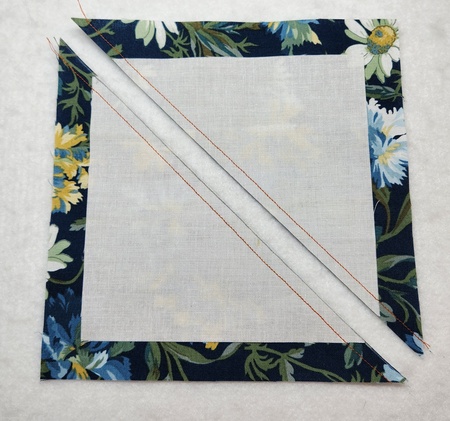 |
| 4. Sew 1/4" from the line, on both both sides. 5. Press to set the seam. 6. Cut on the drawn center line. |
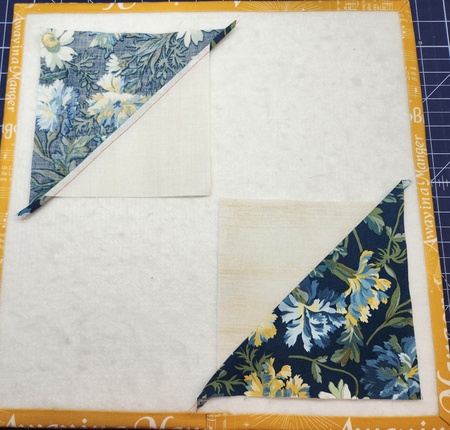 |
| 7. Press towards the large triangle. |
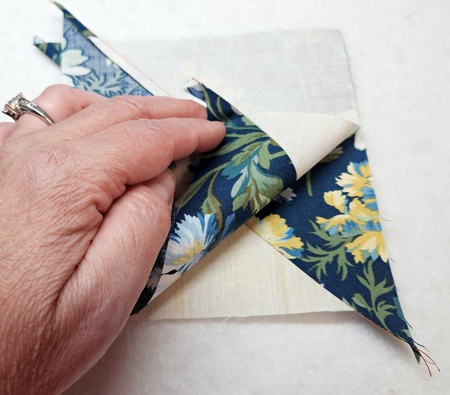 |
| 8. Place the units right-sides-together, with the seams off-set. |
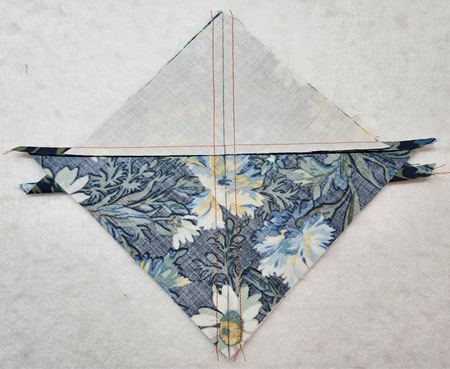 |
| 9. Draw a diagonal line from corner to corner across the seam line. 10. Pin in place so it doesn't shift. 11. Sew 1/4" from the line, on both sides. 12. Press to set the seam. |
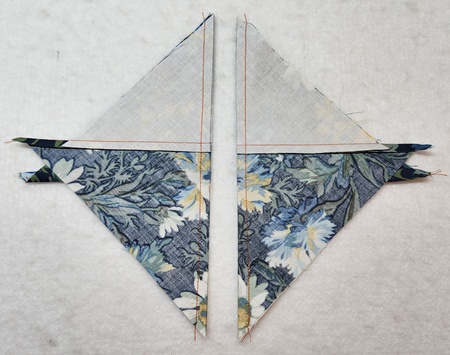 |
| 13. Cut on the drawn center line. |
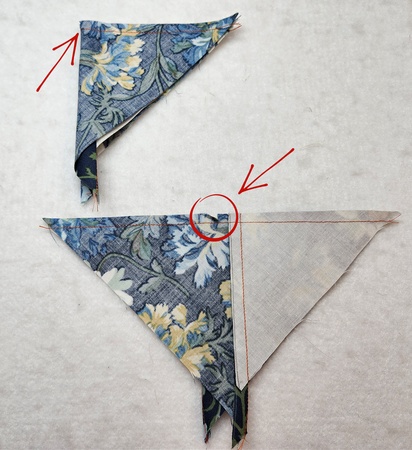 |
| 14. Before pressing, find the center of the unit by folding in half. 15. Clip into the seam allowance up to the stitch line. If you go too far in clipping, don't worry. This will be discarded when trimming to size. |
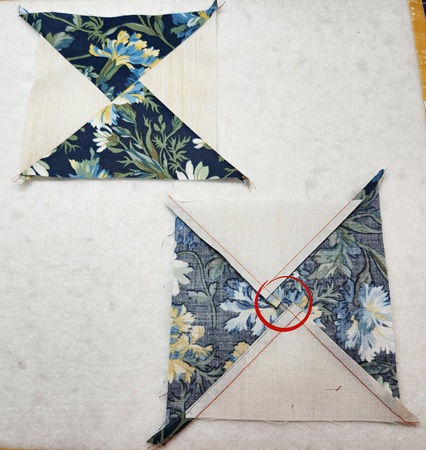 |
| 16. Press the seams away from the center triangle, spinning the seam in opposite directions at the clipped point. |
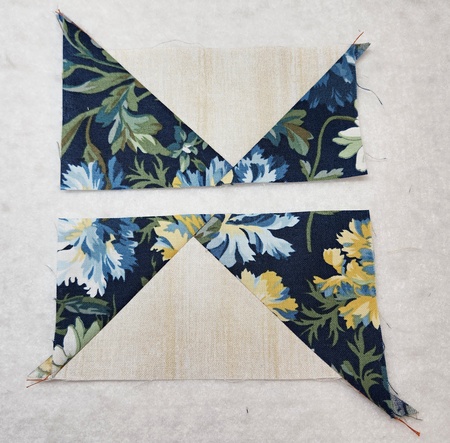 |
| Tip: Before trimming, I like to separate the two oversized flying geese units. I carefully cut halfway between the two points. |
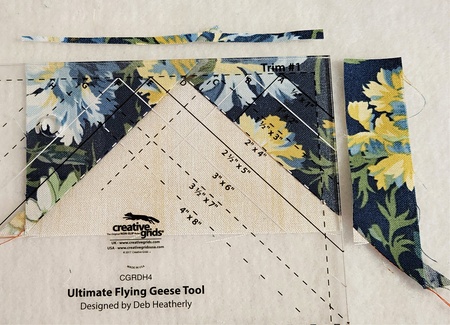 |
| Time to trim to size! 17. Position Trim #1 for your chosen unit size on the pieced fabric, aligning the inner measurement lines with your seam line. In this tutorial, I am creating a 2 1/2 inch by 4 1/2 inch unfinished/2 inch by 4 inch finished block. To make a smaller or larger unit, simply adjust the Flying Geese Ruler to align with the markings for your desired finished size. 18. Trim two sides. |
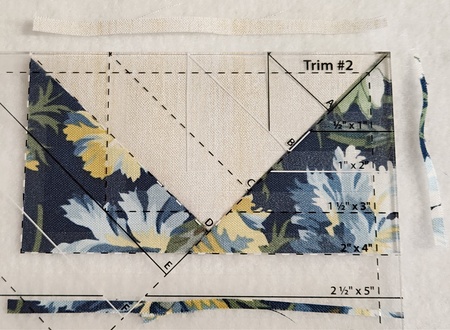 |
| 19. Rotate the flying geese unit and the ruler. 20. Position Trim #2 for your chosen unit size on the pieced fabric, aligning the outer measurement lines with your fabric edge. 21. Twim two sides. |
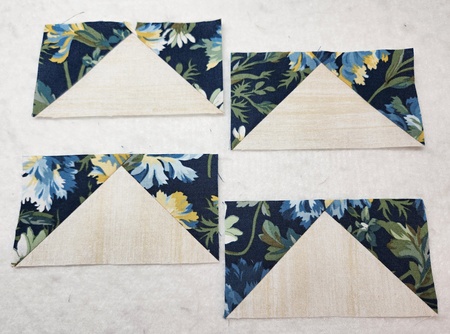 |
| There it is! Four beautiful Flying Geese quilt units without having to cut a single fabric triangle. This block is fun to create and addicting! A few key tips:
Enjoy and Happy Sewing! |
 and the BCQC Team |

