'Blue'tiful Quilt Pattern Sew-Along!
|
|
Welcome to our third block tutorial, the Creative Grids 6" Log Cabin Block, for the Bluetiful Quilt Sew-Along. |
| I created the block tutorial in scrap fabrics so please do not get confused why these fabrics look different. You can see my Bluetiful Log Cabin Blocks down further in the post. |
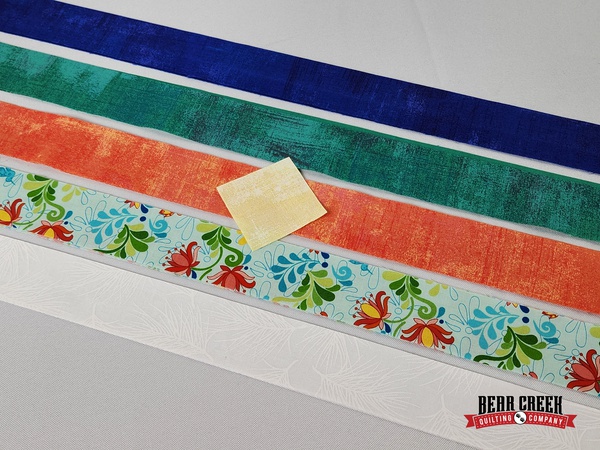 |
| Follow the Bluetiful Quilt Pattern instructions for the size and number of fabric pieces you need for the quilt size you are creating. For the Log Cabin Blocks, you can cut individual "Log" fabric pieces per the pattern instructions or use the strip piecing method. For the tutorial, I will be doing the strip piecing method. The trimming process is the same for either piecing method. Let's get started...... |
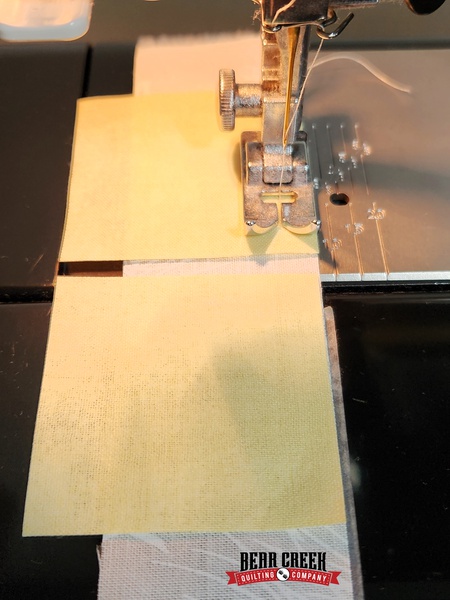 |
| I placed my center fabric square on top of my first "Log" strip fabric. For each "Round", you will sew two white strips and two-color strips. This is the start of Round One. The center fabric square needs to be the correct size based on the pattern instructions. Your fabric strips do not need to be as exact, just a minimum width of 1 1/2" for this pattern. |
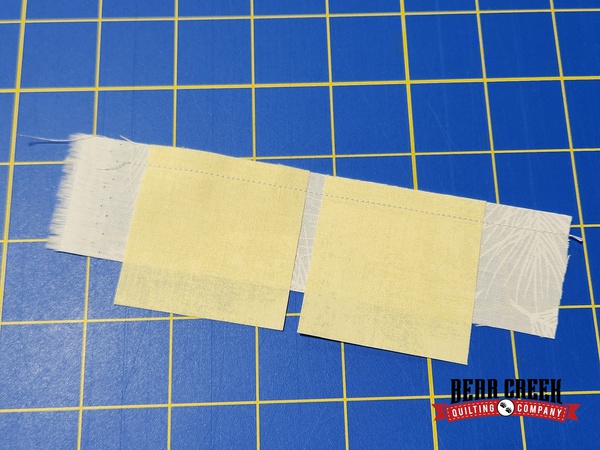 |
| I am only creating two sample blocks. You can sew all your center square fabrics to fill up the strip piece of fabric. Be cautious of how much space you leave between your center blocks. More space means you may need more fabric. Cut your pieces apart. The cutting does not have to be exact.... that is the magic of trimming them up at the end of each "Round". |
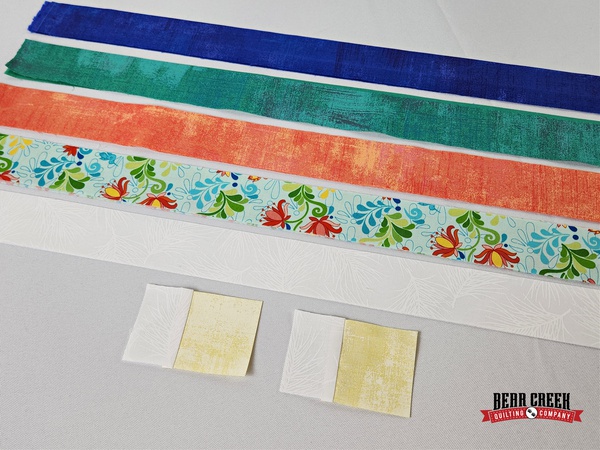 |
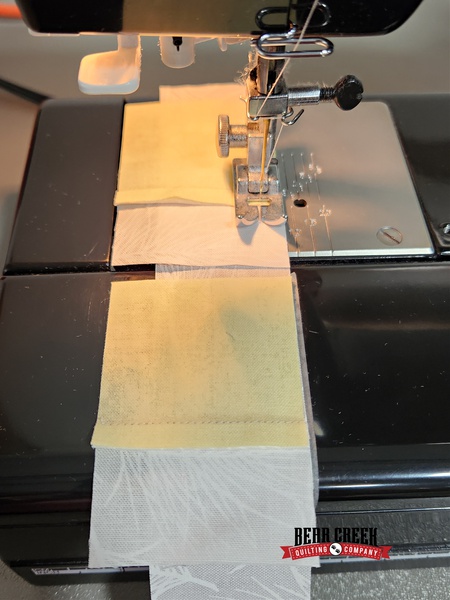
| Set your seam and then press towards the first "Log", in this case the white fabric. |
 |
| When placing your second "Log" notice your orientation. Blocks can be pieced clockwise or counterclockwise. Be consistent for the pattern. For the sample blocks, I was careful and pieced them going clockwise. When I created my Bluetiful Quilt Log Cabin Blocks, I got turned around and created them all going counterclockwise. |
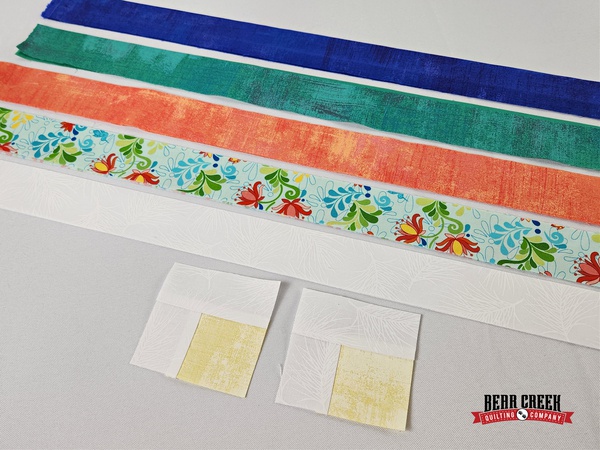 |
| These are cut from the strip fabric and pressed. No trimming yet. |
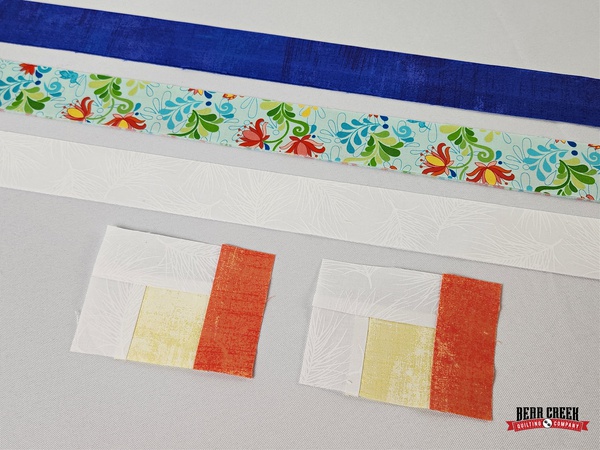 |
| The first colored "Log" is added. All seams will be pressed away from the center fabric square. |
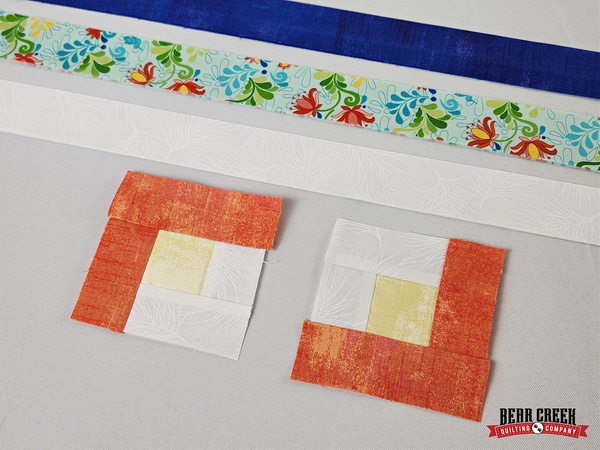 |
| The second colored "Log" is added and pressed. This finishes Round One and now it is time to trim. |
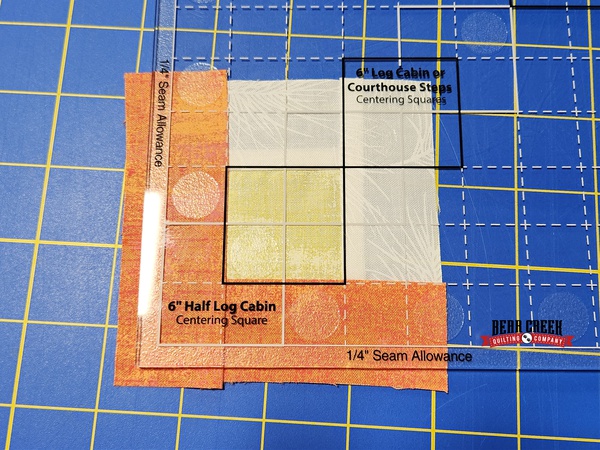 |
| Line up the Creative Grids Log Cabin Ruler printed square with your center fabric. For Round One trimming, use the first black marked square from the ruler corner. (Note: I am using the larger dual size Creative Grids Log Cabin 6" & 12" Ruler. The process is the same if using the Creative Grids 6" Log Cabin Block. |
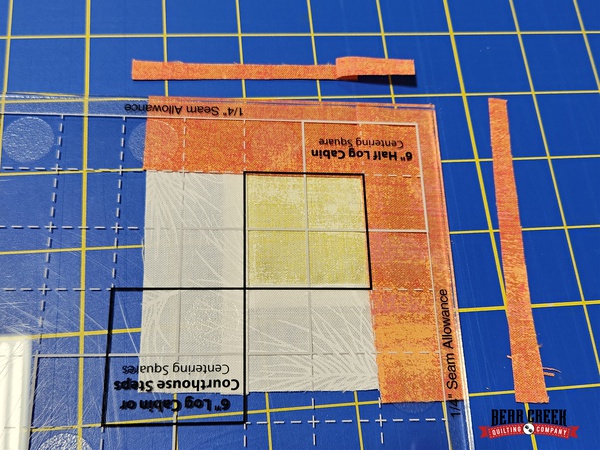 |
| Remember back to the Creative Grids Cat's Cradle Tutorial when I turned the ruler orientation for easier trimming? I am doing that again. Being right-handed, this allows me to trim two sides without playing Twister with my wrist and arm. Safety first.... always! Trim both sides. |
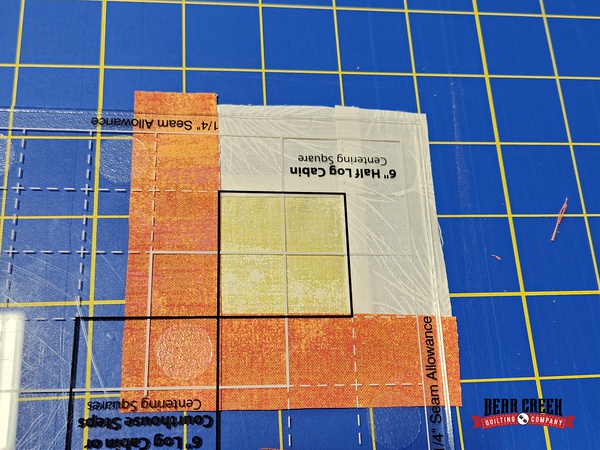 |
| Rotate the fabric block. Line up the Creative Grids Log Cabin Ruler printed square with your center fabric. You will notice that there are marked seam lines which also help you line up seams with your block. Trim both sides. |
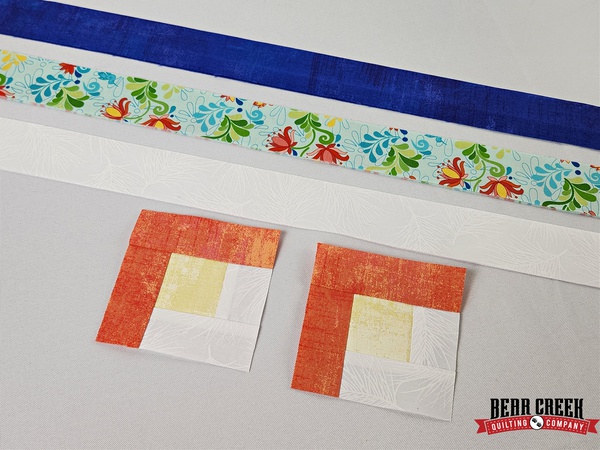 |
| Yahoo! Round One is done. Let's start on Round Two. |
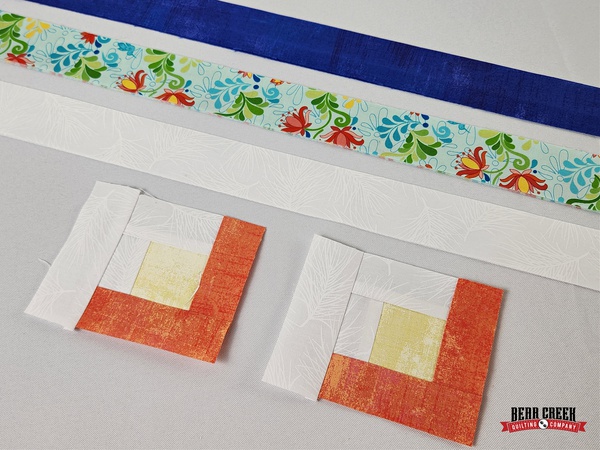 |
| First, the white fabric. |
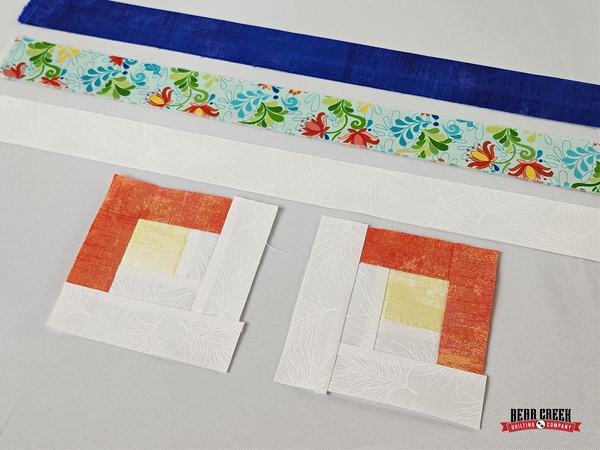 |
| Then, the second white fabric "Log". |
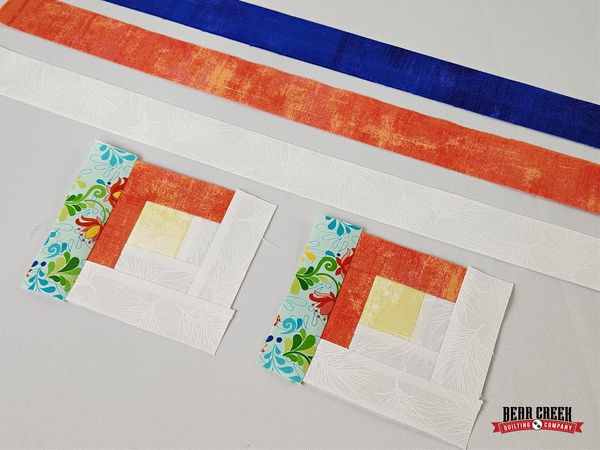 |
| Next, Round Two, first colored fabric. |
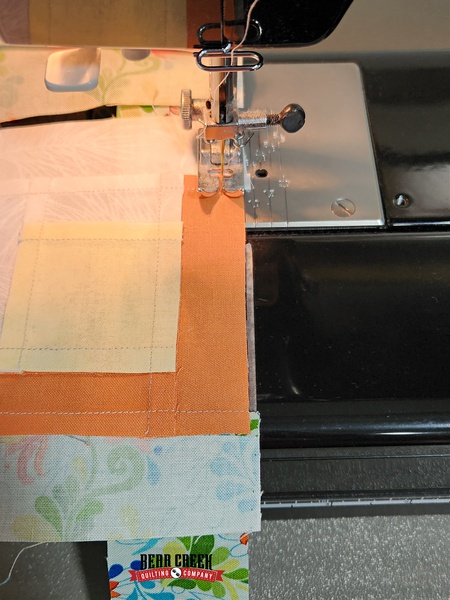 |
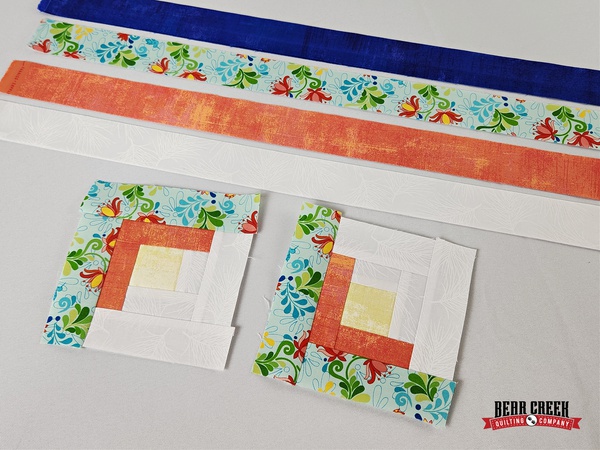
| I am still strip piecing as I add each fabric "Log". Sewing Tip: Line up your trimmed edge with your fabric piecing strip and sew a straight line. Don't worry about those little over-sized fabric pieces. |
 |
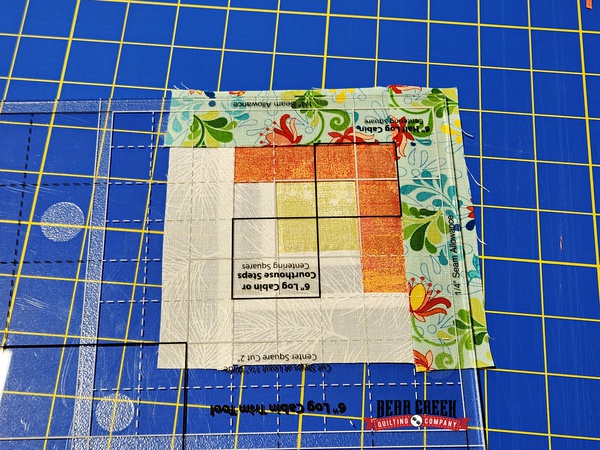
| Round two is complete. Time to trim. |
 |
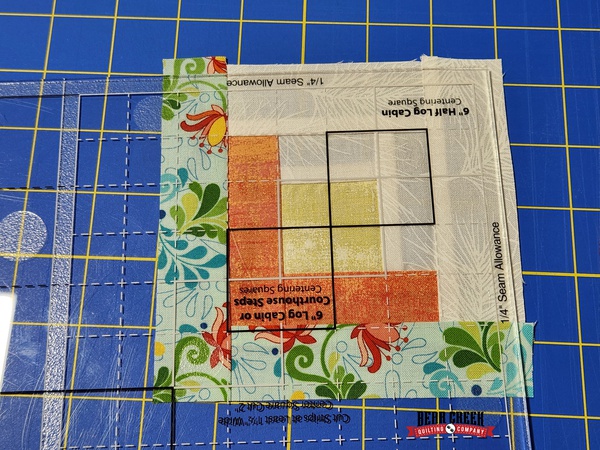
| Line up the Creative Grids Log Cabin Ruler printed square with your center fabric. The alignment for Round Two is the white marked square. Trim both sides. |
 |
| Rotate the block and trim both sides. |
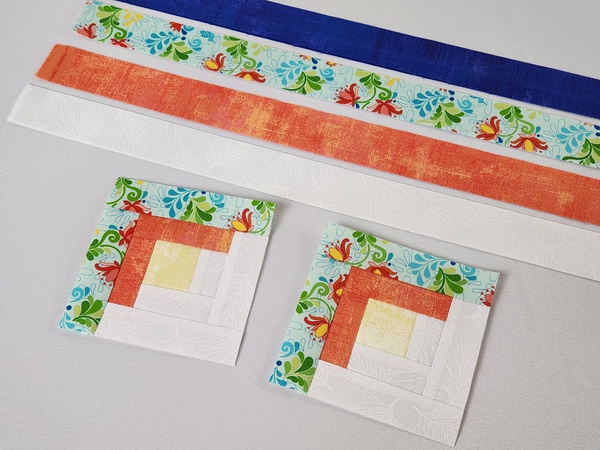 |
| Yippee! Round Two is done. Let's start on Round Three. |
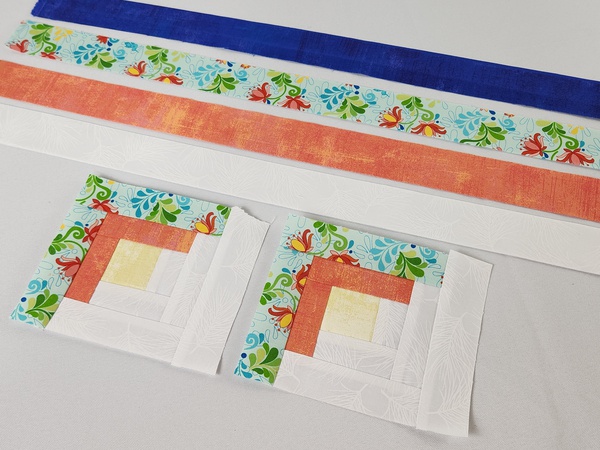 |
| Round Three, first white "Log". |
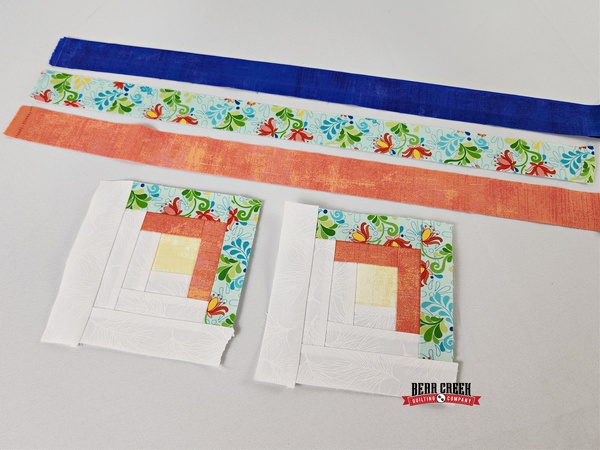 |
| Round Three, second white "Log". |
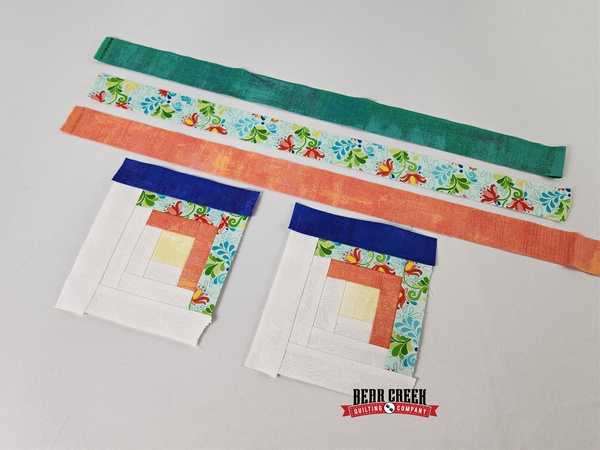 |
| Round Three, first colored "Log". |
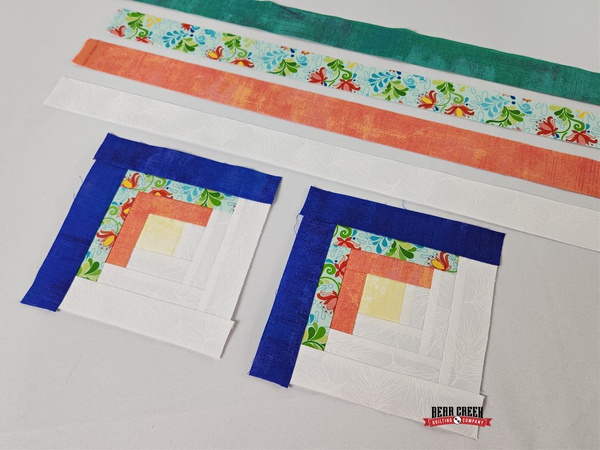 |
| Round Three, second colored "Log". Round Three is complete. Time to trim. |
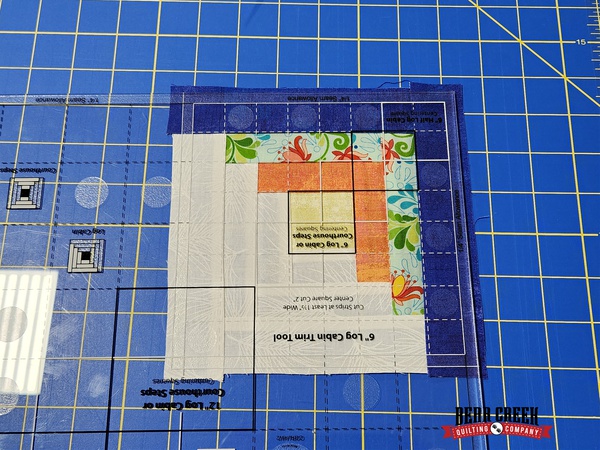 |
| I line my block up with the black marked center square on the Creative Grids Log Cabin Ruler. I am also checking my seam lines to the marked lines on the ruler. Trim both sides. |
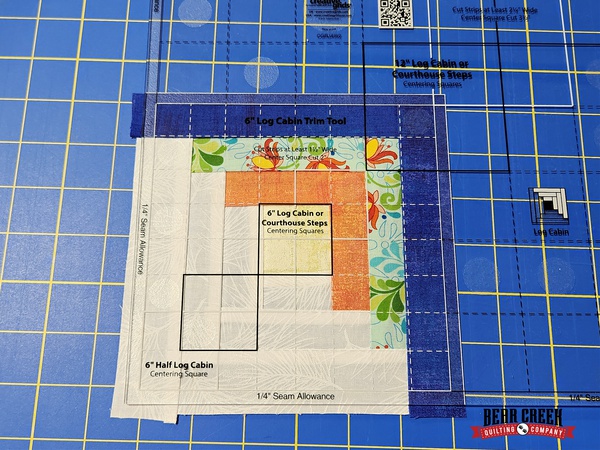 |
| Now STOP! I trimmed several blocks incorrectly at this last trimming, so I really want to alert you to this trick. This is the last sides to trim for our block. If you look closely, you will notice there is a seam allowance marking on the ruler. Rather than just centering your center fabric to the center black square on the ruler, you want to align your block to the ruler marked seam allowance. If you don't, you risk your blocks being too small. I did not catch this until after trimming my first two blocks. |
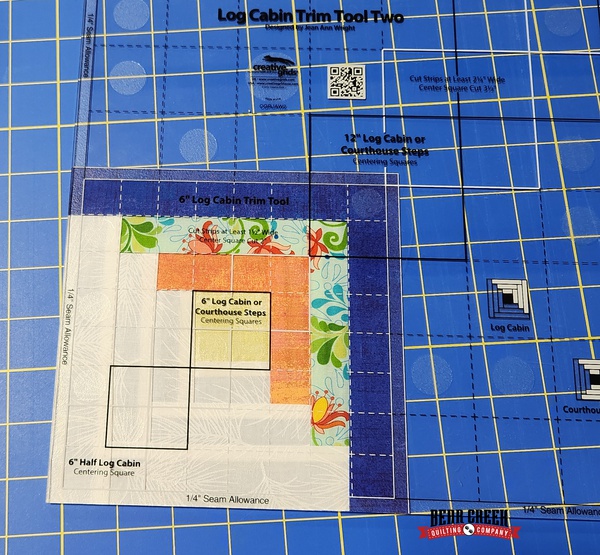 |
| See how that block lines up with the seam allowance markings perfectly? If I was going by just centering that center fabric to the center marked ruler square, my block may have turned out too small. On this last Round of trimming, it is more important to end with the correct size block. |
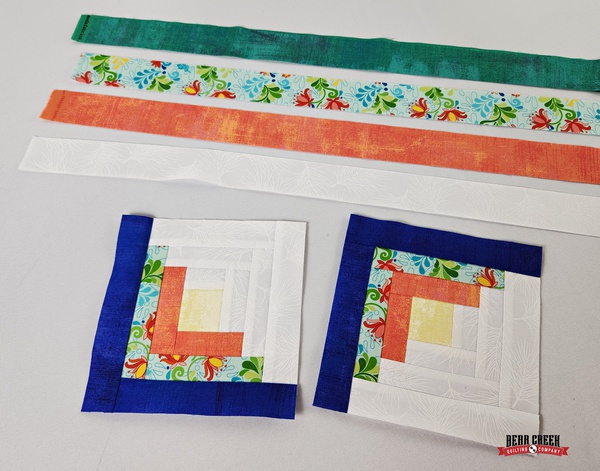 |
| Perfectly trimmed Log Cabin Blocks! |
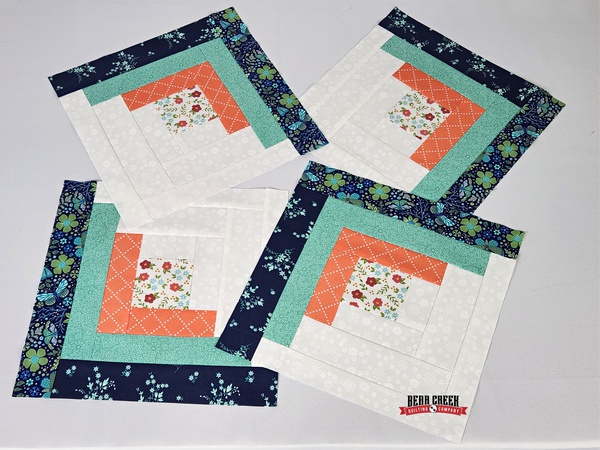 |
| These are my 12" Creative Grids Log Cabin Blocks. I like the Creative Grids Log Cabin 6" & 12" Ruler for the dual sizes in one. (These blocks are not part of the Bluetiful Quilt Pattern.) |
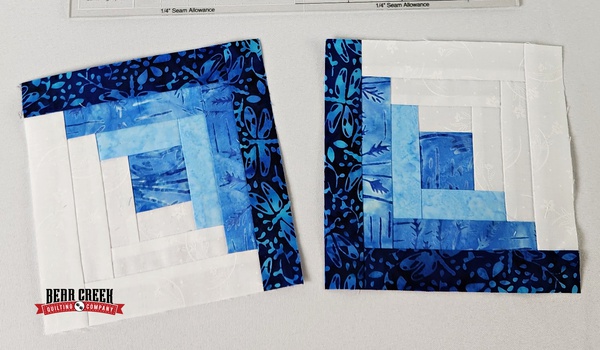 |
| Here are my Log Cabin Blocks for the Bluetiful Quilt! Thank you for following along. Next week is a catch-up week. Keep working on your blocks and we will meet back here again on June 1st to start piecing the Center Medallion. If you are part of the Bear Creek Quilting Company exclusive Sew-Alongs Facebook Group, please post your progress pictures! Happy Sewing! |
| 'Blue'tiful Quilt Pattern Sew-Along Schedule:
|
| |
| The Bluetiful Quilt Pattern Sew-Along articles will be published here on our blog. Bluetiful Quilt Kits are available but supplies are limited. Want to use your own fabrics? No problem. I understand many of you are using your stash fabrics. Or maybe you want permission to shop for some new fabrics. The Creatively Yours Pattern Book is available separately. The Bluetiful Quilt pattern is required to participate as no cutting/sizing information will be given. The Bluetiful quilt pattern is one of many patterns in the Creatively Yours Pattern Book available HERE. This is not a Zoom Class and there is not a specific time to check in. Sew at your own pace as you follow along with me on the Sew-Along schedule. Our Private Bear Creek Quilting Company exclusive Sew-Alongs Facebook Group is available for requesting to join HERE. Be sure to complete all the questions and agree to the group rules or the automated-moderator may deny your request to join. |
| Questions?? Email us at sales@BearCreekQuiltingCompany.com |
 and the BCQC Team |


