Posted by Shari on May 3rd, 2024
'Blue'tiful Quilt Pattern Sew-Along!
|
| Welcome to our first block tutorial, the Creative Grids Cat's Cradle XL Block, for the Bluetiful Quilt Sew-Along. |
| I created the block tutorial in scrap fabrics so please do not get confused why these fabrics look different. You can see my Bluetiful Cat's Cradle Blocks down further in the post. Also, my home sewing room is functional but not setup with "studio-style" lighting. So, my photo colors do look a little drab, but the purpose is the step-by-step tutorial and for that, it works just fine. |
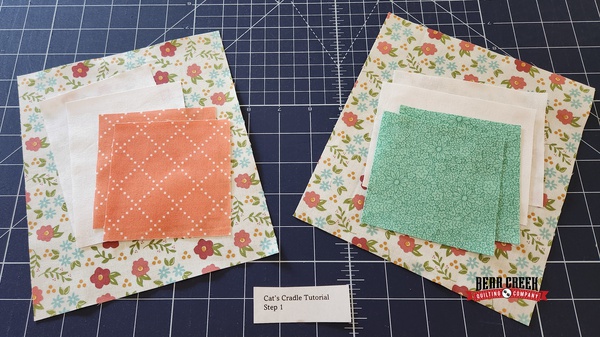 |
| Follow the Bluetiful Quilt Pattern instructions for the size and number of fabric pieces you need for the quilt size you are creating. (You can also refer to the Creative Grids Cat's Cradle XL video and printed instructions for details on piecing a Cat's Cradle Block.) Each set of Cat's Cradle fabric pieces will create two blocks. For the Cat's Cradle Block, you need one large rectangle, two smaller rectangles, and two squares. |
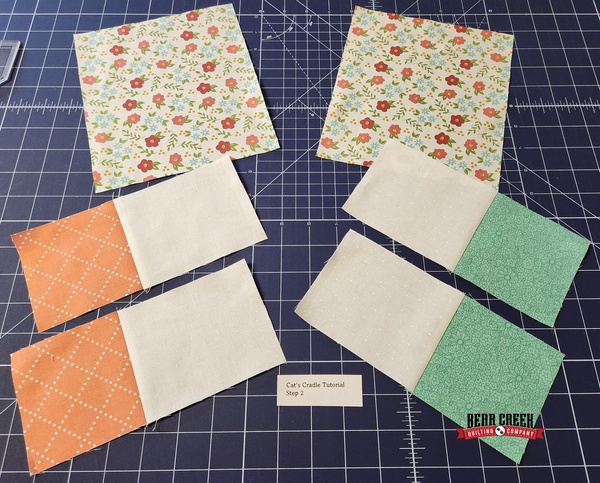 |
| You will sew your two square fabric pieces to your two smaller rectangle pieces. Press to set the seam and then press the seam towards the rectangle. |
| ***missing image**** Oops, I failed to grab a picture here. Keep following the tutorial and it should be easy to figure out how to sew these units together. Sorry! |
| Stitch these units together along one long side with the squares facing in opposite directions. |
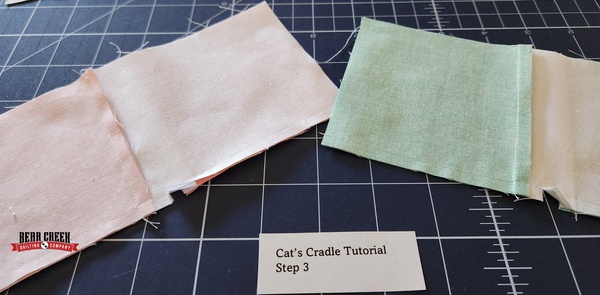 |
| Before you press your seams, fold the unit in half to find the center. Clip the fabric to the stitch line. (It is ok if you clip that stitched seam.) |
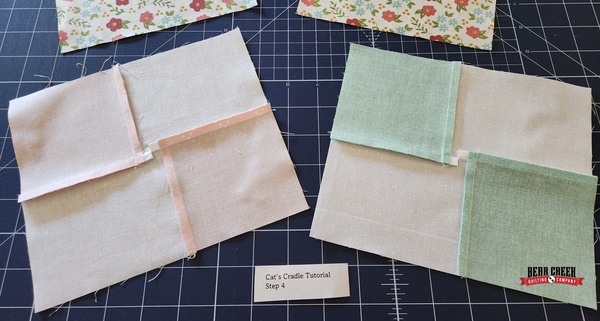 |
| Press the seams in opposite directions, towards the rectangles. |
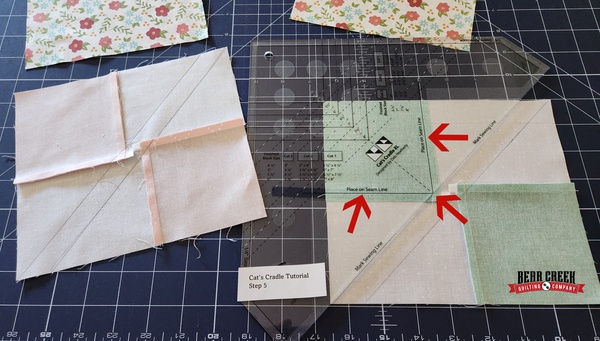 |
| Now, it's time to use the Creative Grids Cat's Cradle XL Tool. (Creative Grids offers two sizes of Cat's Cradle Tools. The smaller tool does block sizes 1 1/2 inches to 4 inches. The larger tool (XL) does block sizes 4 1/2 inches to 8 inches.) Line up the "Place on Seam Line" markings on your stitch line. Draw a line along the "Mark Sewing Line" marking. I like to use a Sewline Chalk Pencil for marking my fabrics. Turn the block around and repeat. You want that marking line to intersect right through the corner stitching line. |
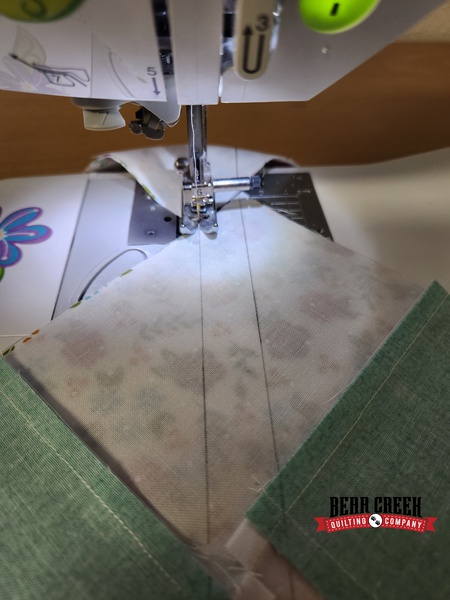 |
| Sewing Tip: Start your stitching on the marked line that is not in the corner. This will prevent your corner point from getting stuck in the feed dogs. Stitch on your marked lines. |
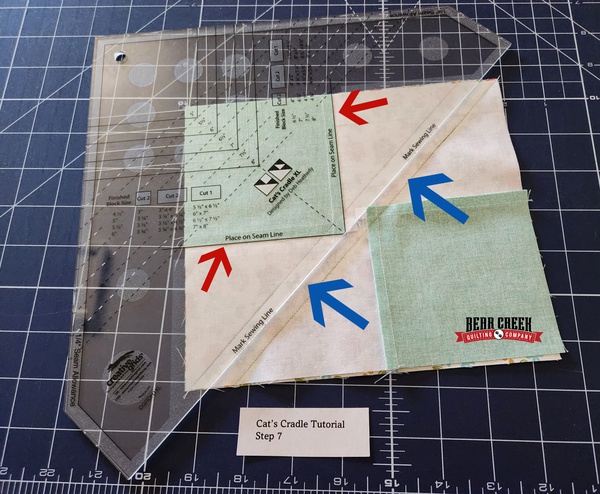 |
| Time to trim! The Creative Grids Cat's Cradle XL instructions say to cut a 1/4 inches from your sewing line. I found there wasn't enough fabric in that center to worry about so I only make one cut. I positioned the Creative Grids Cat's Cradle Tool back on my fabric square, this time aligning with the raw edge, not the seam line. (See red arrows above.) I did a single cut through the center. (See blue arrows above.) |
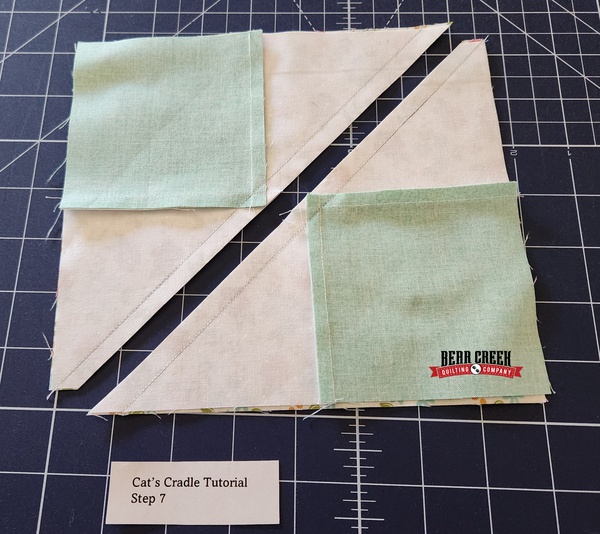 |
| Ta Da! Two Cat's Cradle XL Blocks! |
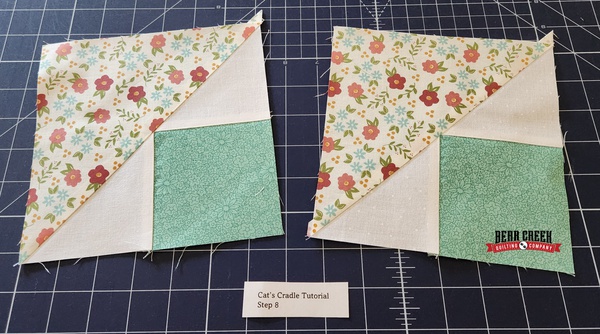 |
| Time to open up the blocks to see those pretty points. Press to set the seam and then press towards the large triangle. |
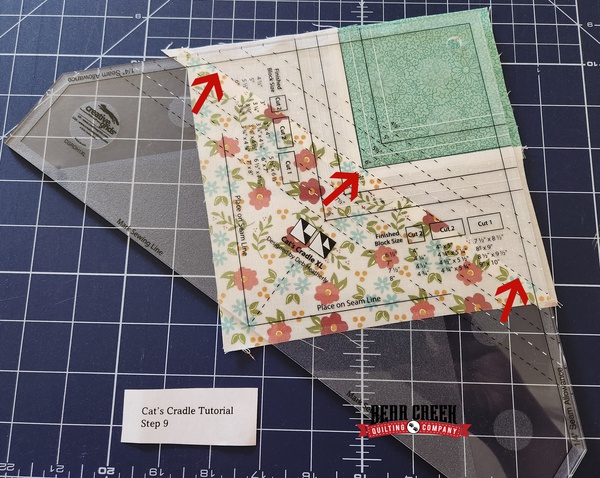 |
| Now, let's make those blocks perfect to size! Line up the square marking to the size noted in your Bluetiful Quilt Pattern and aligned with the seam line. Trim both edges. |
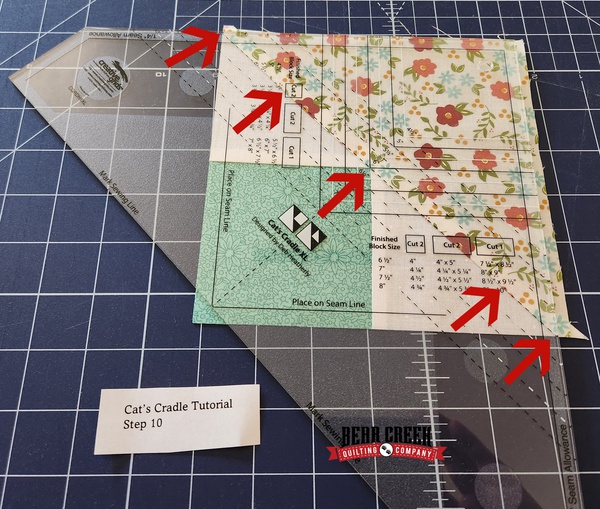 |
| Turn your block around. This time aligning only the seam line for the same size you just trimmed. Check your corner edges. Your alignment should give you a clean point where the fabrics meet. Trim both edges. |
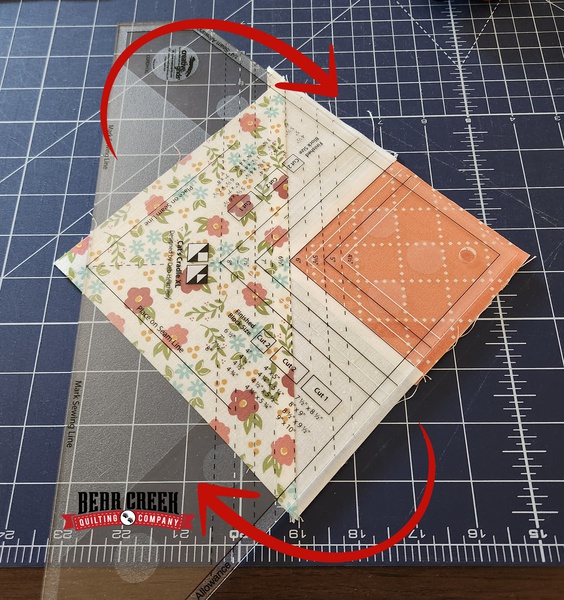 |
| Trimming Tip: Rotate your Creative Grids Cat's Cradle XL Tool. I am right-handed and I don't do well cutting at strange angles. So, rotate your tool to work better for you. You can see by the image above; this is a much easier position for trimming edges. |
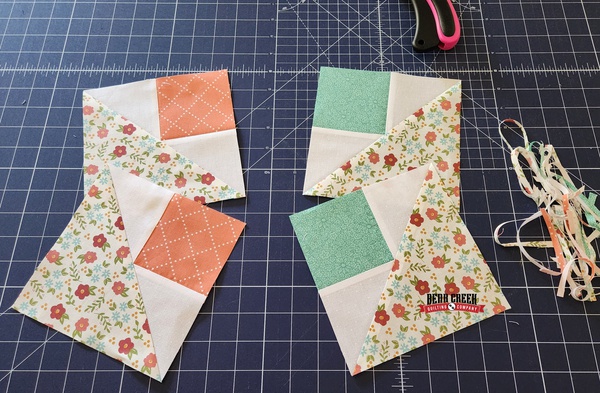 |
| Yeah! You now have two beautiful Cat's Cradle Blocks. But wait...we are not done yet! |
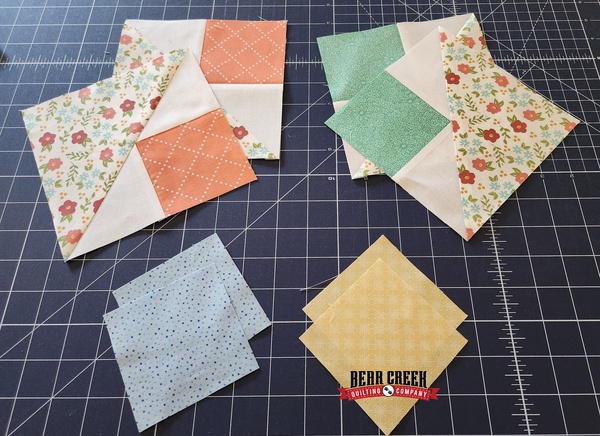 |
| We are going to "split" those Cat's Cradle Blocks. You will need one square fabric piece for each block. (Size needed is in your Bluetiful Quilt Pattern.) |
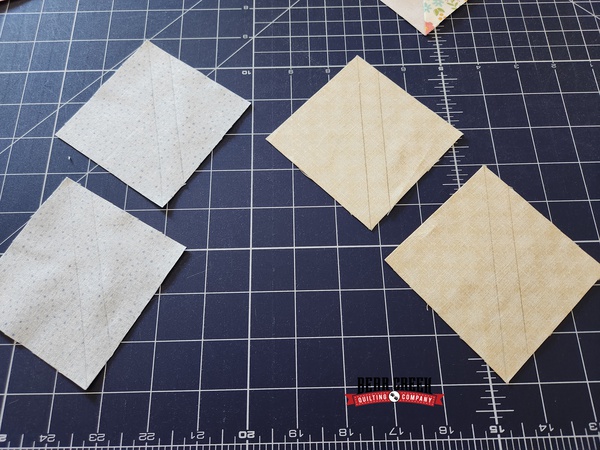 |
| On the back of the fabric square, draw a line from point to point. Sewing Tip: I drew an additional line a 1/2 inch from my first line. This will give me a Half Square Triangle for a different project later. No reason wasting pretty fabrics! |
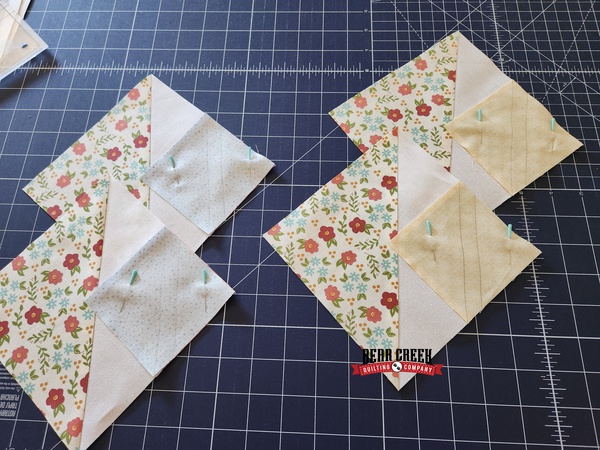 |
| I like to pin these pieces so they don't "walk" and move out of place. Sew directly on both marked lines. |
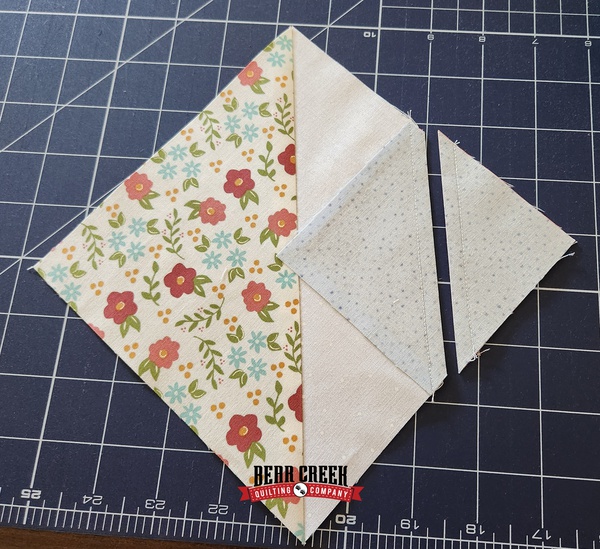 |
| Press to set the seam and cut in the middle of your sewn seams. That little Half Square Triangle can be tucked away for a different project. I usually wait to trim them until I have decided what project I am using them in. Press the seam towards the corner square. |
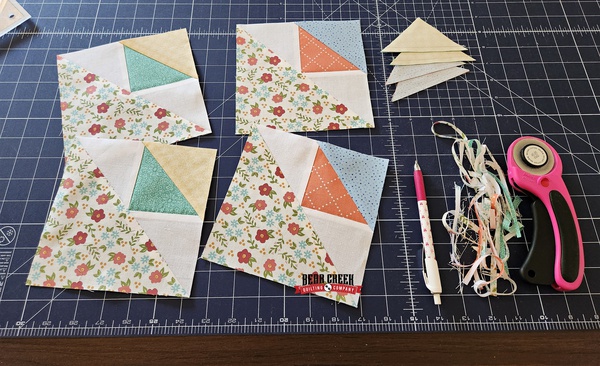 |
| Aren't they cute?! All trimmed up and ready to be pieced into a quilt. This was my first time using the Creative Grids Cat's Cradle XL Tool and I am in love with it! |
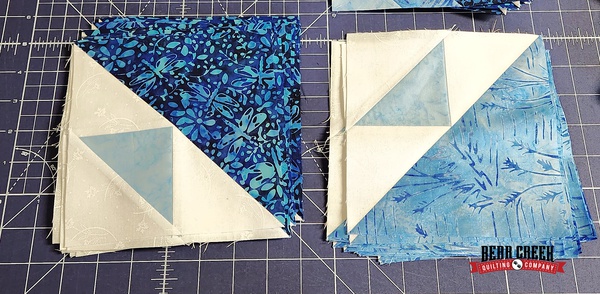 |
| (Not the best lighting for photography in my home sewing room.) Here's the Split Cat's Cradle Blocks for the Bluetiful Quilt! Thank you for following along. Next week, we will work on the Half Square Triangle Variation Block. If you are part of the Bear Creek Quilting Company exclusive Sew-Alongs Facebook Group, please post your progress pictures! Happy Sewing! |
| 'Blue'tiful Quilt Pattern Sew-Along Schedule:
|
| |
| The Bluetiful Quilt Pattern Sew-Along articles will be published here on our blog. Bluetiful Quilt Kits are available but supplies are limited. Want to use your own fabrics? No problem. I understand many of you are using your stash fabrics. Or maybe you want permission to shop for some new fabrics. The Creatively Yours Pattern Book is available separately. The Bluetiful Quilt pattern is required to participate as no cutting/sizing information will be given. The Bluetiful quilt pattern is one of many patterns in the Creatively Yours Pattern Book available HERE. This is not a Zoom Class and there is not a specific time to check in. Sew at your own pace as you follow along with me on the Sew-Along schedule. Our Private Bear Creek Quilting Company exclusive Sew-Alongs Facebook Group is available for requesting to join HERE. Be sure to complete all the questions and agree to the group rules or the automated-moderator may deny your request to join. |
| Questions?? Email us at sales@BearCreekQuiltingCompany.com |
 and the BCQC Team |


