| Chickadees and Berries Christmas Gift Trio |
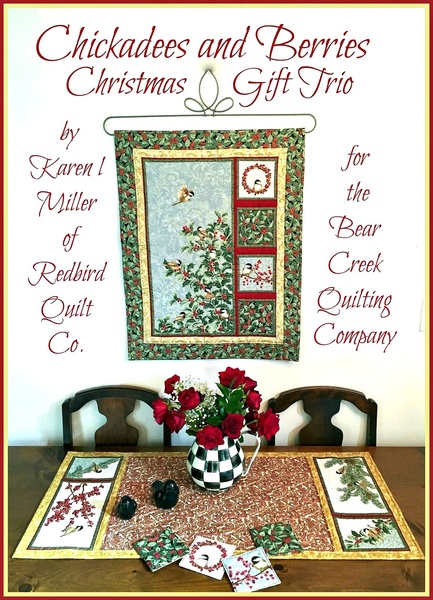
| Greetings fellow Quilters...it's Karen of Redbird Quilt Co. and Karen's Quilts, Crows and Cardinals Blog. I'm excited to share a sweet Christmas Gift Trio made using the Chickadees and Berries Panel by Jackie Robinson for Benartex. |
 |
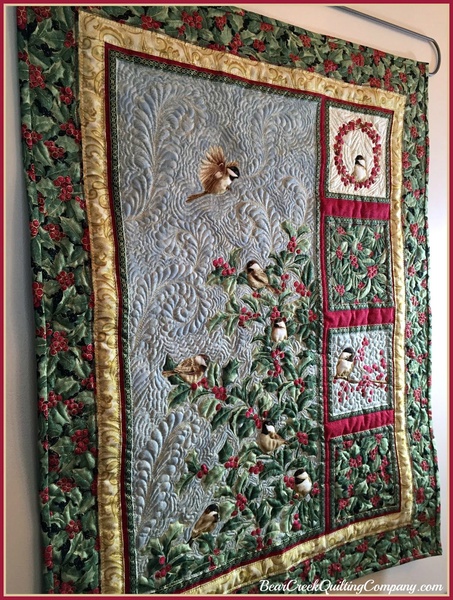 |
| In this tutorial, we will create a beautiful wall hanging... |
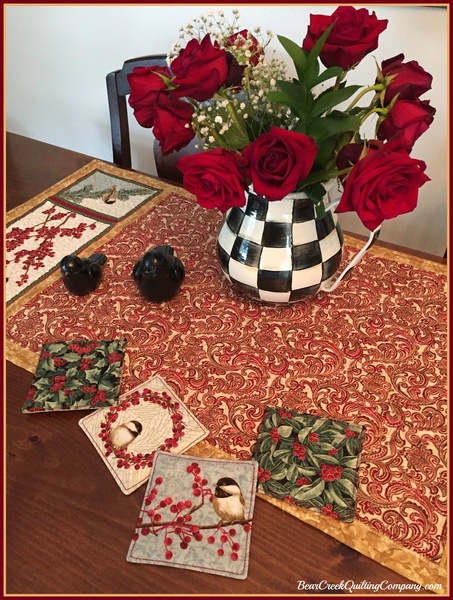 |
| ...a table runner, and 4 fun coasters - all with one panel a bit of coordinating fabrics. You've got to give this one a try! |
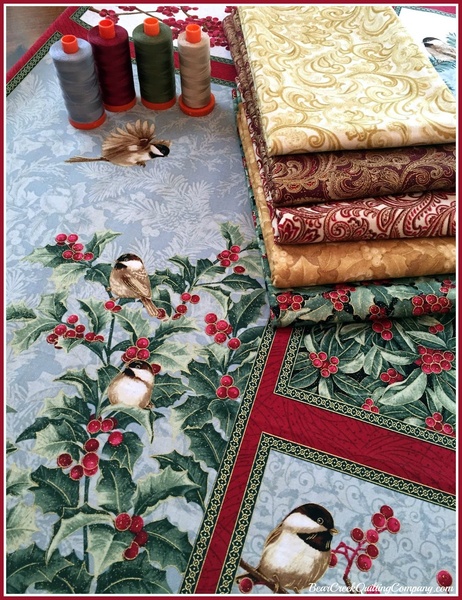 |
Chickadees and Berries fabric needed:
|
Optional Thread Choices:
|
| Press and Cut the Panel: Note: On all panel cuts, place the ruler approximately 3/8" outside of the green panel edge (therefore including 3/8" of red edge on each cut section). Most of this red edge will be sewn into the seam allowance. This allowance is included in the dimensions provided. Begin by pressing the panel. It if seams twisted or distorted, attempt to press it square. Now use a rotary cutter, mat and ruler to cut the panel into sections as noted below on the Cutting Diagram. |
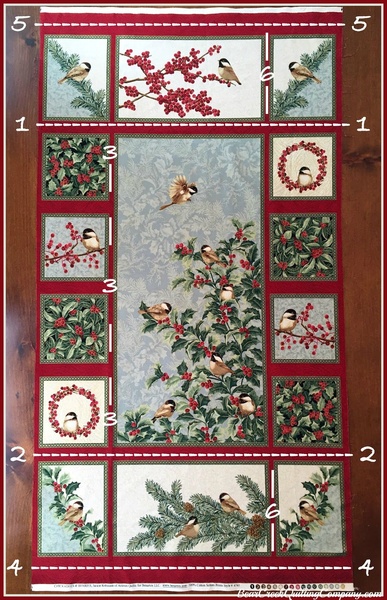 |
| Cutting Diagram (shown above) |
| First...make cuts to prepare a 23 3/4" tall by 18" wide wall hanging panel. |
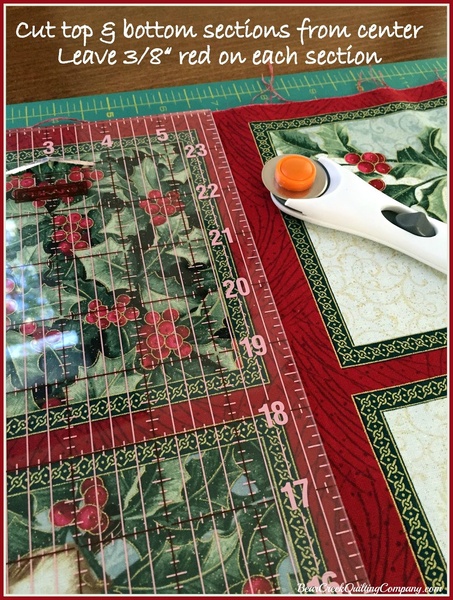 |
| Start by cutting the top and bottom sections away from the center section. (See Cutting Diagram: Cut #1 and Cut #2) Next cut the left side off the center section - again, leaving 3/8" to the left of the center panel. (See Cutting Diagram: Cut #3) Note: The 4 blocks to the left will have little/no red edge on them. |
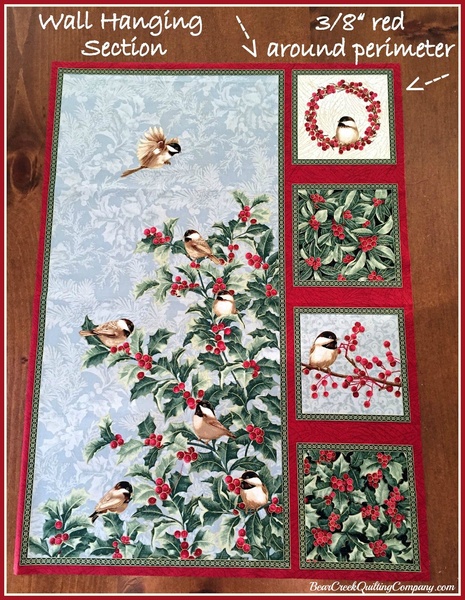 |
| The resulting 'center' panel should measures 23 3/4" tall by 18" wide. Set aside. Later we will cut the left side into 4 square and sew them into coasters. Continuing with cuts from the table runner: Take the top and bottom sections that you cut away and trim them to measure 7 1/2" tall by width-of-panel. (See Cutting Diagram: Cut #4 and Cut #5) Note: There is no image for this. |
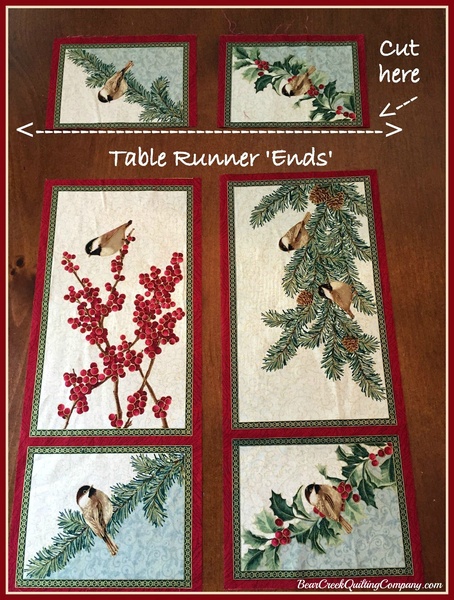 |
| Next, position the top and bottom cuts so they are both facing the same direction (shown above) and cut the right side (or top in photo above) off of each section; again leaving 3/8" of red edges. Each resulting 'end' section should measure 7 1/2" x 18". (See Cutting Diagram: Cut #6) |
| Cutting Tip for long pieces: Some of the sashing, center and border pieces you will cut are longer than 24" (the length of my longest ruler). I learned a neat trick, years ago, that aids in cutting longer pieces. If you need to cut a piece of fabric longer than your longest ruler, try the "fold-it-in-half" method. |
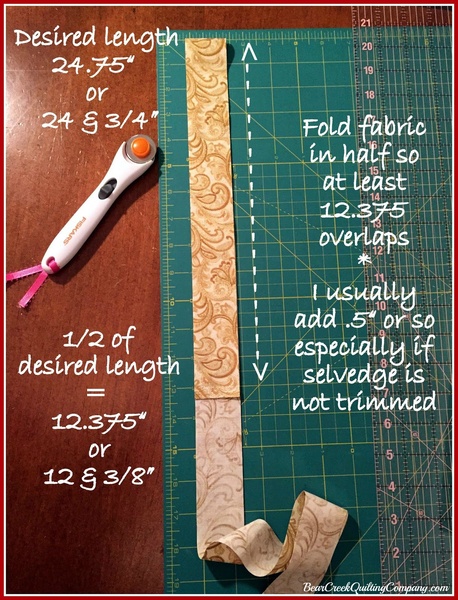 |
| For a desired length of 24 3/4", divide the desired length by 2 (24.75 / 2 = 12.375"). Fold the fabric in half on your cutting mat so at least 1/2 the total length plus an extra 1/2" (or so) are overlapping. |
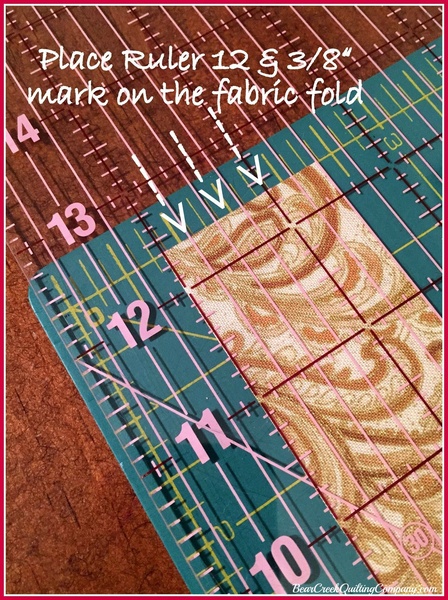 |
| Place the ruler on the fabric fold with the "1/2 the total length" marking on the ruler aligned on the fabric fold. In my case I needed a piece 24 3/4" long, so I place my ruler on the fold at the 12 3/8" mark on the ruler. |
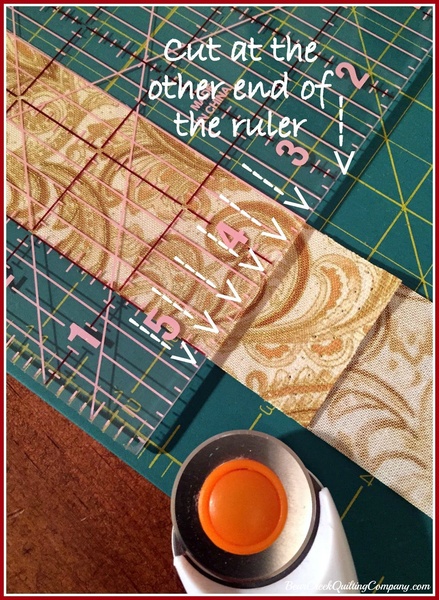 |
| Cut the fabric at the other end of the ruler. When you unfold the fabric you will have the correct length. This method also allows you to trim the selvage at the same time as your final cut. You can try out this method for a few of the sashing and border pieces in this tutorial. I also used it on the center section of the table runner (the cream/red). In this case, I used the mat measurements to determine where to cut. |
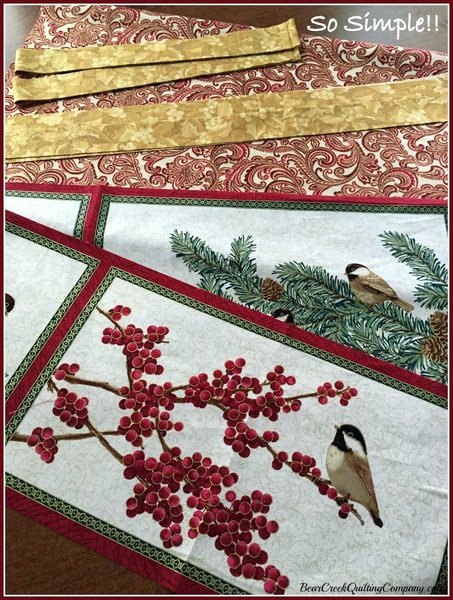 |
| Prepare the Table Runner: This is so simple - you will love it! |
| Table Runner Cutting: |
From the Chickadees and Berries Holly Gold:
|
From the Chickadees and Berries Scroll Cream/Red:
|
From the Chickadees and Berries Scroll Red:
|
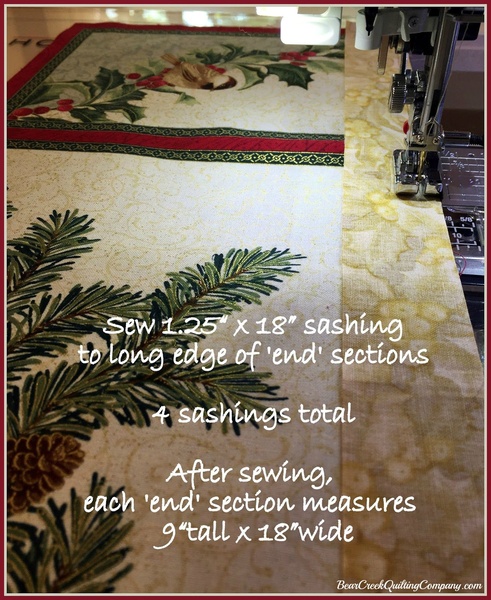 |
| Table Runner Piecing: Start with the top and bottom sections of the panel, each 18" wide x 7 1/2" tall and the (4) 18" Chickadee and Berries Holly Gold sashing pieces. Sew the (4) 1 1/4" x 18" gold sashing pieces to the top and bottom of each 'end' panel. |
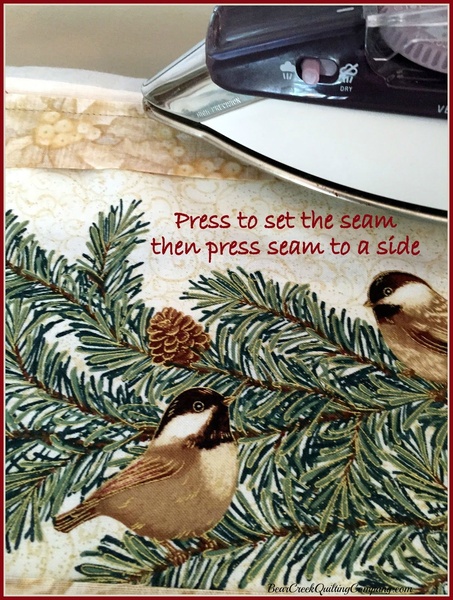 |
| Press to set seam and press seams outward. |
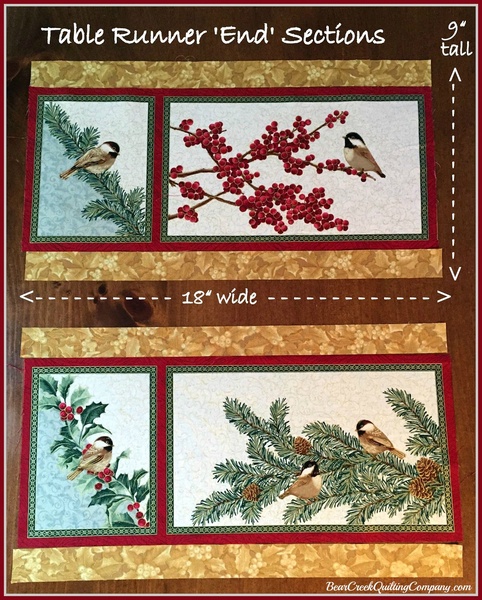 |
| When done, you should have two 'end' sections, each 18" x 9". Next, attach the 'end' sections to either end of the 18" x 25" Chickadees and Berries Scroll Cream/Red. I attached my 'end' sections facing outward, away from the center fabric. When preparing to sew the end section sashing to the center section scroll red/cream -- make sure your 'end' sections are oriented the way you want them. |
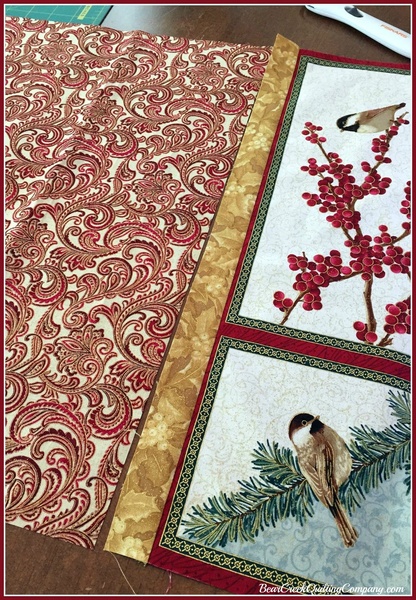 |
| Sew with a scant 1/4" seam allowance - right sides together. |
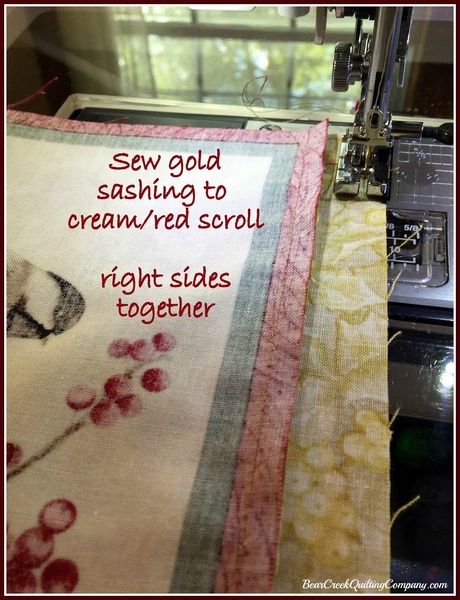 |
| Press to set seams and press outward again. |
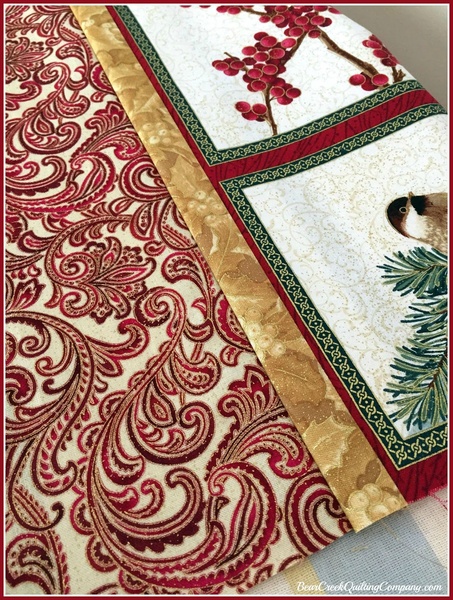 |
| When you are done, you should have an 18" x 42" piece. Ok - now lets prepare and sew the 42" sashing pieces to both long sides of the table runner. |
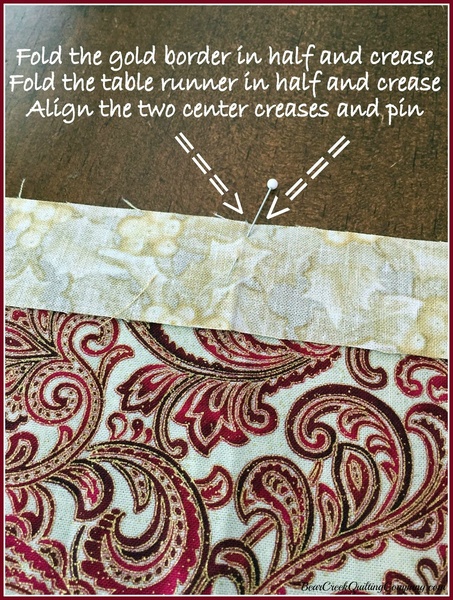 |
| Whenever I must align a sash or border piece on a quilt top, I will always fold each in half (separately) and place a finger press (or crease) at the halfway mark. Then, using the creases, align the quilt top with the sashing or border at the crease mark. Put a pin at the creases to hold in place. |
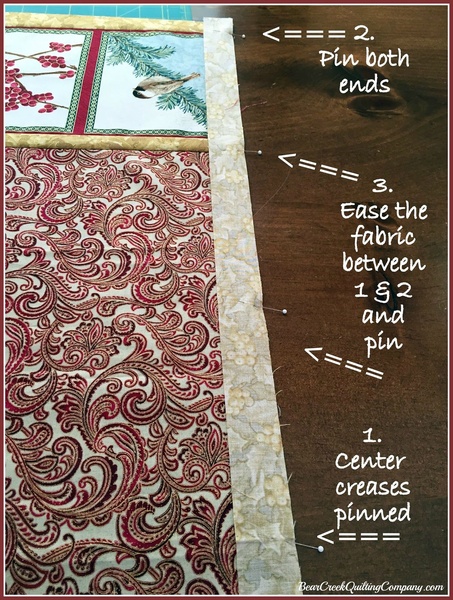 |
| Next, I would pin the sash or border at the ends of the quilt top and then ease the remaining fabric in between the middle and ends; pinning as I go. Take this to the machine and stitch with a scant 1/4" seam allowance. |
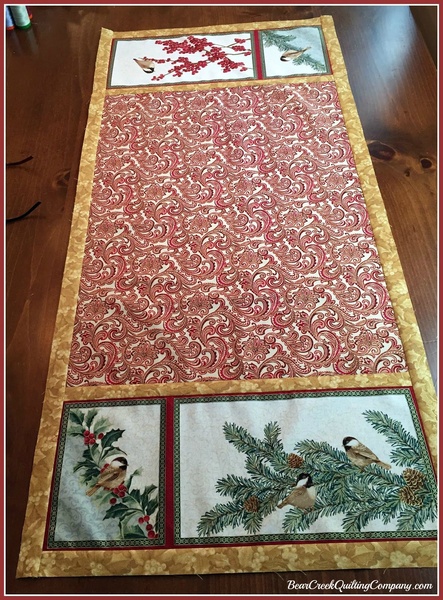 |
| Once you have sewn the long sides on, press to set the seams and press the seams away from the center. There you have it!! This table runner was fun to prepare. Now onto the backing and quilting... |
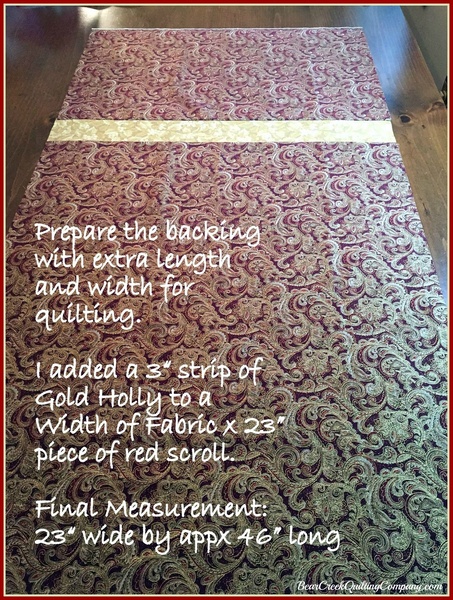 |
| For the backing, I pieced a 23" x WOF Chickadees and Berries Scroll Red and a 23" x 3" Chickadees and Berries Holly Gold together. I always prepare the backing a few inches larger than the top to allow for quilting. |
 |
| Layer and Baste: |
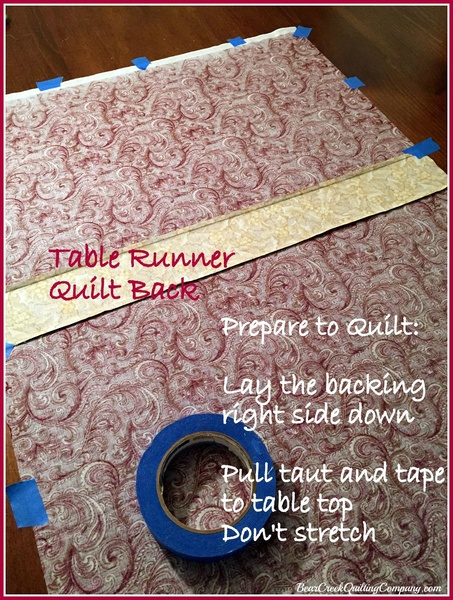
| Now prepare to layer and baste your quilt sandwich. These same steps will be used for the Wall Hanging but I'll describe them once here. Tape the backing fabric, right side facing down, to the table top. Make the backing fabric taut but do not stretch it. Start at the top or on a side and use tape to secure the backing to the surface. I like to use the blue painters tape as it doesn't leave a residue on the surface and peels away easily. |
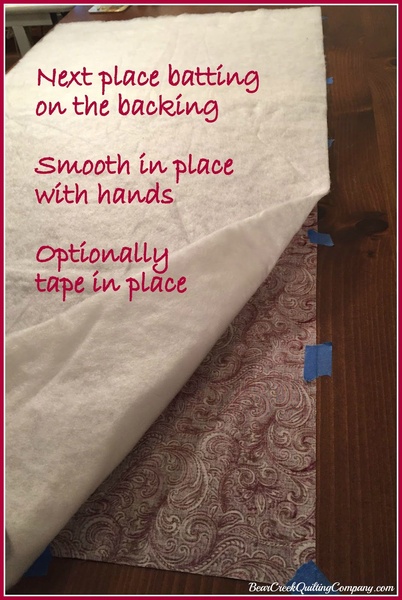 |
| Once you have secured the backing, layer your batting on top of the backing and smooth it in place. Sometimes I tape it in place too but it's not always necessary. |
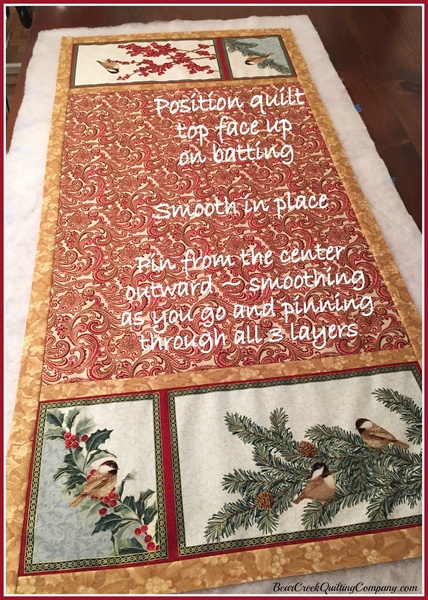 |
| Finally, position the quilt top on the batting and smooth it in place. Be sure it is centered on the backing fabric before smoothing and pinning. Start pinning in the center, smoothing outward and pinning more as you go. This will help avoid creases and bunches in your quilting. When you pin, be sure to pin through all 3 layers. |
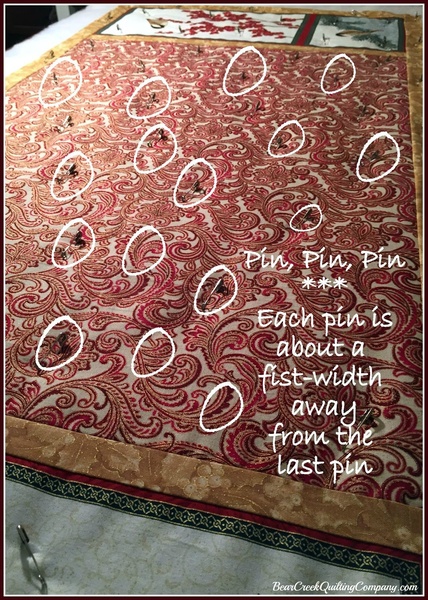 |
| It's hard to tell from the image, but I try to put a pin approximately every 'fist-width' from the last pin. Closer pinning requires too much stopping and starting when you are quilting. Farther away increase your risk of fold and bunches in your quilting. |
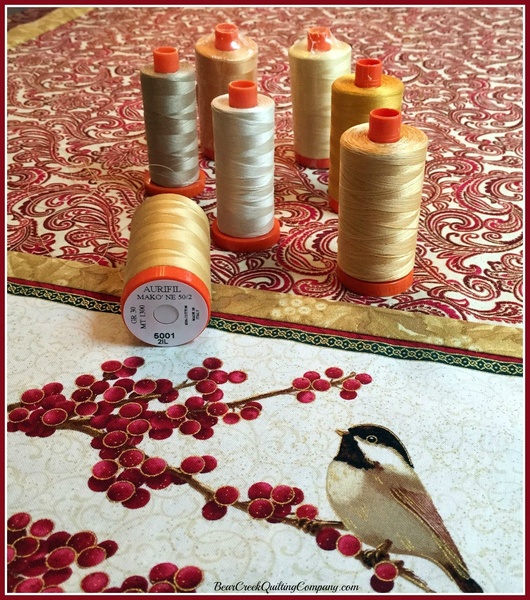 |
| I always love the 'choosing threads' portion of quilting. I started a stash of Aurifil thread a few years back and add to it often. |
 |
| Sometimes 'just the right thread color' makes a difference - so try out a few by unwinding the spool and laying the thread on the fabric. |
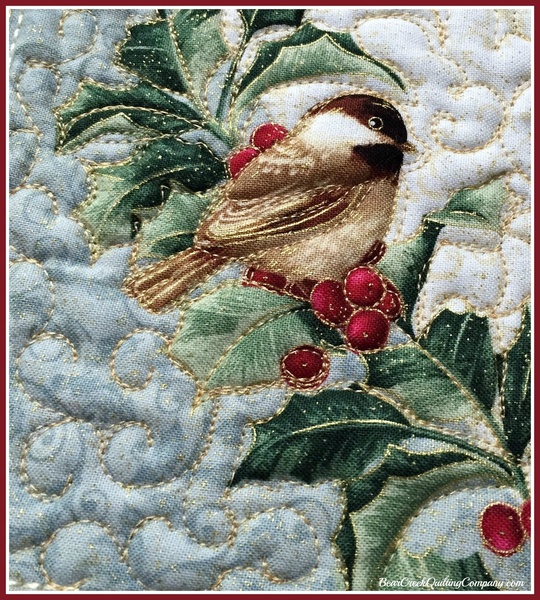 |
| In this case, I found the Aurifil 50wt Mako Cotton #5001 to be 'just right' for much of the areas on the Chickadee and Berries panel. I love the sheen -- plus the thread color accents the glitter of the songbirds perfectly! |
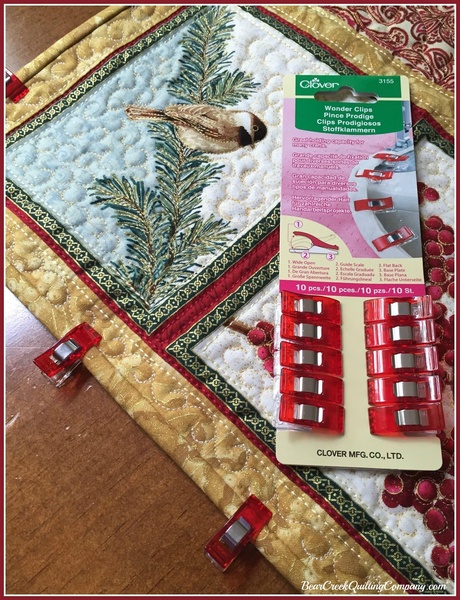 |
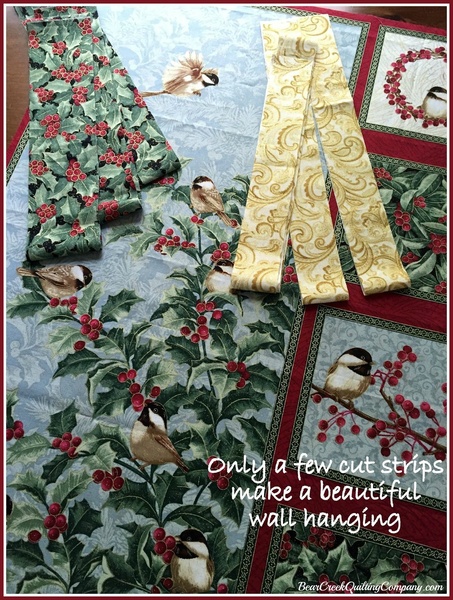
| Once quilted, I make my binding from the 2 1/4" strips of Chickadee and Berries Holly Gold. I love using the small Clover Wonder Clips to hold the binding in place while I stitch it by hand on the back side. |
 |
| Chickadees and Berries Wall Hanging: |
From the Chickadee and Berries Scroll Cream/Gold:
|
From the Chickadee and Berries Scroll Cream/Red:
|
From the Chickadee and Berries Holly Muti:
|
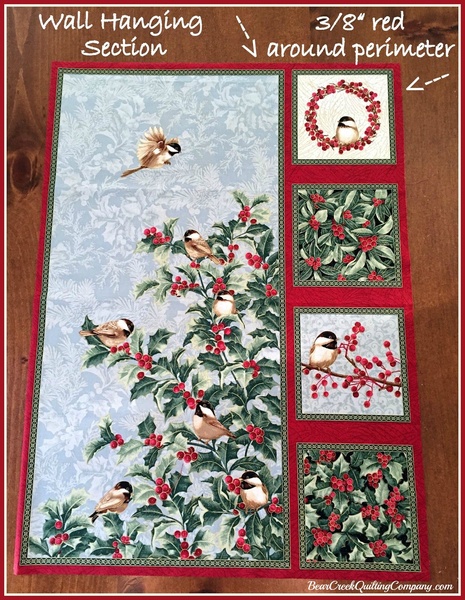 |
| Start with Center Right panel measuring 24 3/4" tall x 18" wide. |
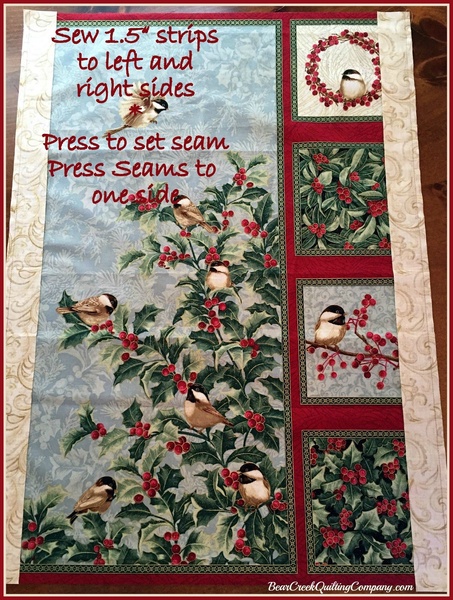 |
| From the Chickadee and Berries Scroll Cream/Gold: Attach left and right border sides, then attach top and bottom border pieces. |
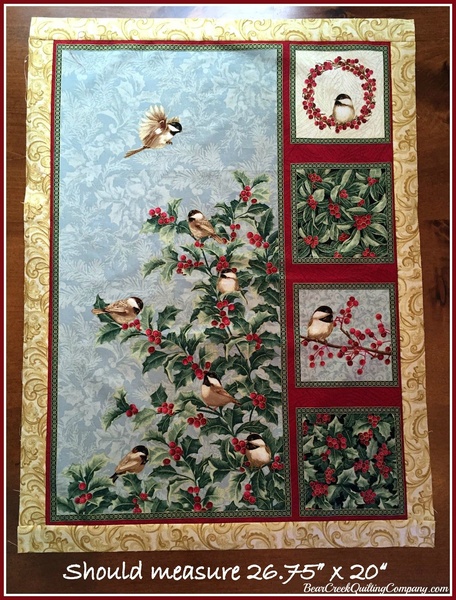 |
| Resulting piece should measure 26 3/4" x 20". |
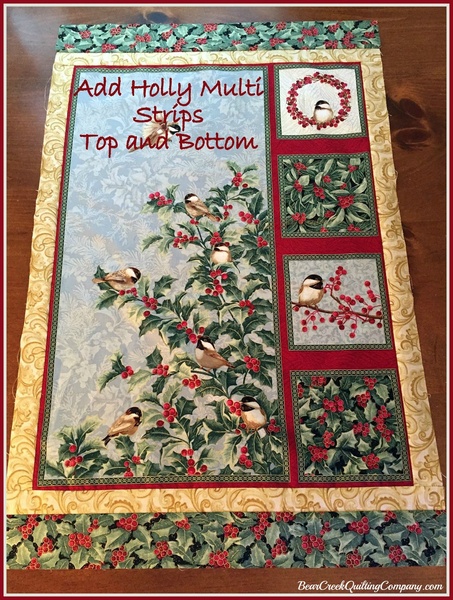 |
| Chickadee and Berries Holly Multi - attach left and right border sides, Press to set the seam and press the seam outwards. Now attach the top and bottom border pieces. |
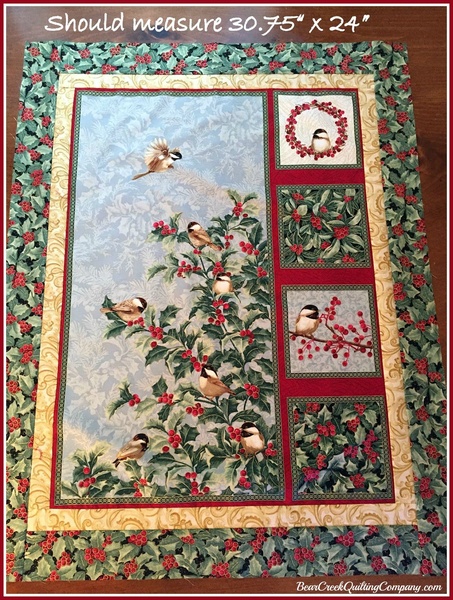 |
| Resulting piece should measure 30 3/4" tall by 24" wide. There you have it...so fast and simple (and beautiful)! |
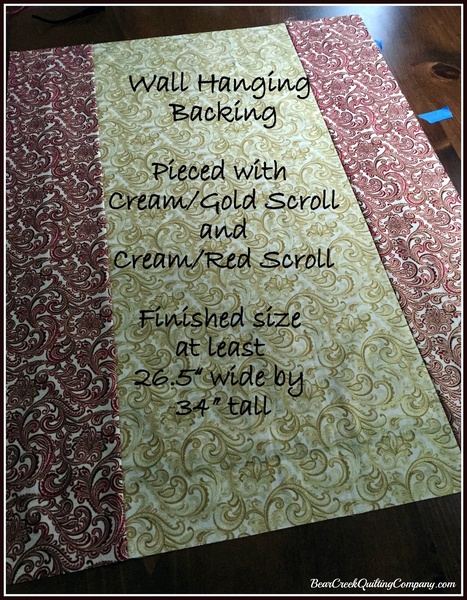 |
| Prepare a backing piece at least 34" x 26 1/2". I pieced mine from the Chickadee and Berries Scroll Cream/Red and the Chickadees and Berries Scroll Cream/Gold - beautiful fabrics!! (See cutting measurements above.) |
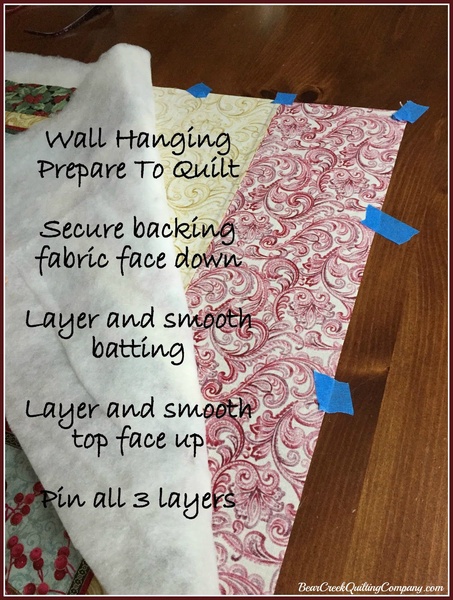 |
| Layer and pin baste as outlined above for the table runner. |
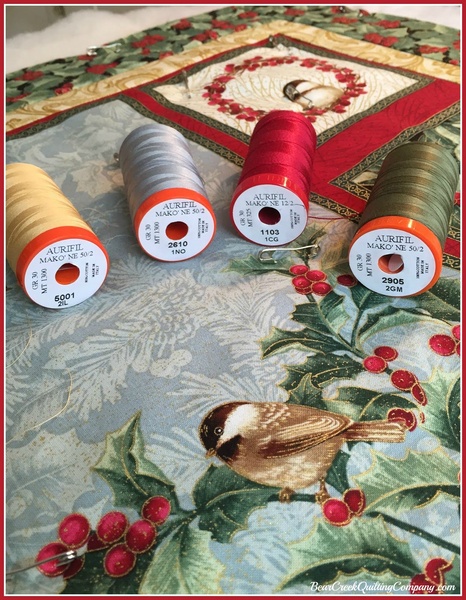 |
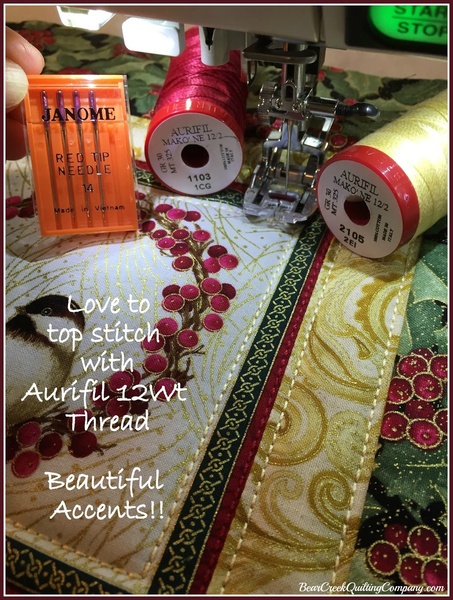
| Choosing threads to quilt -- one of my favorite steps! For the Wall Hanging and the Table Runner, instead of the 'stitch-in-the-ditch' method, I used Aurifil 12wt Cotton thread and a Walking Foot (or an Even Feed foot) to top-stitch the panel sections. The Aurifil 12wt thread adds depth, sheen and provides a beautiful accent on the fabric. Be sure to use a larger needle (90/14) with this heavier thread. I used 50wt thread in the bobbin. I LOVE the way it looks - have fun with it!! |
 |
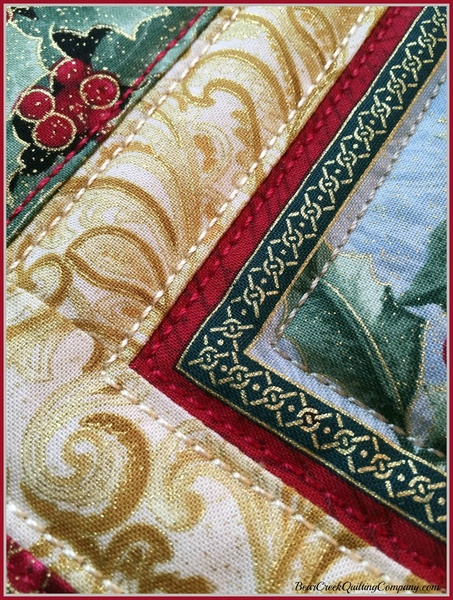 |
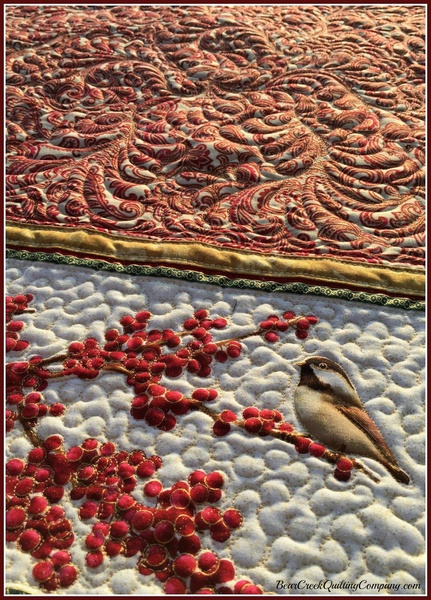
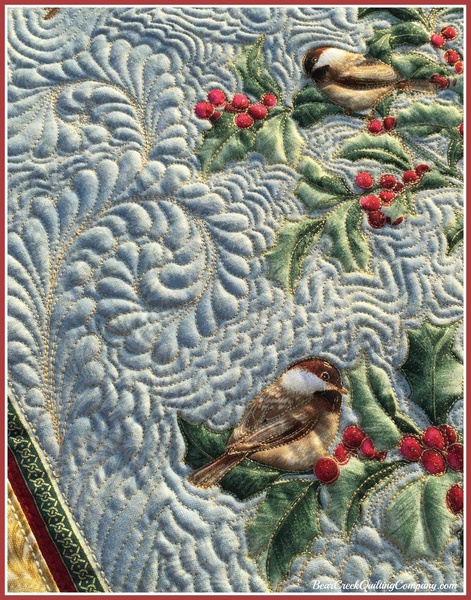
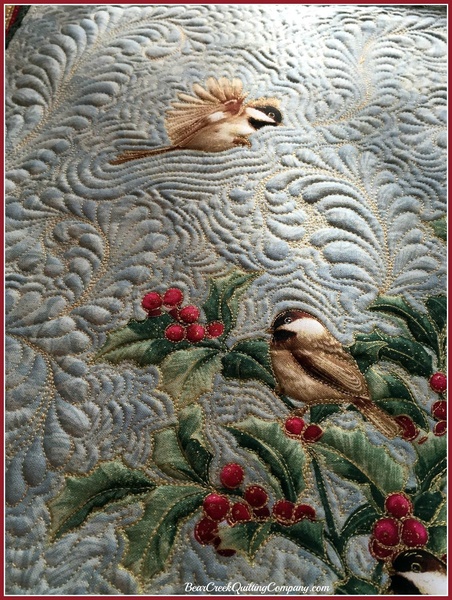
| After top stitching, I had fun with feathers and echo quilting the main section of the panel. I outlined most of the panel accents (birds and holly) with Aurifil 50wt color #5001 -- oh my that gold tone is perfect for this fabric! |
 |
 |
| To see more quilting images and learn a little more about the free motion quilting on the Chickadees and Berries Gift Trio, visit by blog - Karen's Quilts, Crows and Cardinals Blogspot. |
 |
| Prepare Wall Hanging Sleeve: |
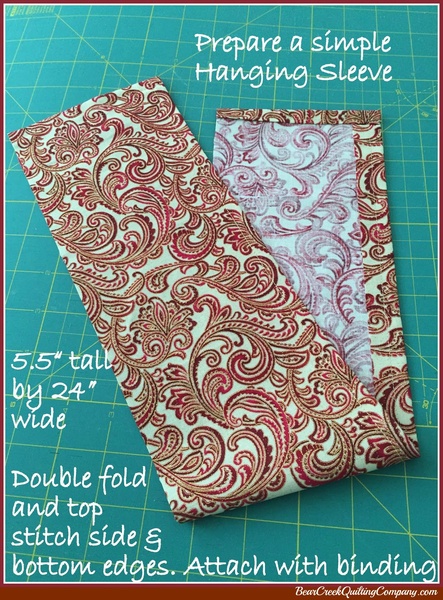
| Chickadees and Berries Scroll Cream/Red - I used a piece approximately 5 1/2" tall by 24" wide. Finish each short side with a double fold and finish the bottom with a single fold (top stitch all 3). The raw edge will be aligned at the top of the quilt and sewn when you machine stitch the binding. |
| After quilting and preparing the sleeve, I made binding from the 2 1/4" strips of Chickadee and Berries Holly Multi. I machine stitch the binding to the front of the quilt and hand stitch the back. |
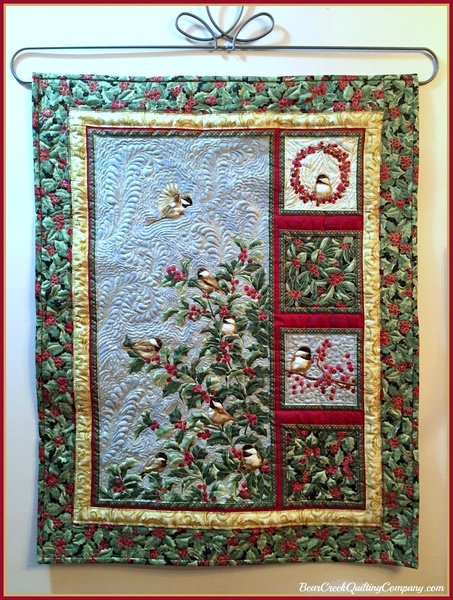 |
| The fabric and focus of this wall hanging is just beautiful! It makes a lovely accent in any room. |
 |
| Coasters "Inside-Out-Method": |
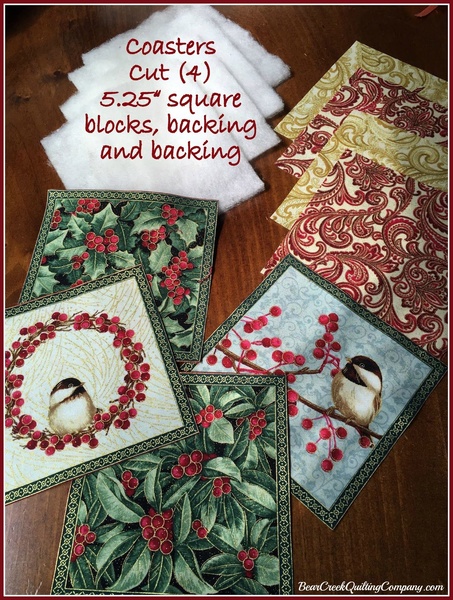
| Let's use the 4 extra 'blocks' that we cut from the center panel and whip up some sweet coordinating coasters. |
| You will need 4 each: blocks, backing and batting. I cut them approximately 5 1/4" square. Exact size doesn't really matter, you will stitch inside the green edge and trim the excess. |
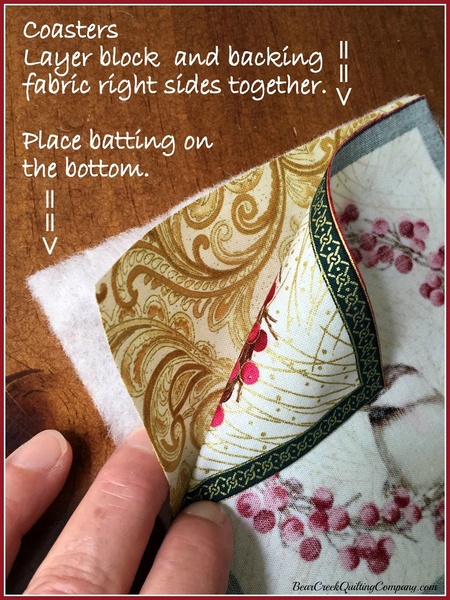 |
| Layer the front and backing fabric right sides together and add a piece of batting under the backing. It seems crazy to do this but it works every time. Now prepare to sew. |
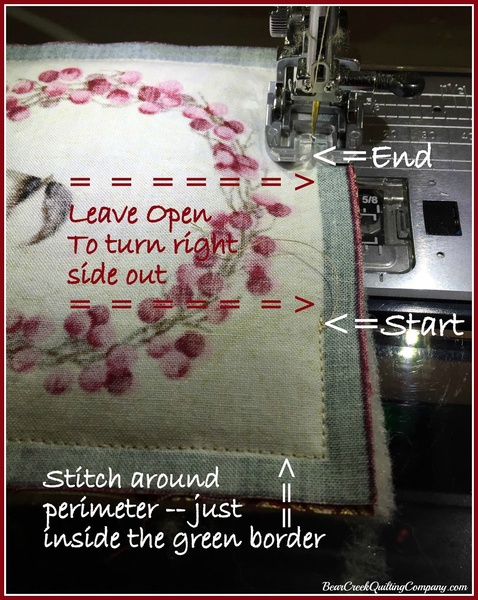 |
| After layering, stitch around the perimeter of the coaster. I stitched just inside the green edge. Be sure to leave a 2" opening on one side so you can turn the coaster right side out. |
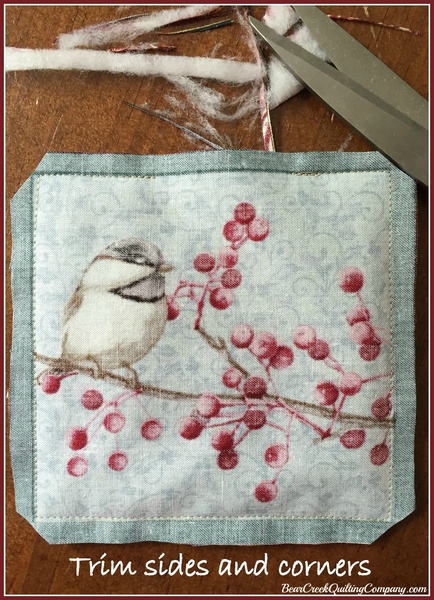 |
| After stitching the perimeter, trim the excess fabric/batting from the sides and corners. Now, prepare to turn right side out. |
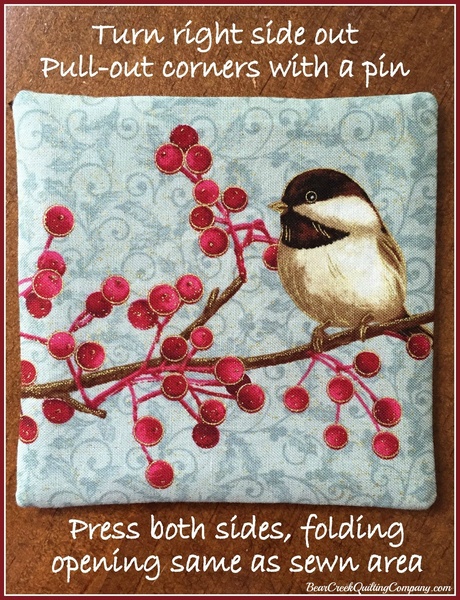 |
| Once right side is out and you have fussed with pushing and pulling the corners out, give both sides a good pressing, fold the opening the same as the seam. This will be sewn closed with the top stitching. |
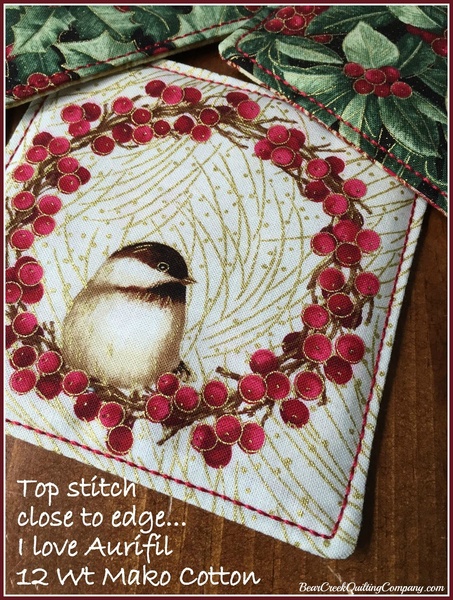 |
| I used Aurifil 12wt Mako Cotton thread and top stitched the perimeter of the coasters. If you stitch close to the edge, it will also serve to finish the opening. |
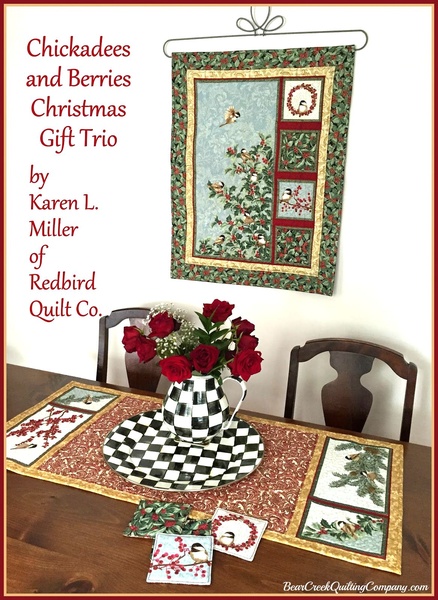 |
| There you are -- you now have a beautiful Christmas Gift Trio made from one Benartex Chickadees and Berries Panel and some yardage. It is a quick and easy gift -- or keep it home to accent your holiday table. To see more quilting images and learn a little more about the free motion quilting on the Chickadees and Berries Gift Trio, visit my blog - Karen of Redbird Quilt Co. and Karen's Quilts, Crows and Cardinals Blog. GIVE-AWAY!! No Redbird Quilt Co. written tutorial is complete without a give-away, right? You won't want to miss out on this fantastic fabric and thread give-away -- so be sure to jump over to my blog and join the fun! Here's the link: Karen's Quilts, Crows and Cardinals Blog Give-Away Closed Thanks again for stopping by today - and many thanks to Bear Creek Quilting Company for hosting the tutorial and sharing such beautiful fabrics. |
 |
| Chickadees and Berries Christmas Gift Trio instructions can be printed here. |
| Chickadees and Berries Christmas Gift Trio was designed and created for Bear Creek Quilting Company by Karen Miller of Redbird Quilt Co. and Karen's Quilts, Crows and Cardinals Blog. |
| Fabric used in this tutorial is from Chickadees and Berries by Jackie Robinson for Benartex. |
| Do you love free fabric? Do you love to teach? Want to be a contributor on our blog? Send us an email at web@bearcreekquiltingcompany.com to get started! |



Comments