Wristwatch Quilt - Assembling your top!
Are you following along and making this quilt? Well it is not to late to catch up! Check out the first post HERE to get all the details on fabric requirements. It is an easy pattern that is great for the beginning quilter!
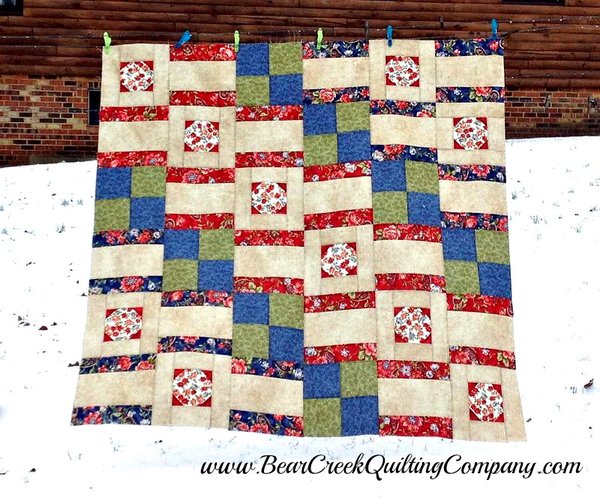
(Finished size: 60 1/2" x 60 1/2")
Along the way we have shown you how to make each individual block in this quilt. Click on each block to see specific tutorials- Snowball Block, Four Patch Block, and Rail/Strip Block.
Now we need to get these blocks together and finish our top!
There are 3 units to assemble; Unit A, Unit B and Unit C.
Unit A- make 3 of these.
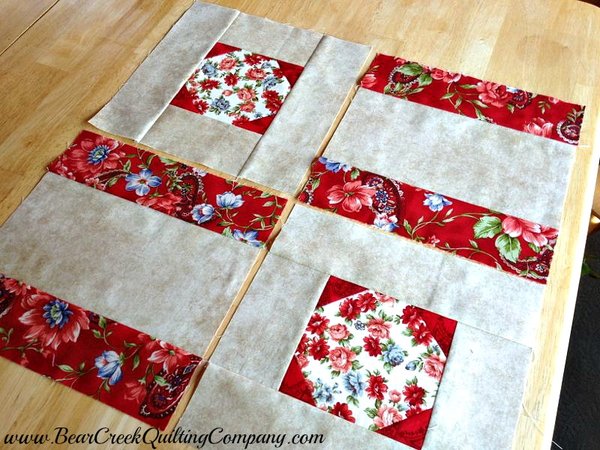
Unit B- make 2 of these.
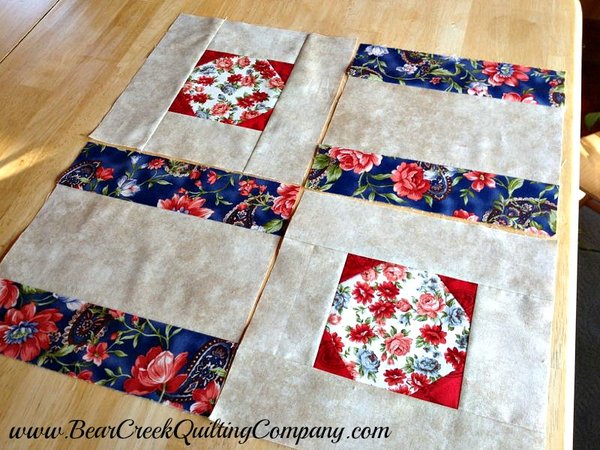
Unit C- make 4 of these. Two of these units will be rotated when placed in the quilt.
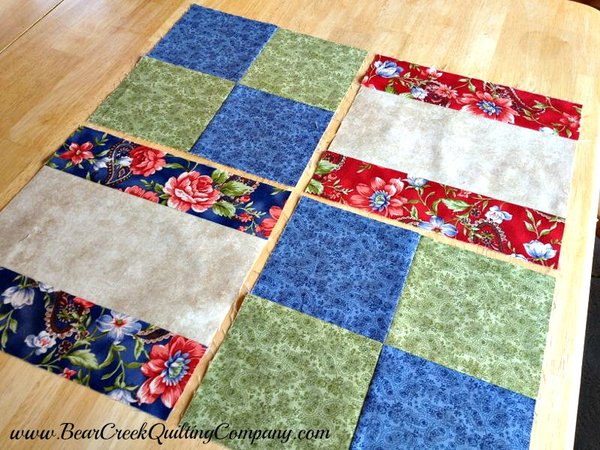
Each unit finishes at 20 1/2" square with a total of 9 units.
Layout all your units as in the diagram and then piece them together. Two of the "C" units will be rotated to keep blue and red colors correctly lined up. See the photo of the quilt to make sure your blues and reds end up in the right spot!
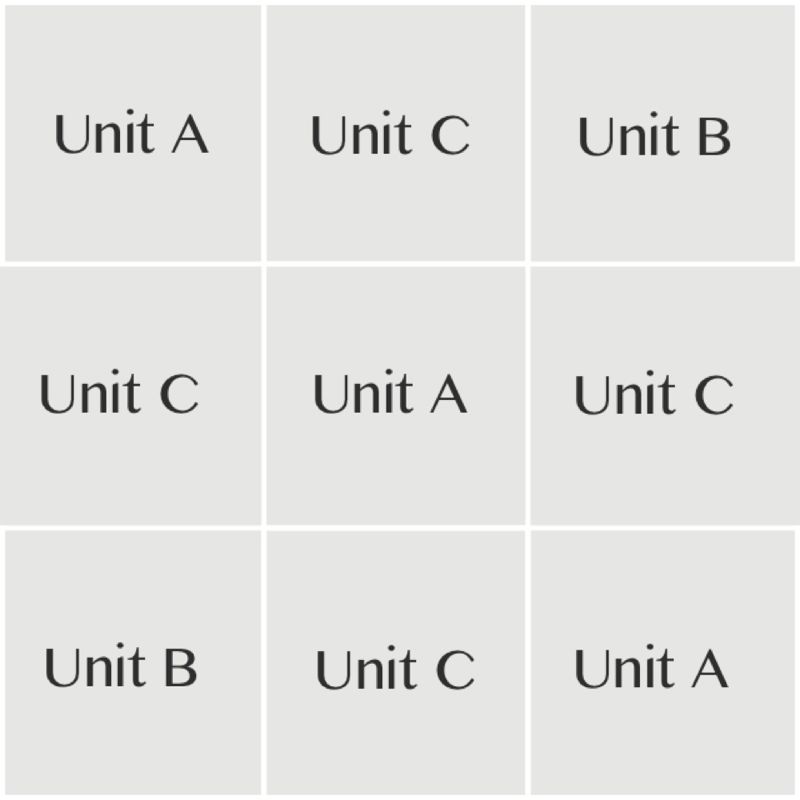
Easy, right?!
Now, layer your backing, batting, top and quilt as desired.
Cut (7) 2 1/2" x width-of-fabric (WOF) strips from your binding fabric and join end to end to form your binding. Then bind your quilt.
Hope you guys enjoy this one and please share your pictures. You can email pictures to web@BearCreekQuiltingCompany.com and we will share on this post!
Keep it Sassy!

♥♥♥♥♥
"Wristwatch" Quilt was designed and created for Bear Creek Quilting Company by Paula of The Sassy Quilter
Fabric used in this tutorial is from Home and Heart by Yuko Hasegawa for RJR Fabrics and Shadow Play by Maywood Studios.
Do you love free fabric? Do you love to teach? Want to be a contributor on our blog? Send us an email at web@bearcreekquiltingcompany.com to get started!

