Quilt Block Tutorial: Four Patch Block
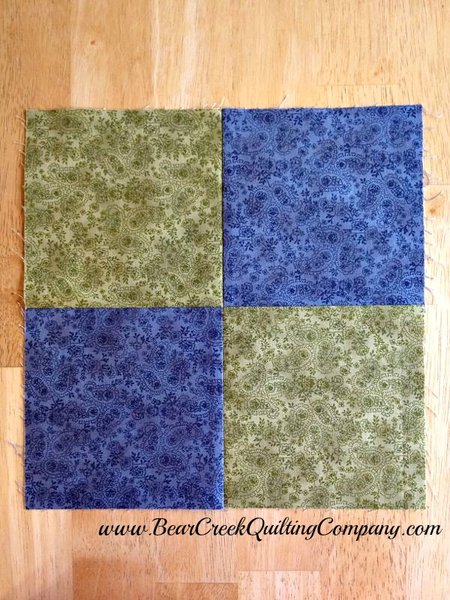
If you are following along and making the "Wristwatch" quilt; here are your cutting instructions for the four patch blocks in this quilt. If not...this is just a tutorial you can use to add to your quilty skills tool box.
Cutting Instructions:
Green fabric- cut (3) 5 1/2" x width-of-fabric (WOF) strips
Blue fabric- cut (3) 5 1/2" x width-of-fabric (WOF) strips
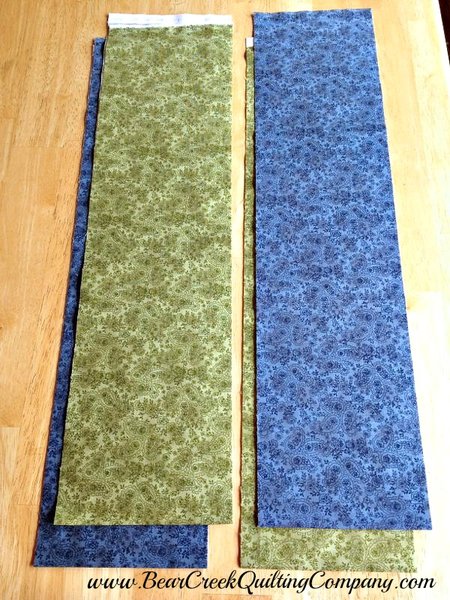
The technique I am going to show you uses a strip piecing method. This makes them extra speedy.
For the four patch block two fabrics are used and should have some contrast so that they pop against each other. You will start with WOF strips that are 5 1/2".
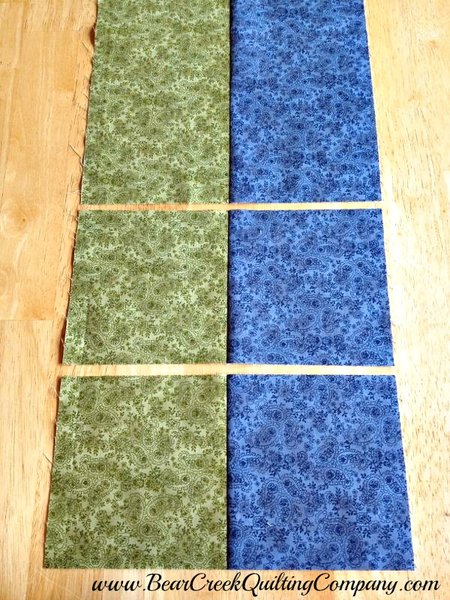
Sew two of the 5 1/2" WOF strips together to form a strip set. Press toward the darker of the two. Then subcut 5 1/2" sections; you can get 7 out of each strip set and you will need a total of 16.
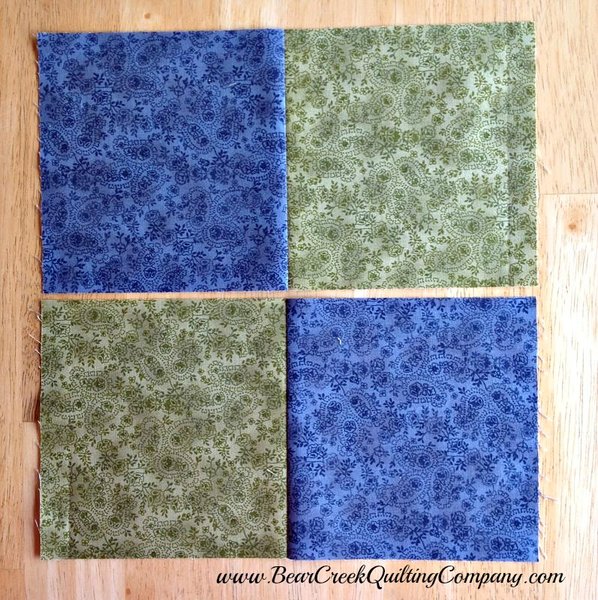
Two of your cut sections will form the four patch block. Flip one so that the colors are opposing each other. You will need 8 pairs.
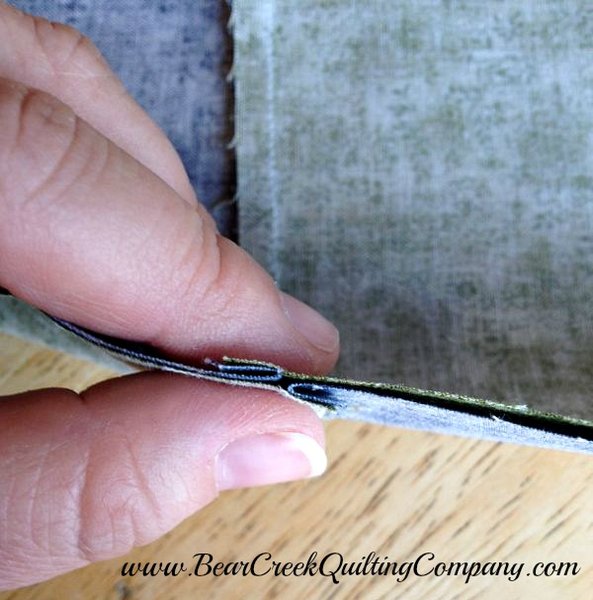
Put these right sides together and sew a 1/4" seam. Your seams should "nest" against each other. This will give you a perfect center to your block!
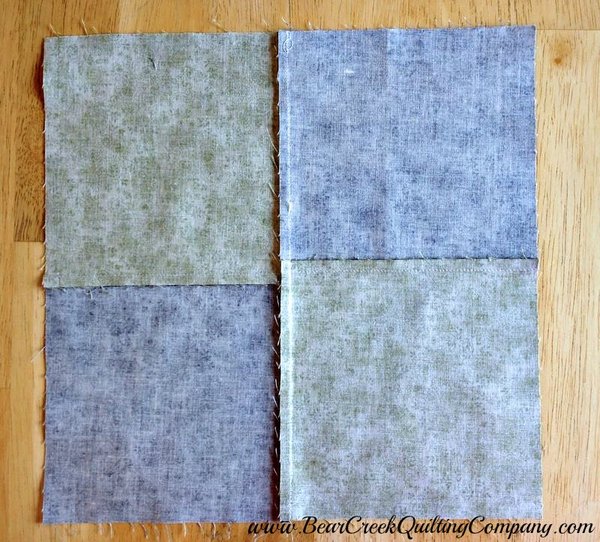
Press open, this is what the back should look like.
When seam line up like this it can make the center area of your block kind of thick and form a bump. Now I am going to show you an extra little tip to keep the center of this block nice and flat!
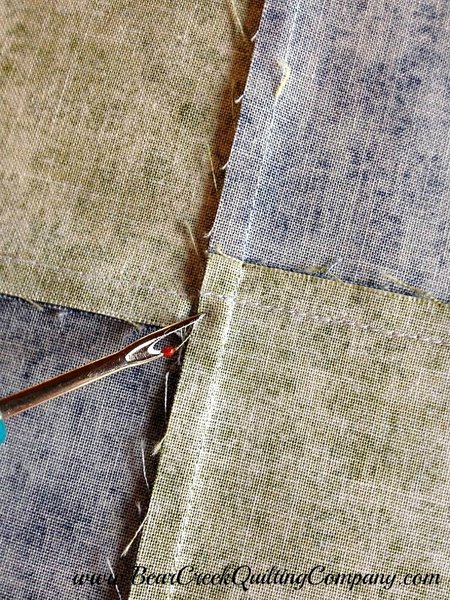
On the back of the block...take notice of the last couple of stitches past where you sewed your last seam.
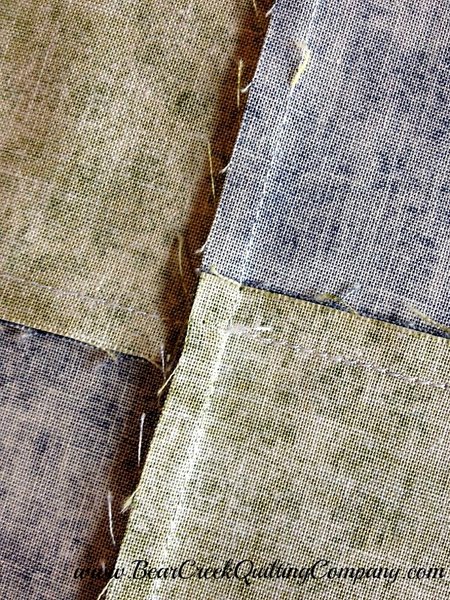
Using your seam ripper, up-pick the last two or three stitches past the seam line. Notice all of these seams are going in a counter clockwise direction except the bottom one.
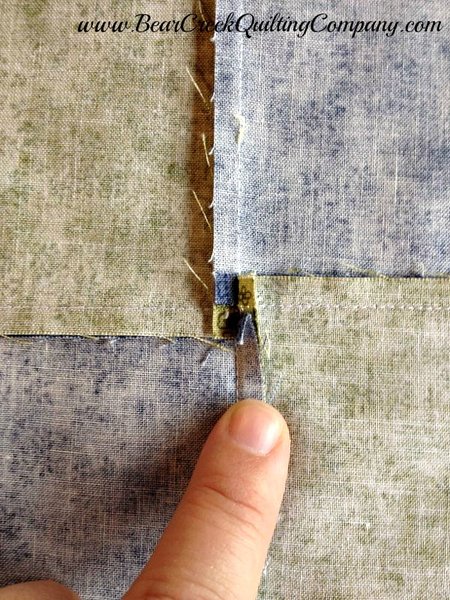
Now that we have removed those last couple of stitches, we can push that bottom seam so that it is going in the same direction as the rest. This will reveal a little mini four patch in the center seams.
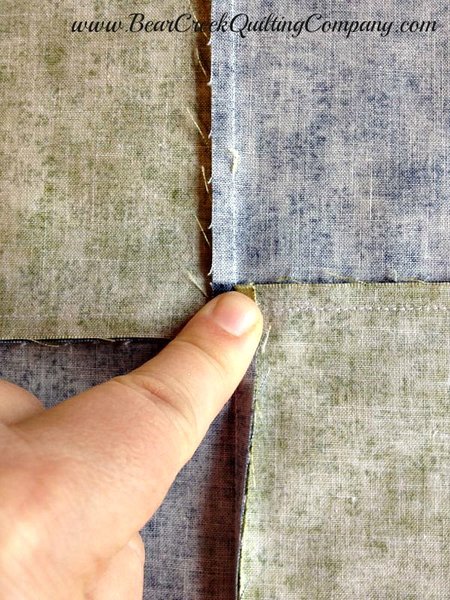
Using your finger tip...really smush that center!
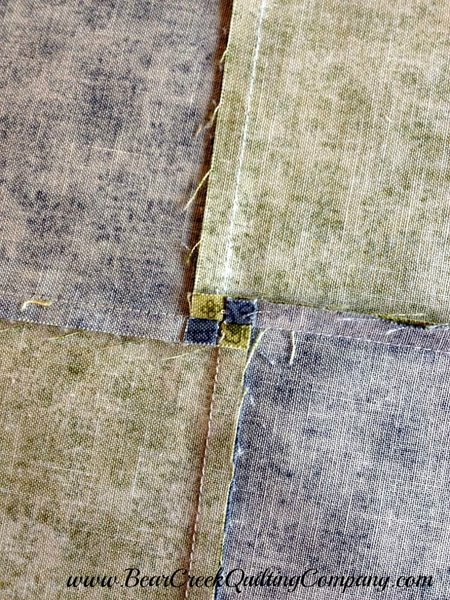
Then give it a press with your iron to set everything in place! Isn't that little mini four patch just as cute as a button? This evenly distributes the bulk of your seams and your center is flat and smooth, this also makes it easier to quilt!
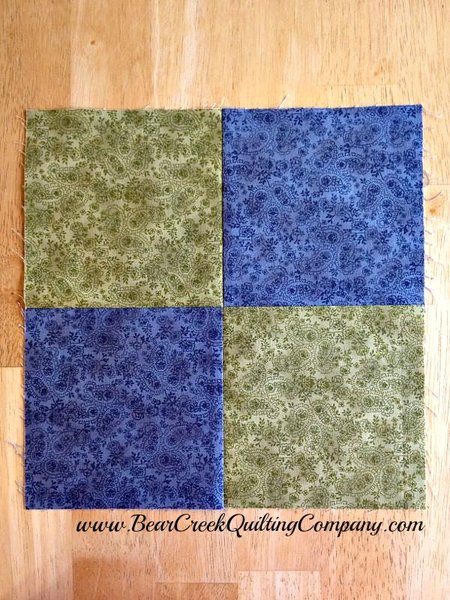
Perfect! This is a great block for beginners, so easy and quick. You will need 8 Four Patch blocks for the "Wristwatch" quilt and they should finish at 10 1/2" square.
Now, go get four patch crazy!
Keep it Sassy!

♥♥♥♥♥
"Wristwatch" Quilt was designed and created for Bear Creek Quilting Company by Paula of The Sassy Quilter
Fabric used in this tutorial is from Home and Heart by Yuko Hasegawa for RJR Fabrics and Shadow Play by Maywood Studios.
Do you love free fabric? Do you love to teach? Want to be a contributor on our blog? Send us an email at web@bearcreekquiltingcompany.com to get started!


Comments