Posted by Shari on June 21st, 2015
| Tiles Quilt-Along, Part 2: Let's Get Cutting |
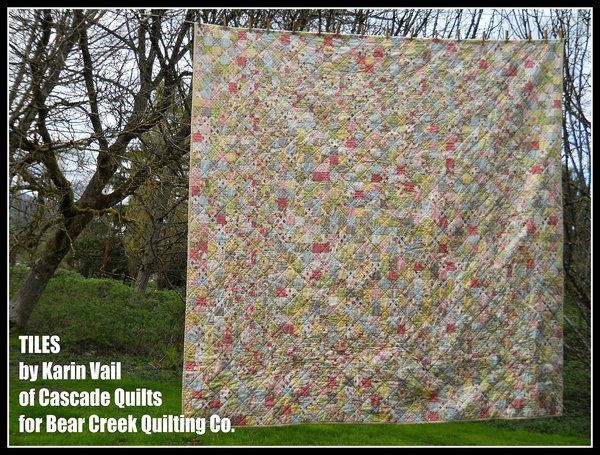
| Hello Friends! Welcome back to the Tiles Quilt-Along! We will be working on the cutting and strip set piecing for the quilt this week! (If you missed Part 1, you can find it here.) |
 |
| Hopefully you have all gathered your 40 fat quarters (or 44 'just in case' your fat quarters don't measure the generous 18 1/2 inches wide that I have found with Moda fat quarter bundles.) First, iron your fat quarters well. I like to give them a little bit of starch as I press, but it's not necessary. |
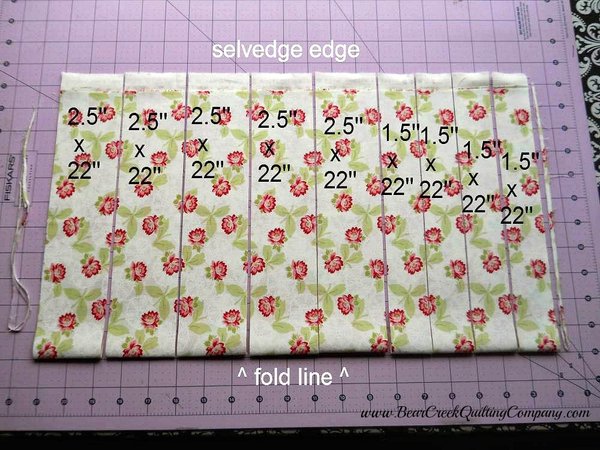 |
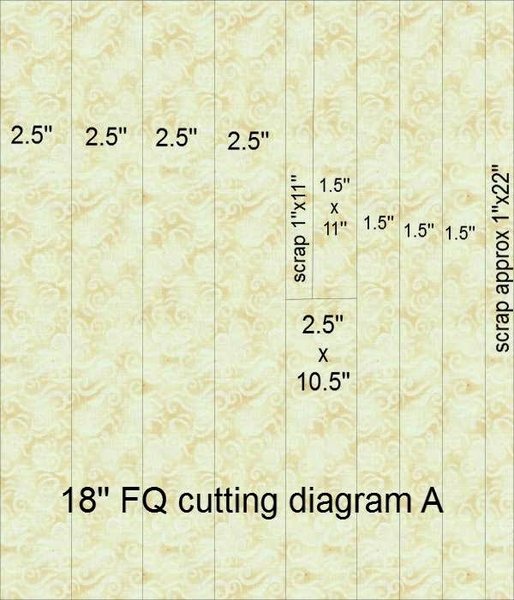
| Fold your fat quarter in half with the selvedge edge to the cut side (that was originally a fold line when it came off the bolt). Trim the VERY least little bit off the left edge if you must, but try to not have to cut any. Then, cut FIVE - 2 1/2 inch strips, and FOUR - 1 1/2 inch strips. You can see how very little waste there is if your fat quarter is 18 1/2 inches or more. Mine were all 18 5/8 inches, so I only trimmed 1/16 inch off each side. |
 |
| Now, take one of your 2 1/2 inch x 22 inch strips from each fat quarter, unfold it, and cut 10 1/2 inches from one side. From the remaining 11-ish inches, cut 1 1/2 inches wide. You will only have one piece from each fat quarter that is 1 inch x 11-ish inches that you can add to your scrap bin. |
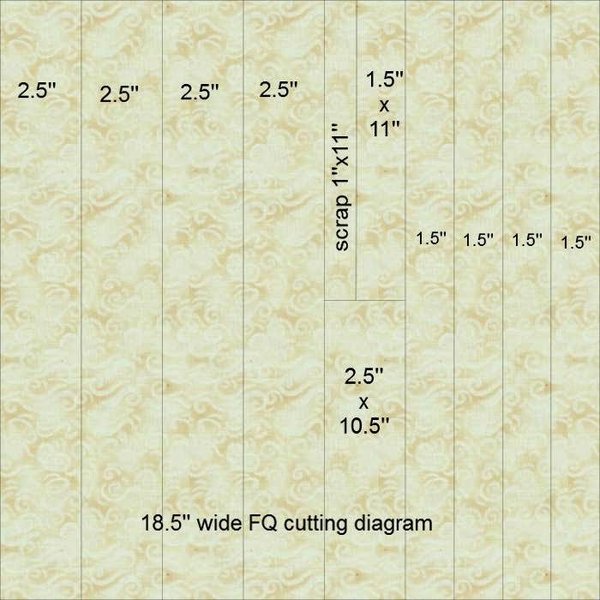 |
| Here are some diagrams you can print out if your fat quarters are 18 1/2 inches wide. |
 |
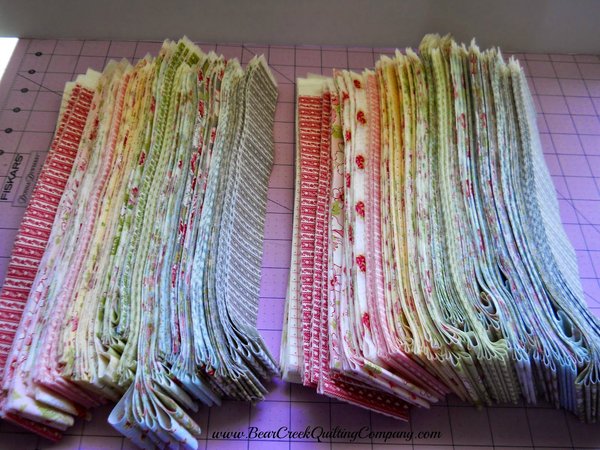 |
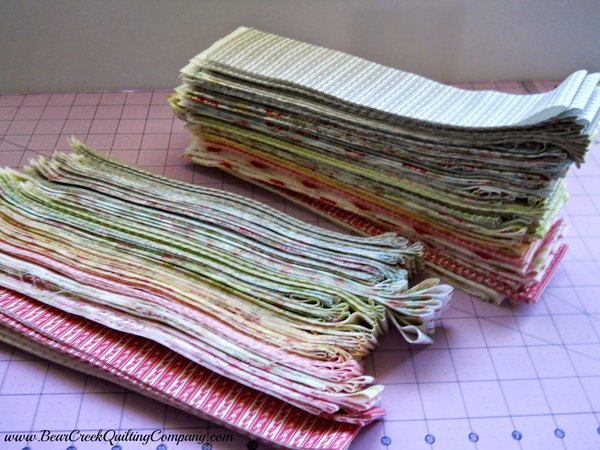
| Repeat with all 40 fat quarters until you have a huge pile of 1 1/2 inch strips and 2 1/2 inch strips. You will have 160 pieces of each at 22 inches long and 40 shorter pieces of each (40 @ 2 1/2" x 10 1/2'' and 40 @ 1 1/2" x 11''). If you are cutting from yardage and cutting width of fabric strips - you can cut 90 @ 2 1/2 inches and 90 @ 1 1/2 inches. |
 |
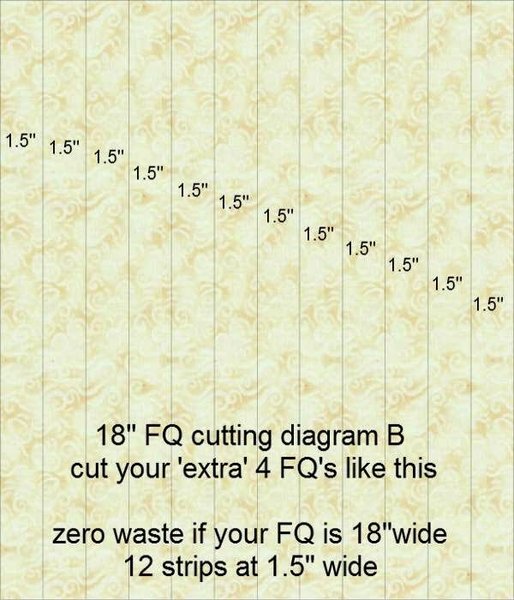 |
| Now, if your fat quarters don't quite make the 18 1/2 inch mark, then cut your 40 fat quarters the same, but leave out cutting the last 1 1/2 inch strip. You will cut your extra 4 fat quarters into all 1 1/2 inch strips in that case (you should get 12 strips from each fat quarter for a total of 48 - that will more than make up for the one less on each of the other fat quarters - you technically only NEED 40 more 1 1/2 inch strips though, so you can cut less from your extra if you prefer.) I hope that made sense! Now, we can move onto SEWING! I am not going to go into detail here, just be sure to use a SCANT 1/4 inch seam allowance for this quilt. |
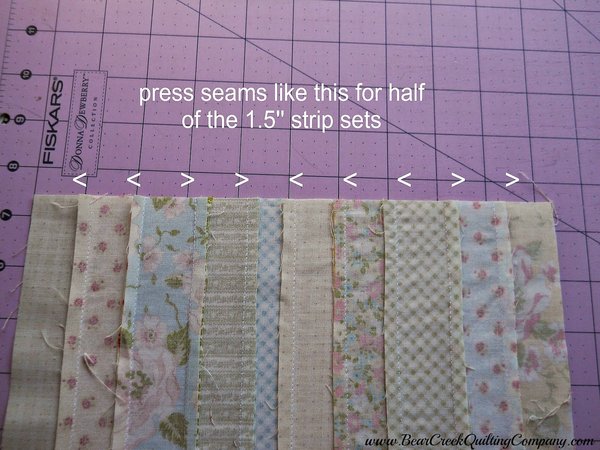 |
| Sew your 1 1/2 inch strips into strip sets of 10. Don't worry about pressing until all 10 strips are sewn together with a scant 1/4 inch seam allowance. Then, half of your strip sets, press the seams like pictured above. The only gremlin seam is that very center one. He can go either way you please, just be consistent. You should have 16 strip sets of 10, and 8 of them you will press like this. The shorter pieces of 1 1/2 inch strips will make another 4 strip sets. Press 2 of the shorter ones like this. |
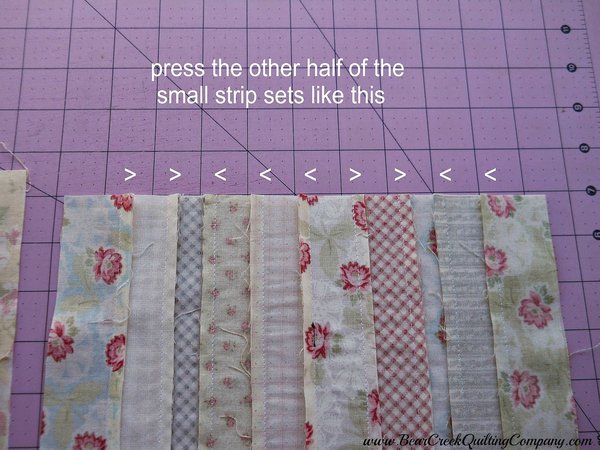 |
| The other 8 strip sets you will press like this. The remaining 2 shorter strip sets you will press like this as well. Now, you can work on the 2 1/2 inch strip sets! |
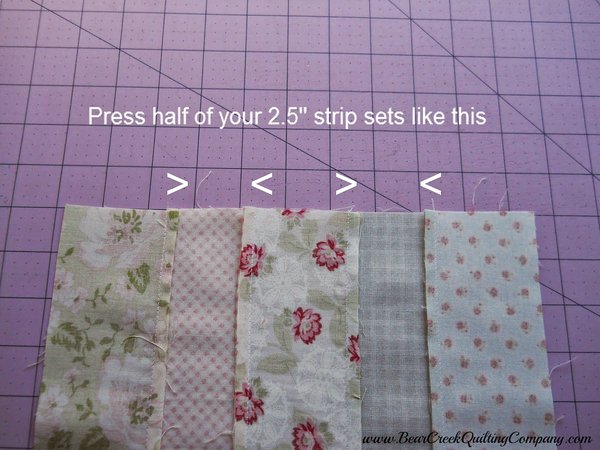 |
| Sew your 2 1/2 inch strips into strip sets of 5. You will have a total of 32 that are 22 inches long and 8 that are 10 1/2 inches long. Press half of the strips of both lengths like this. |
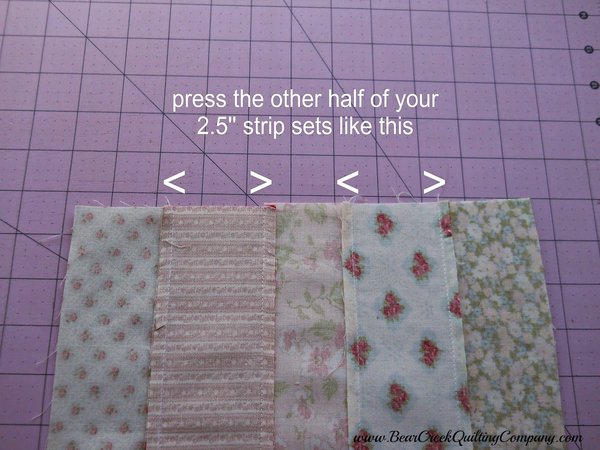 |
| And the other half of your strip sets, press like this. |
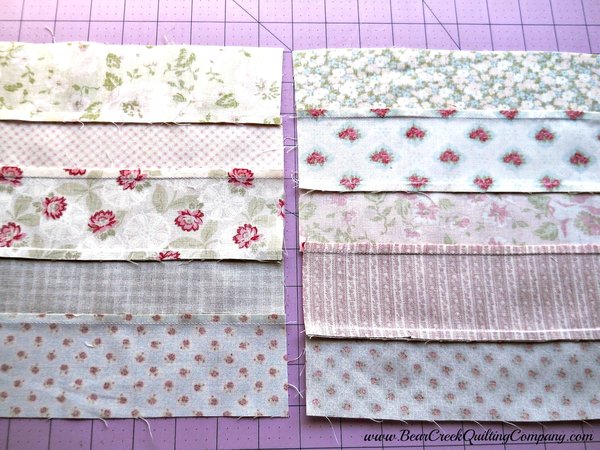 |
| Half of your strip sets will be pressed one way, the other half the other way - so when you subcut your strip sets, you alternate from each strip set in the assembly of your blocks. That way, you get perfectly matching seams! Whew! That was a lot of strip sewing and pressing! I will be back next week for the sub-cutting and block assembly instructions. |
| I have started a Flickr group to share your pictures if you plan to join in the quilt along! https://www.flickr.com/groups/2827925@N23/ is the link to the group. |
 |
| "Tiles" Quilt-Along, Part 2 instructions can be printed here. |
| "Tiles" Quilt-Along was designed and created for Bear Creek Quilting Company by Karin from Cascade Quilts. |
| Fabric used in this tutorial is from Ambleside by Brenda Riddle Designs for Moda. |
| Do you love free fabric? Do you love to teach? Want to be a contributor on our blog? Send us an email at web@bearcreekquiltingcompany.com to get started! |


Comments