Bouquet Memories Wall Hanging Tutorial
Greetings fellow Quilters!
My name is Karen Miller and I am honored to be a guest blogger for Bear Creek Quilting Company and present to you a sweet wall hanging tutorial.
I used the most beautiful fabric; "Bouquet Memories" by Hoffman of California, and I'm certain you will love this fabric as much as I do!!
The awesome thing about "Bouquet Memories" is that it comes in three colorways; Wild Rose, Orchid, and Iris -- all three equally beautiful!!
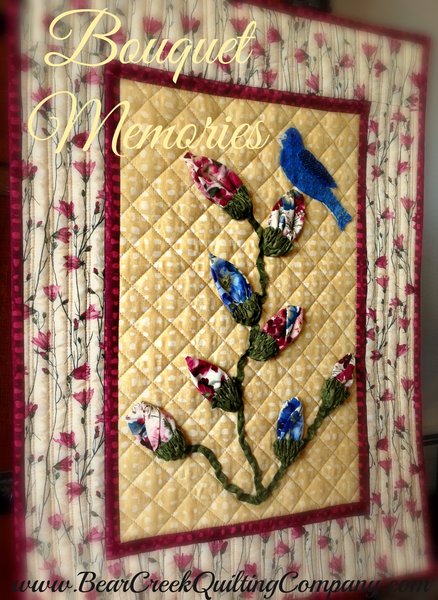
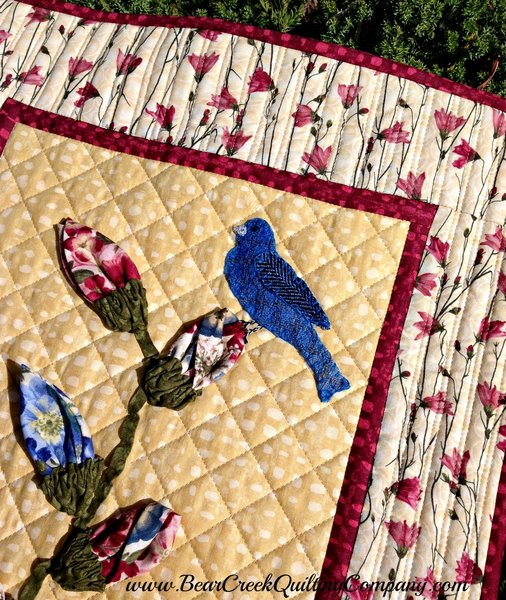
The finished wall hanging measures roughly 17" by 23", includes a simple pieced background, some dimensional flowers, bias tape stems, and some straight line accent quilting to top it off! (Bird? Did someone mention a bird??) For the tutorial sample I chose to use the Wild Rose colorway. I just love burgundy so Wild Rose was right up my alley!
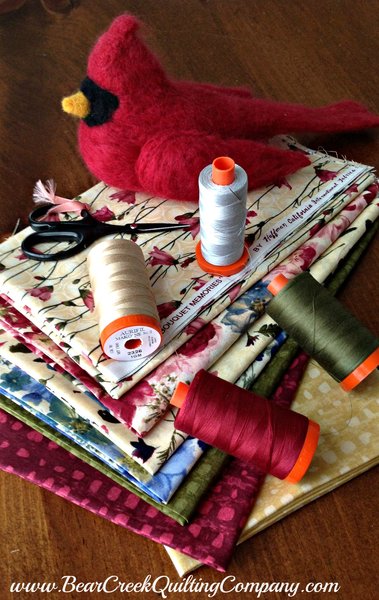
Bouquet Memories Fabric Requirements:- 1 Fat Quarter Cream (background & backing)
- 1 Fat Quarter Wild Rose (flowers)
- 1 Fat Eighth Iris (flowers)
- 1 Half Yard Wild Rose Vine (outer border and backing)
- 1 Fat Quarter Berry (inner border and binding)
- 1 Fat Quarter Olive (flower stems and sepal/receptacle)
- 1 Fat Eighth Wild Rose Petals (backing and hanging sleeve)
- Aurifil Color #2326 for piecing and quilting
- Aurifil Color #2905 for flower stems, sepals and receptacles
- Aurifil Color #2460 for binding prep and sewing
- Clover #6 Bias Tape tool for (3) 1/4" stems
- Freezer Paper to make a 6" and 4" round template for flower pieces
Preparing the Quilt Top:
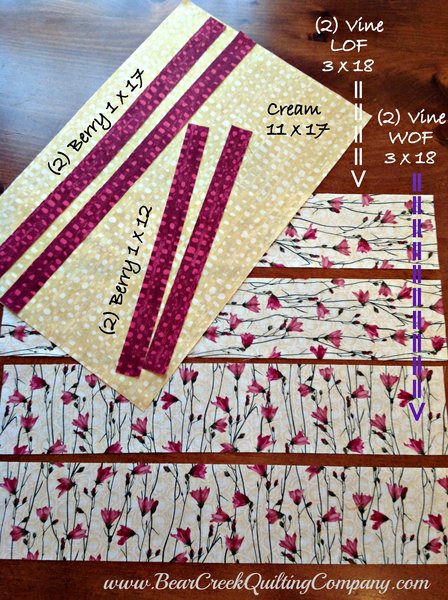
Cut the following pieces for the quilt top:
- 11" x 17" Cream (background)
- (2) 1" x 12" Berry (left/right inner border)
- (2) 1" x 17" Berry (top/bottom inner border)
- (2) 5/8" x 15" Olive (for two 1/4" bias stems)
The outer border print is directional. In order to have the vines and flowers all running up and down you'll need to make two Length of Fabric cuts first and two Width of Fabric pieces last.
- (2) 3" x 18" Wild Rose Vine - cut LENGTH of Fabric (left/right outer border)
- (2) 3" x 18" Wild Rose Vine - cut Width of Fabric (top/bottom outer border)
Piece the quilt top (Use a scant 1/4" seam allowance throughout):
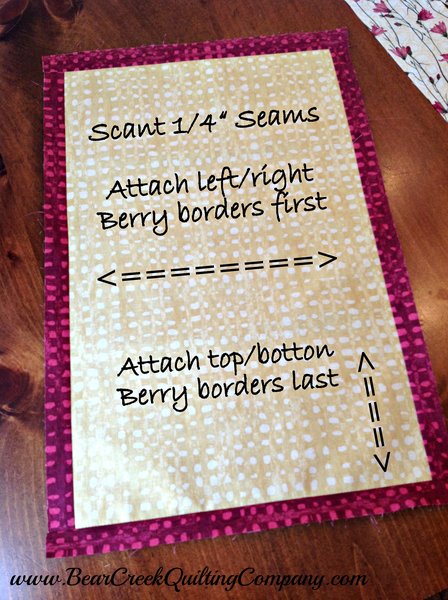
- Attach the Berry inner border pieces (1" x 17") to the left and right of the background
- Press to set the seam and press toward the border
- Attach the Berry inner border pieces (1" x 12") to the top and bottom of the background
- Press to set the seam and press toward the border
Piece the quilt top continued:
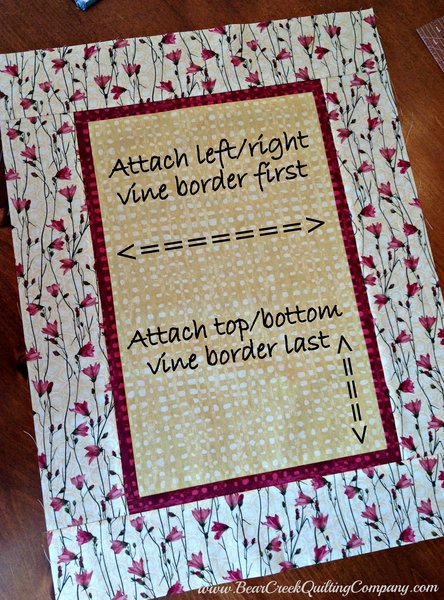
- Attach the Wild Rose Vine outer border (3" x 18") to the left and right
- Press to set the seam and press toward the border
- Attach the Wild Rose Vines outer border (3" x 18") to the top and bottom - making sure they are running in the same direction as the top and bottom border.
- Press to set the seam and press toward the border
Prepare the bias stems:
Use the Olive fabric to prepare (2) 15" by 1/4" bias stems. If you're not familiar with preparing bias stems you can review the details in this Moda Bake Shop tutorial for Redbird and Berries. The steps are outlined within the tutorial. Now that you've prepared the bias stems, use a hand zig-zag stitch to gather them, giving them a bit of dimension. You may choose to attach them without gathering but the gather brings the stem to life!
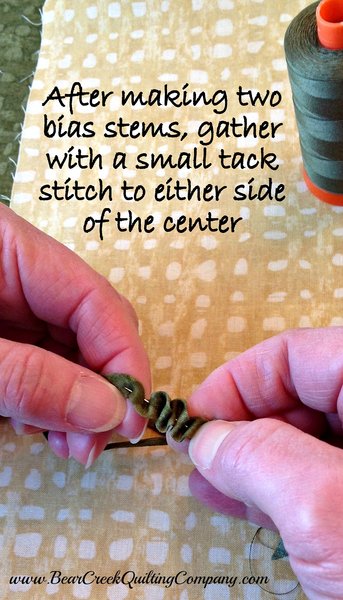
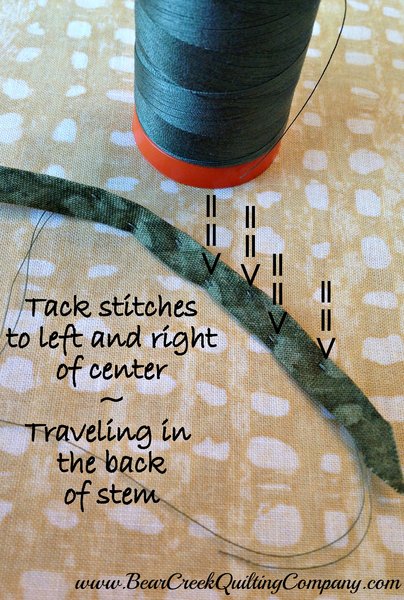
To prepare the gathered stem choose a matching thread (the Aurifil Mako Cotton #2905 worked perfectly with the Bouquet Memories Olive) and a straw or milliners needle, knot your thread and make a small tack stitch alternating to the left and right of center and leaving about 1/4" between each tack.
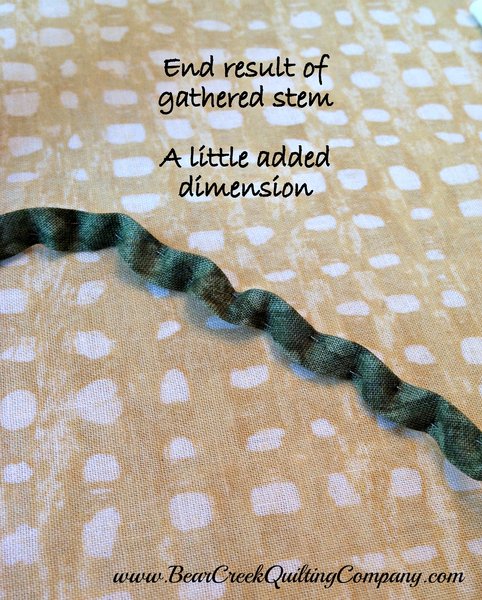
Once you've gathered your stems, they should like similar to this:
Position and attach stems:
Use the diagram below to position the stems on the background fabric. (No need to be exact.)
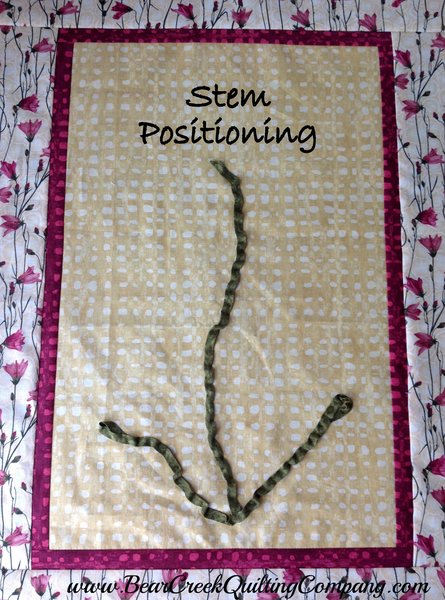
The stem up the middle is all one piece and the left and right stem is all one piece with a slight bend in the middle. Use pins or glue to hold the stems in place. I pin to either side of the stem and not through it (sometimes when you pin through a stem it changes the shape of it). Fold the end of the stems under to hide the raw edge and tack it down when stitching.
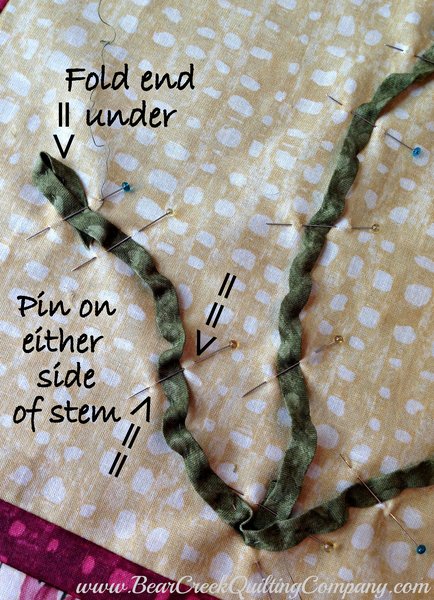
Using thread that matches the Olive fabric (Aurifil Mako Cotton #2905), tack the stems to the background fabric with small stitches about 1/4 inch apart (traveling in the back of the fabric). Don't place too many tack stitches -- they will flatten your stem.
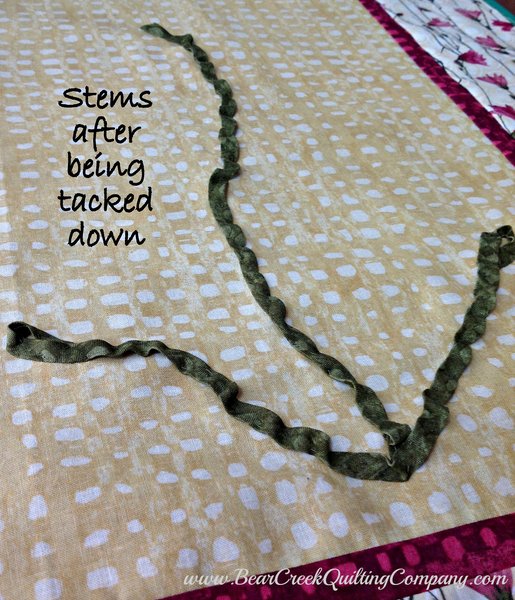
Cut fabric circles for flowers and flower sepals:
There are a total of 8 flowers and sepals in the wall hanging. 6 Wild Rose and 2 Iris -- each with Olive sepals. Draw two circles on freezer paper -- one roughly 6" in diameter (the top of a 16 oz. cool whip container is just about right) and one 4" in diameter (just find something around the house that measures 4" across at the widest point). Neither need to be exact. Cut the freezer paper on the marked line. You will press it to the fabric with a dry, medium-heat iron.
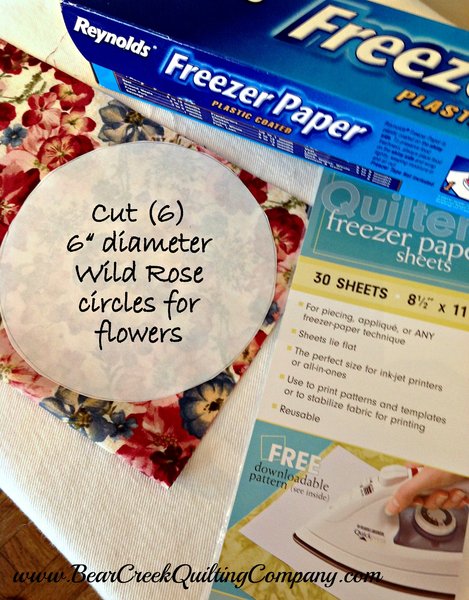
Be sure that you are conservative with your fabric cuts -- you'll need the following cuts:
- (6) 6" circles from the Wild Rose fabric
- (2) 6" circles from the Iris fabric
- (8) 4" circles from the Olive fabric
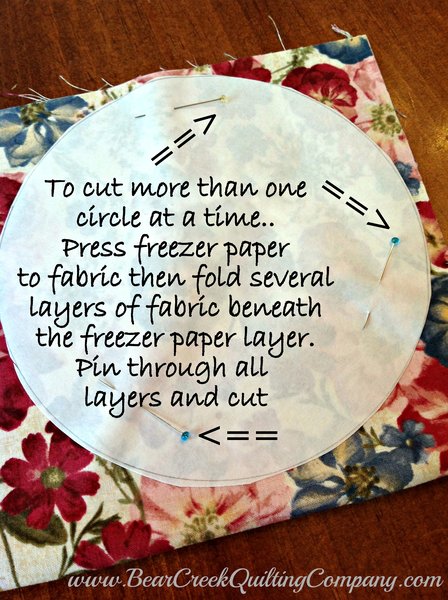
The freezer paper template is re-usable - just iron it on for each circle needed or fold/layer and pin your fabric to get multiple pieces with one cut.
Fold, gather and secure the flowers:
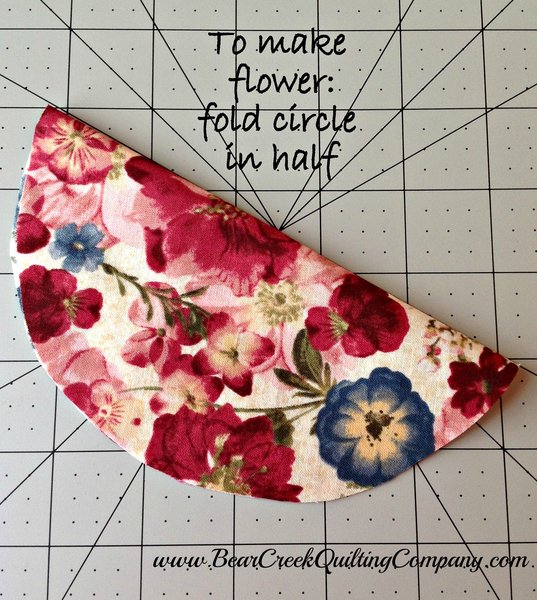
To prepare a flower take a 6" flower circle and fold it in half once, making a 1/2 circle.
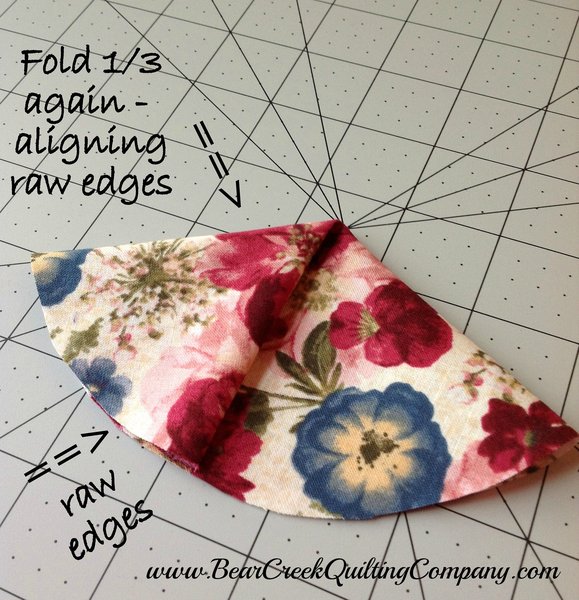
Lay the 1/2 circle fabric on the table top and make two more equal size folds toward the middle (fold 1/3 toward middle from each edge) aligning raw edges.
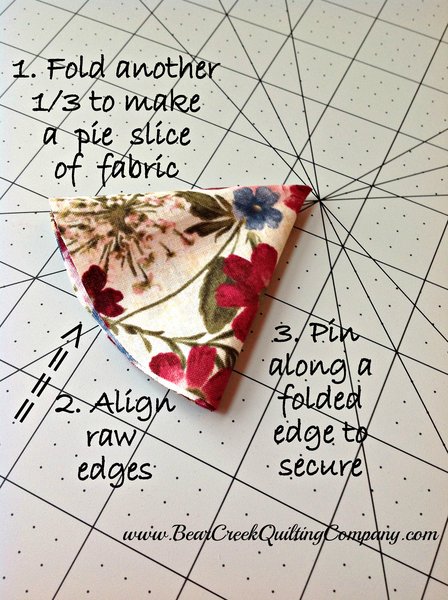
Use a threaded and knotted straw or milliners needle to sew a running stitch across the bottom (raw) edge of the fabric. I used a neutral color thread (Aurifil #2326 worked perfectly for this).
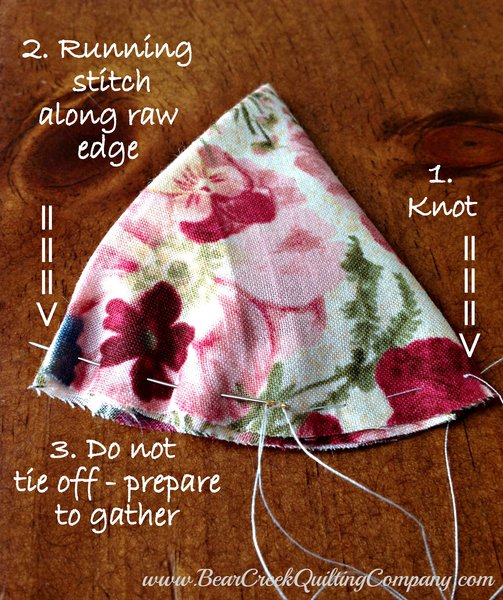
Pull the running stitch taut to gather the flower - while keeping it taut, tie off the gather with a knot. Then sew back through the same gather in the opposite direction to secure and tie off again.
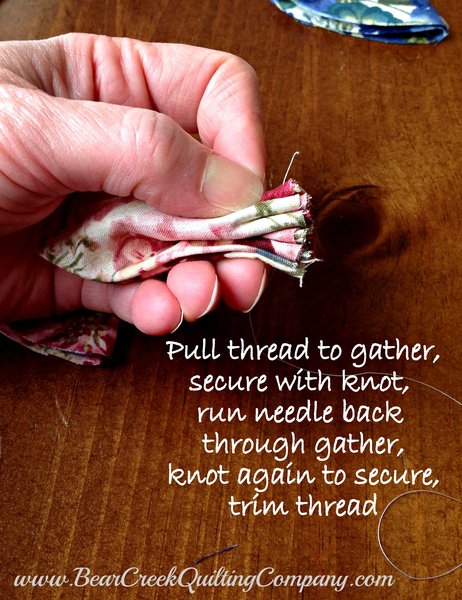
Perform the same step for all 7 flowers. Set them aside while you prepare the sepal. To have a bud like appearance, you can fold the flower edges back (see image below).
Prepare the flower sepal:
With a few simple stitches you can make a beautifully gathered flower sepal. If you haven't done so already, prepare/cut the sepal circle using the 4" freezer template and Olive fabric.
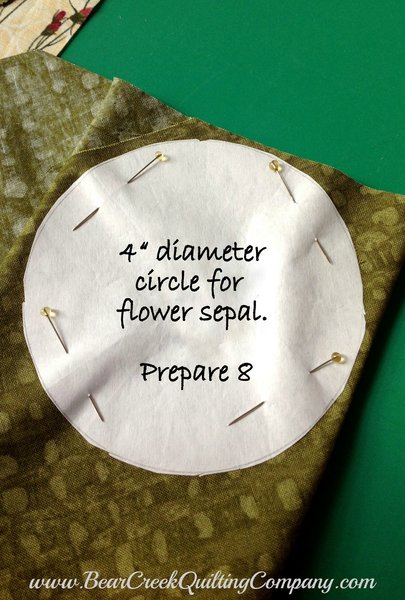
Prepare a straw or milliner needle with matching color thread (Aurifil Mako Cotton #2905) that is knotted. With the wrong side of the fabric facing you, fold about 3/8" of the raw edge toward the center of the circle.
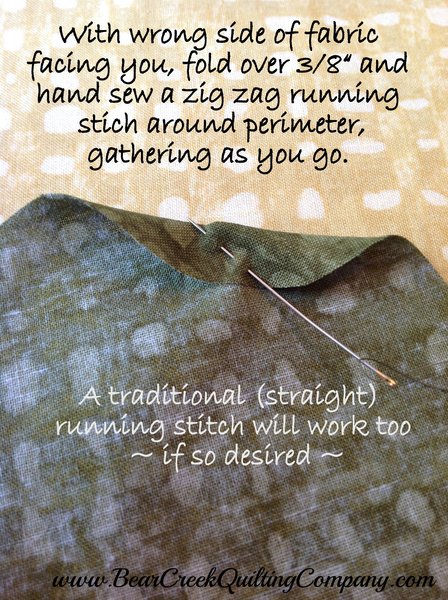
You are going to sew a "V" shaped running stitch around the perimeter of the circle, folding 3/8" edge toward the center as you go and loosely gathering (pulling taut) the stitches as you go.
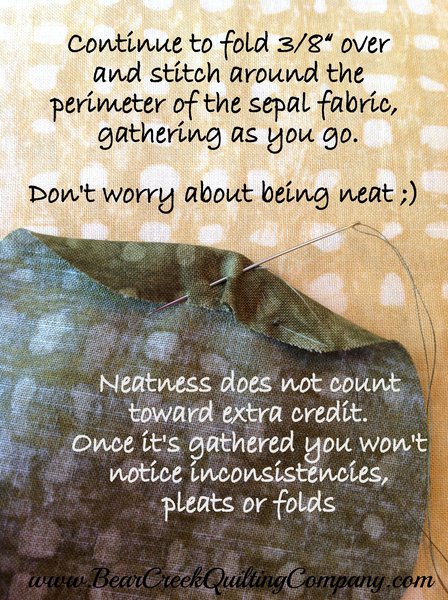
Once the entire circle perimeter is sewn you'll have a small finger puppet size cup with scalloped edges.
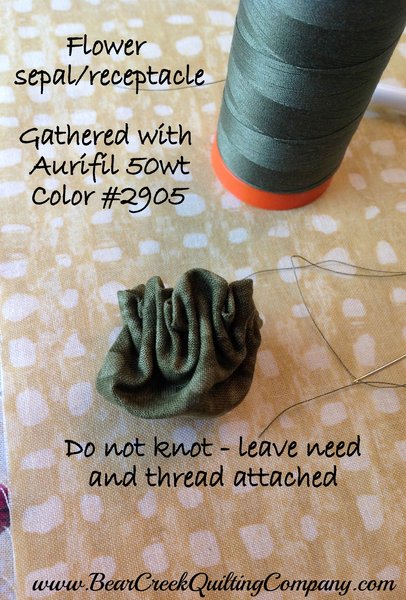
This is your flower sepal or receptacle. It might sound/look scary -- but it's really kinda fun!!
Note: DO NOT knot the sepal when you're done -- you will knot it later. Leave the needle and thread attached for the next step.
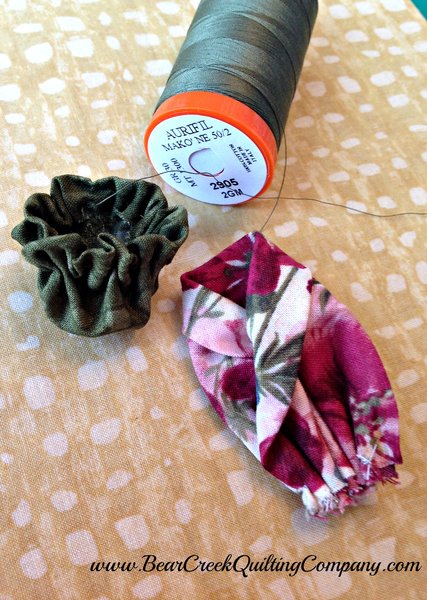
Join flower and sepal:
Place the base (raw edge) of the flower into the sepal making sure that the flower running stitch is well covered inside of the sepal.
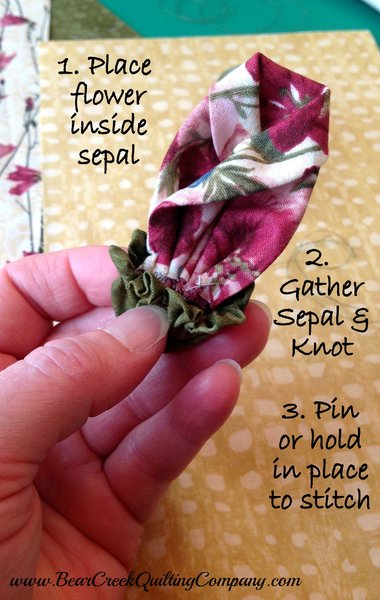
With the needle and thread already attached to the sepal, attach the sepal to the flower with tack stitches - starting from back to front and working across the entire flower/sepal.
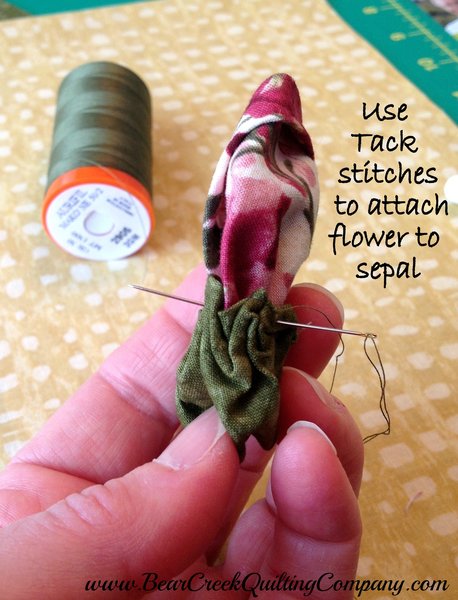
On the front of the flower be sure that your stitches are tucked into one of the sepal folds so they don't show and take only small tack stitches on the front. Your stitches can show on the back side as it will be against the fabric background. Once you've attached the flower to the sepal you'll want to gather the base of the sepal to make it look realistic. Do this by taking small tack stitches in the bottom of the sepal and pulling to gather them. Start by traveling inside the sepal to one of the outside edge.
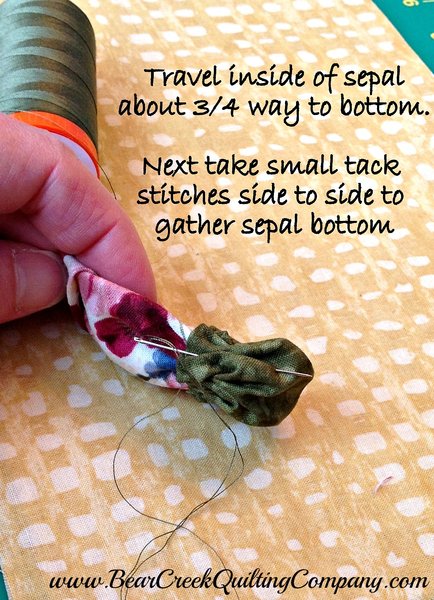
Take a tiny stitch and travel across the middle of the sepal on the inside -- exiting the opposite side of the sepal.
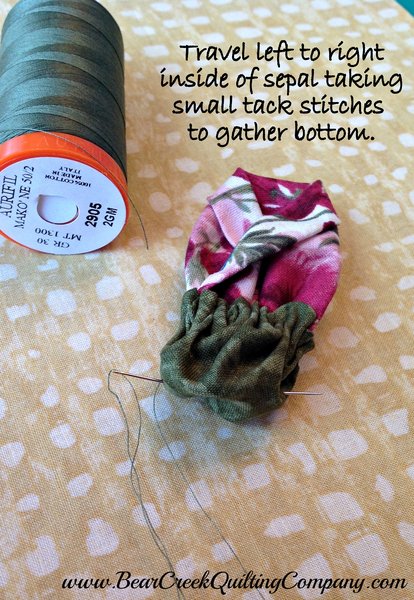
Now pull the thread taut and repeat this step, traveling inside of the sepal, taking a small tack stitch, etc., until you like how it looks. This is fun.... it's kinda playing with, collecting, or gathering the fabric with needle and thread. Once you're comfortable with how the sepal looks, travel inside again to the back of the sepal where it is joined with the flower. Now tie off the thread with several knotted stitches -- again leaving the thread attached (do not trim it -- you can use it later to attach the flower to the background).
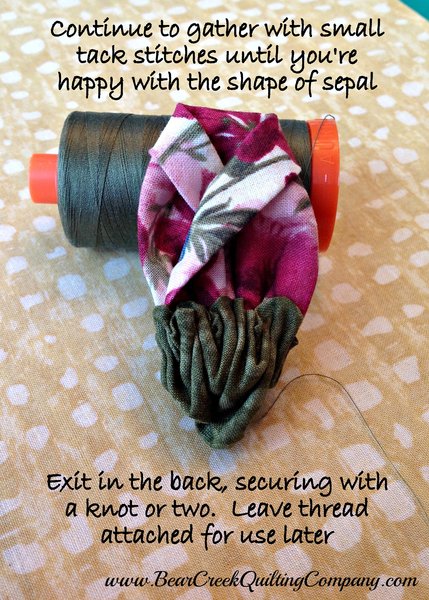
Whew! I hope you enjoyed that step - it seems a little scary at first but when you're done it's a "one of a kind" sepal -- no two alike. Do the same step for a total of 6 Wild Rose flowers and 2 Iris flowers.
Attach flowers or quilt the top? Decisions, decisions...
Now that 8 flower/sepal combinations are ready -- you have a decision to make:
1. Attach the flowers to the quilt top now, and quilt it later, or...
2. Quilt the top now, and attach the flowers later.
Option 1 allows you to stitch the flowers to the background fabric with no worry about your stitches showing through the back of the quilt.
Option 2 allows you to quilt freely -- without working your way around any bulky flowers.
For the tutorial I chose to quilt the top before attaching the flowers. This allowed me to do a simple crosshatch design needing only worry about jumping over the stems (and not working around the flowers). If you're going to hand stitch or just fill in with an echo stitch or some other sparse stitching you can attach your flowers now.
Prepare the Quilt Back and Batting:
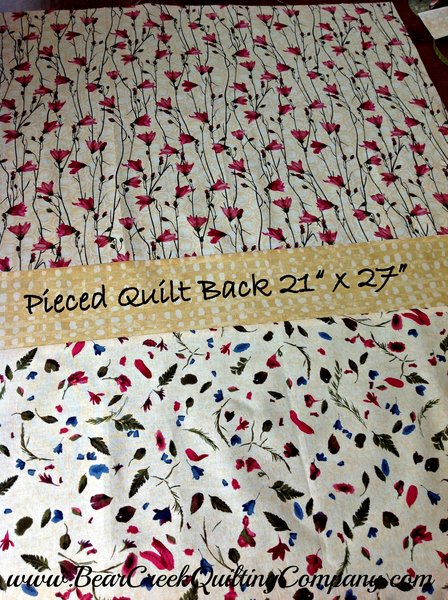
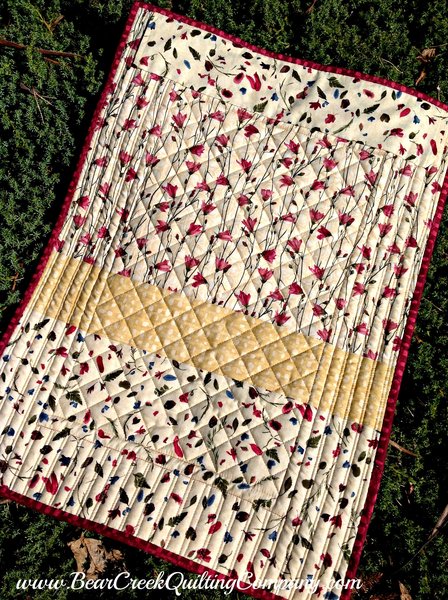
Use remaining fabric to prepare the quilt backing for a finished size of 21" x 27" - which is an extra 1.5" on each side. The extra fabric gives you some "wiggle" room when you are quilting and acts as a fairly inexpensive piece of mind.
- Wild Rose Vine - 15" x 21"
- Cream - 3.5" x 21"
- Wild Rose Petals - 9" x 21"
Sew together with 1/4 seam allowance, press seams in same direction.
Batting: The sample was completed with one layer of Hobbs Heirloom 100% Wool and one layer of Quilters Dream 100% Cotton. The wool batting gives the piece a little bit of loft while the cotton adds stability. Cut the batting the same size as the backing fabric, 21" x 27". If you are going to use a quilt design that requires marking be sure to mark the quilt top before layering and basting it.
Marking Cream Background for Crosshatch Quilting:
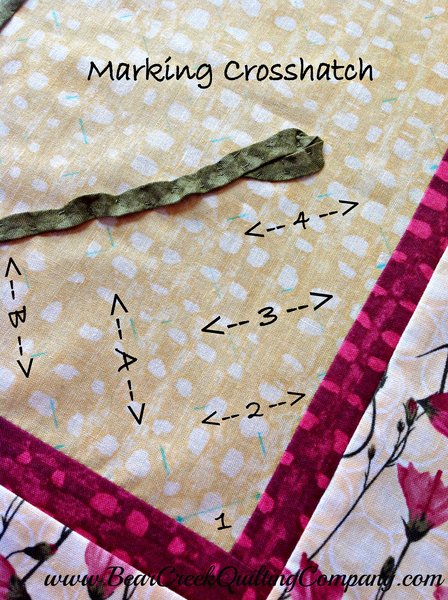
I must admit I am not one to normally mark a quilt top. Most generally I have fun with dense free motion quilting on my tops. Needless to say, making the Crosshatch background was a brand new experience for me. I'm no expert at Crosshatching but here is how I approached it: Use a water soluble marker and mark 1" lines at a 45 degree angle to the bottom of the quilt - starting about 1/2" away from the corner of the Cream background and Berry inner border. No need to draw a complete line just place 1/4" marks every few inches. You need enough of a mark that you can follow it with your walking foot AND know which part of the crosshatch it is. See numbered 1, 2, 3, 4, marking in image below. Now mark the opposite direction, creating an "on point" crosshatch design in the center of the quilt top. See alpha A, B, C markings in image below.
Layer and Pin Baste:
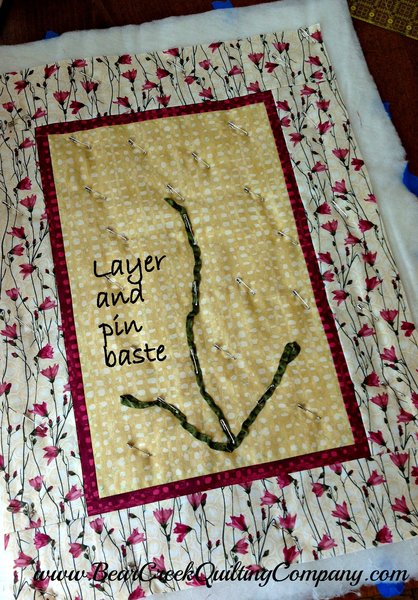
Layer the top, batting and back; pin baste. If you're not familiar with layering a quilt, visit the Moda Bake Shop tutorial for Family Tree Quilted Envelope Pillow. The steps are outlined under "Prepare the Pillow Top Quilting" section in the tutorial.
Quilt the Cream Background:
After layering and pin basting the quilt, use a walking foot with thread that matches the Cream background (Aurifil #2326 worked perfectly for this) and a #3 stitch length to quilt the background fabric. Start by stitching in the ditch to stabilize the top. When crosshatch quilting you will also travel in the ditch but you won't need to worry about thread buildup if you're using Aurifil Mako Cotton 50wt thread!
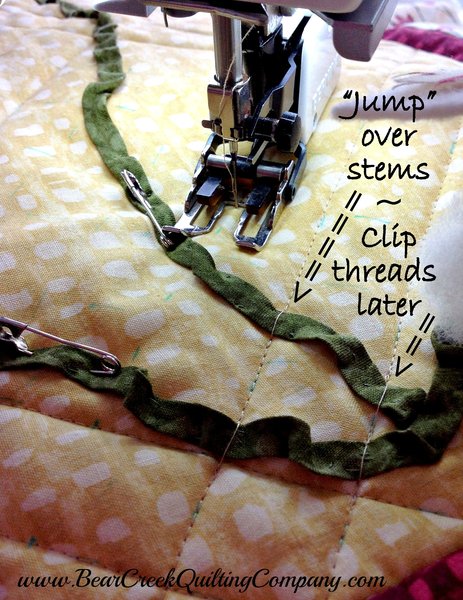
Below is an image of the quilting in-progress. There is a great video tutorial for Crosshatch Quilting on the AllPeopleQuilt.com website. You can see the tutorial by clicking here.
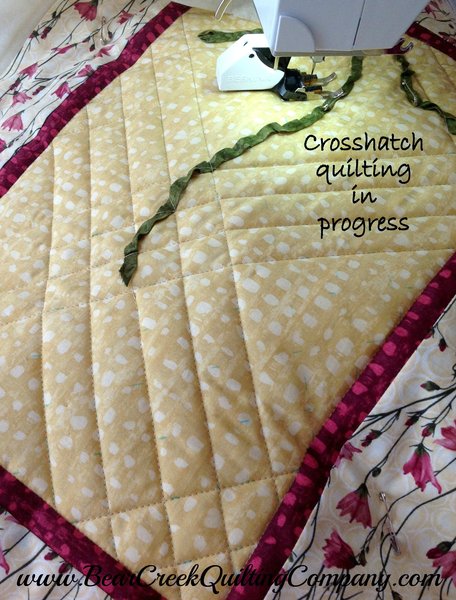
Be sure to "jump" over the stems when you reach them. The "lazy man" approach on this personal (not for show) wall hanging is to sew right up to the stem, take 1 or 2 stitches in reverse, lift the needle and presser foot, slide the quilt to the other side of the stem and start quilting (repeating one stitch forward and one in reverse).
Note: The "lazy man" reverse tacking is not recommended if you're going to enter the quilt in a show. When you're done quilting go back and clip the "jump" threads on the front and back of the quilt top.
Quilting the Border:
Note: The border fabric was quilted after the flowers were pinned in place. Although the border fabric was a little different value than the background fabric, I tested out different shades of Aurifil and decided to use the same thread as was used for the piecing and background quilting - Aurifil Mako Cotton 50wt in Color #2326. I love how it came out.
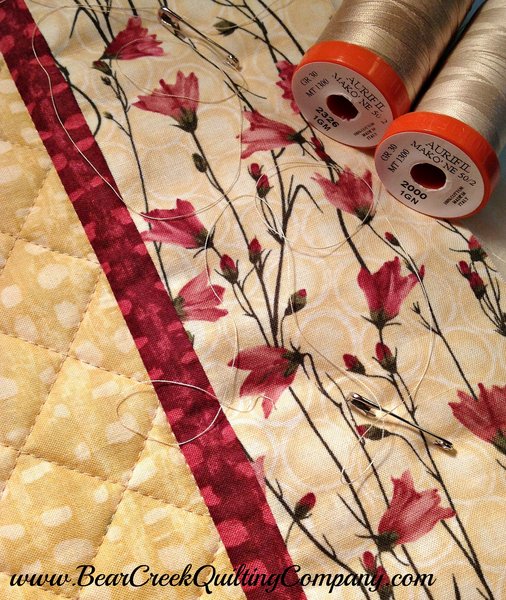
On the outside border, use a walking foot as a guide and quilt vertical straight lines to give the border a bead board appearance.
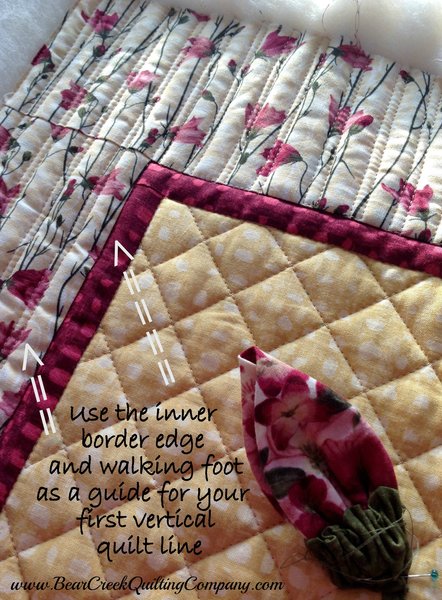
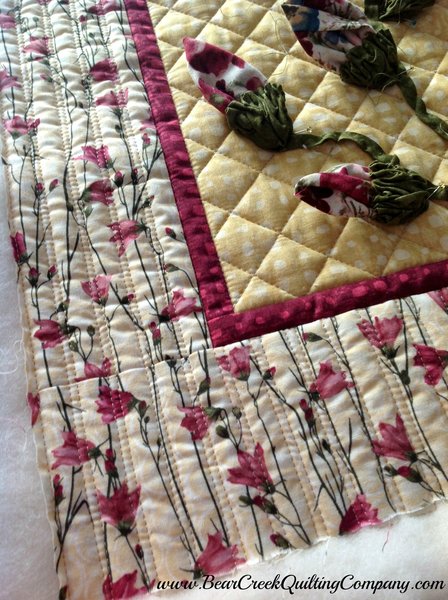
A bit of a warning, quilting the long straight sides did tug the outer border out of shape a bit. If you have a "pressure" setting on your walking foot be sure to adjust it to the lowest setting -- so the walking foot does not push or stretch your fabric. Mine didn't require any correction (blocking) but if you look close you can see the side borders are a bit wonky.
Attaching the Flowers:
Ahhh, now that the quilting is complete it's time to attach your flowers. Below is a placement diagram.
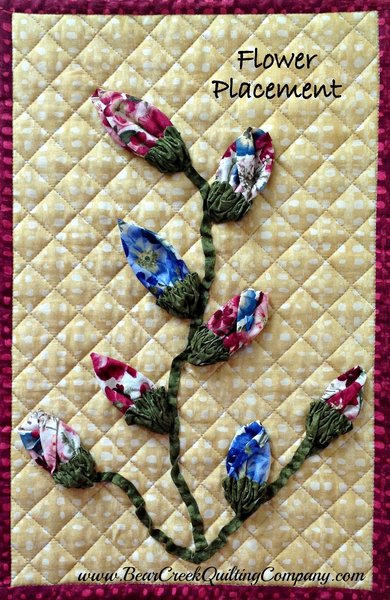
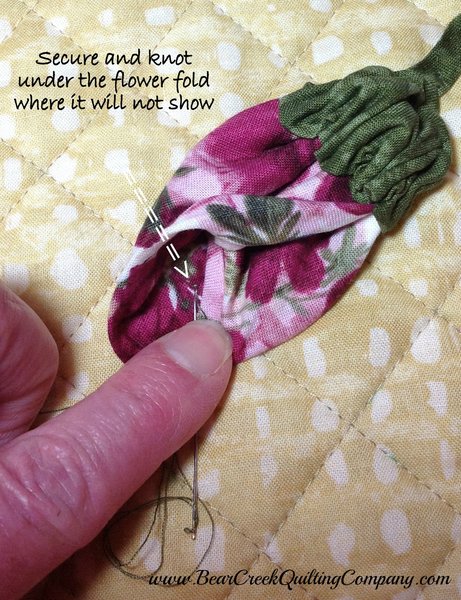
Use thread already attached at the sepal to tack the flowers to the quilt top (using care to NOT stitch through all three layers -- you DO NOT want your tack stitches to show on the back of your quilt). If necessary, start a new needle and thread and bury the knot in the back of the sepal - where it will not show against the background fabric. Be sure to stitch the bottom of the sepal to the stem.
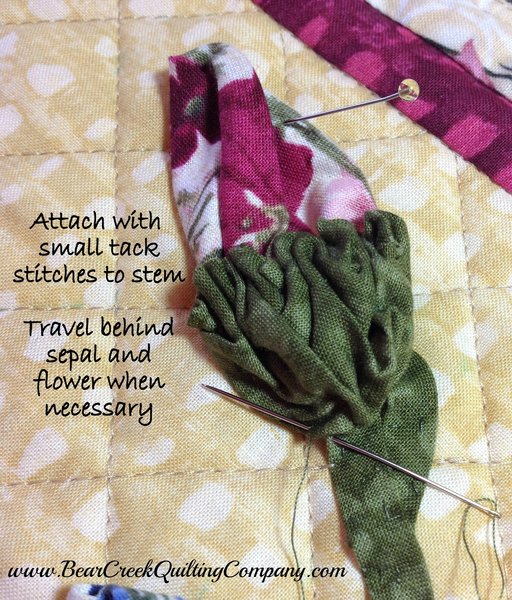
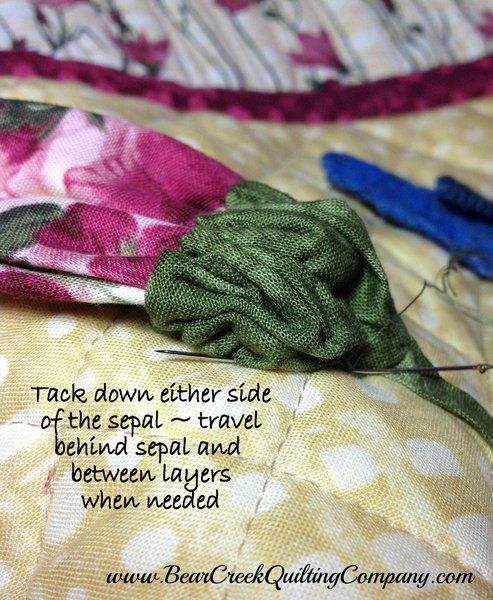
Next, travel behind the sepal or between the quilt layers and tack on either side of the sepal.
Travel again and tack the flower once or twice. No need to completely tack the flower down -- allow it to float a little.
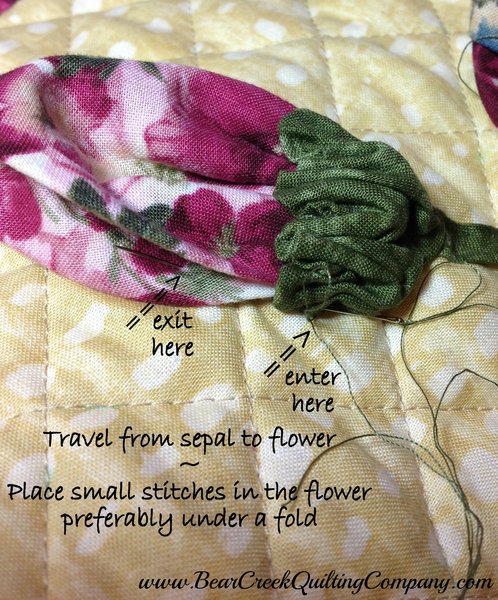
When you're done stitching secure the thread with a few knots. I used the layers of the flower to bury my finish stitches and knot.
Square Up, Hanging Sleeve, Bind, Label:
Square Up: When the quilting is done and the flowers are attached, square up the quilt top - leaving about 3" to the outside of the Berry border.
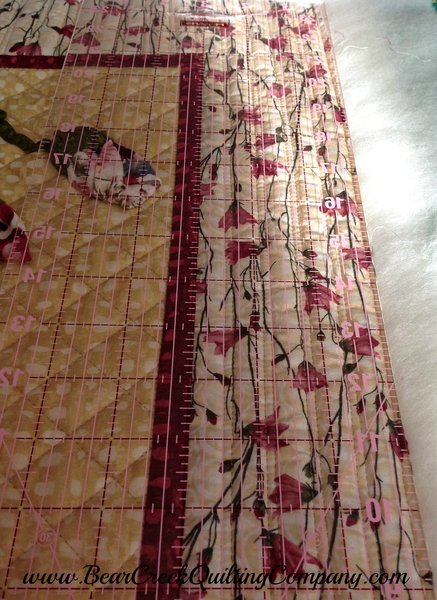
If you're not familiar with the square-up process, visit the Family Tree Pillow Recipe on the Moda Bake Shop for the steps involved.
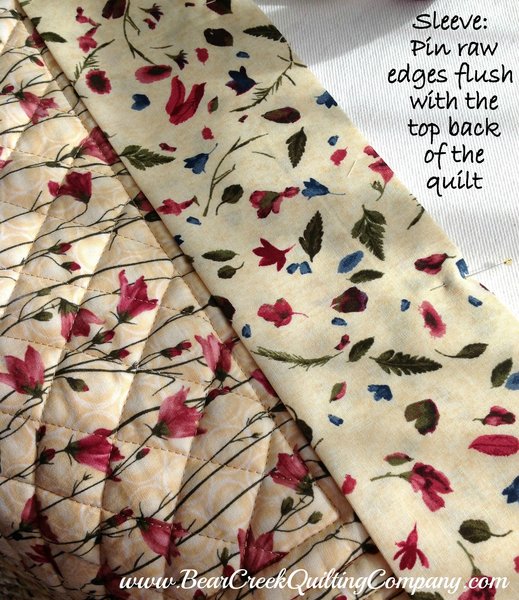
Hanging Sleeve: No wall hanging is complete without a hanging sleeve. I cut a 7" by 17" piece of the Wild Rose Petals to make the sleeve. Fold the short edges over twice and top stitch them for a finished look.
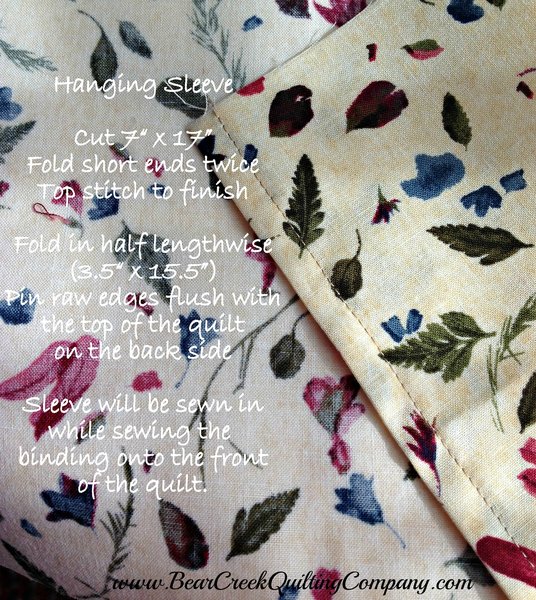
Fold the piece in half lengthwise, it should now measure roughly 3.5" x 15.5" Align raw edges flush with the top of the back of the quilt and pin in place. The sleeve will get sewn into the seam at the same time you attach the binding to the front.
Binding: For the sample I used (5) strips 2.25" inch wide x 21.5" long from the Berry fabric for the binding. Sew the pieces together end to end (I use a diagonal seam).
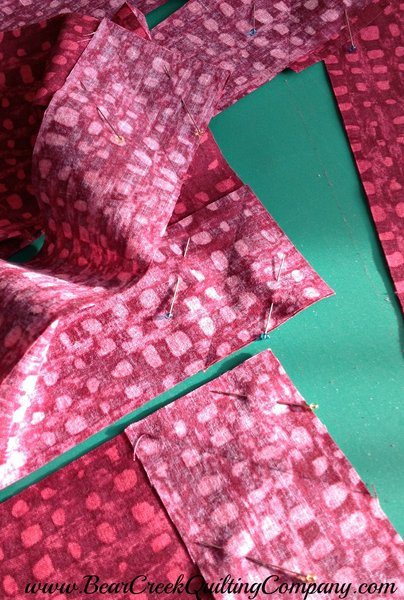
Once they are sewn fold them in half along the long edge and press. Sew to the quilt top with a 3/8" seam allowance. For a great binding tutorial, visit the Moda Bake Shop Basics Binding post here.
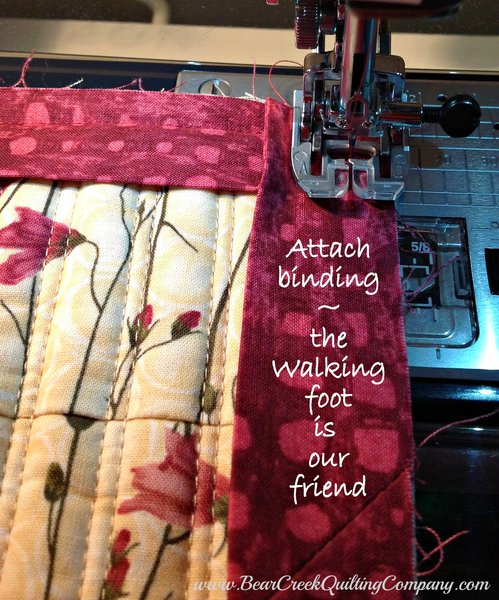
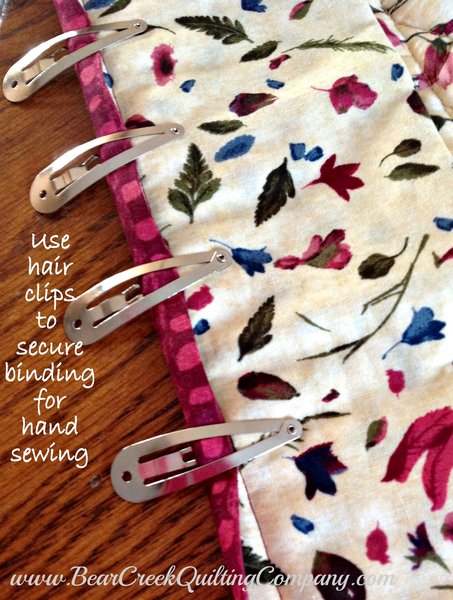
Be sure to clip the quilt fabric and batting in the corners and then hand finish the binding on the back of the quilt.
Label: Don't forget to label your quilt (I say this even though mine is not yet labeled). If you're like me, you DRAG at this step -- see my Printed Quilt Label Tutorial for a quick and easy way to label your quilts.
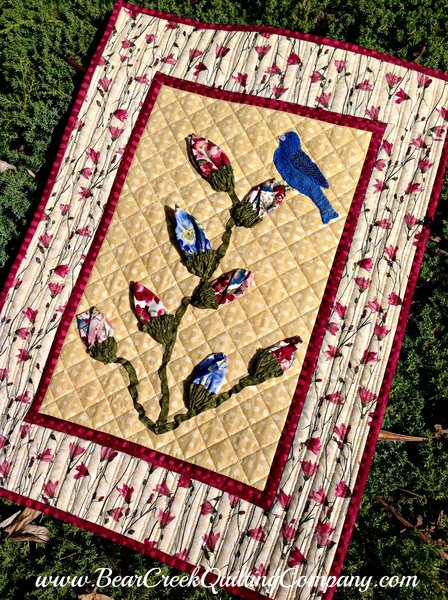
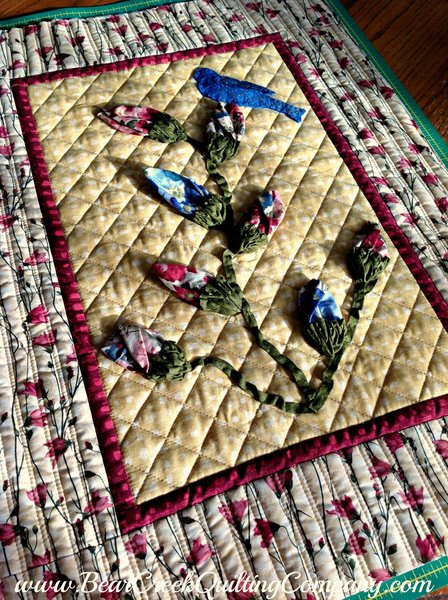
Finished Quilt: The finished wall hanging measured roughly 17" wide by 23" long and makes a beautiful addition to any wall or door in your home.
I hope you enjoyed this wall hanging tutorial. If you're interested in the Bluebird Tutorial, hop on over to my blog, Karen's Quilts, Crows and Cardinals.
Bouquet Memories Wall Hanging Kits are available here. SOLD OUT
Would you like to win a Bouquet Memories Wall Hanging kit sponsored by Bear Creek Quilting Company? Give-away expired on 5/5/2014.
Hop on over to my blog, Karen's Quilts, Crows and Cardinals for details on how to enter.

Bouquet Memories Wall Hanging was designed and created for Bear Creek Quilting Company by Karen Miller of Redbird Quilt Co.
Fabric used in this tutorial is from Bouquet Memories fabric collection by Hoffman Fabrics.
Thread used in this tutorial is from Aurifil.


Comments