Posted by Shari on February 22nd, 2015
| Great Granny Star Pillow Tutorial |
|
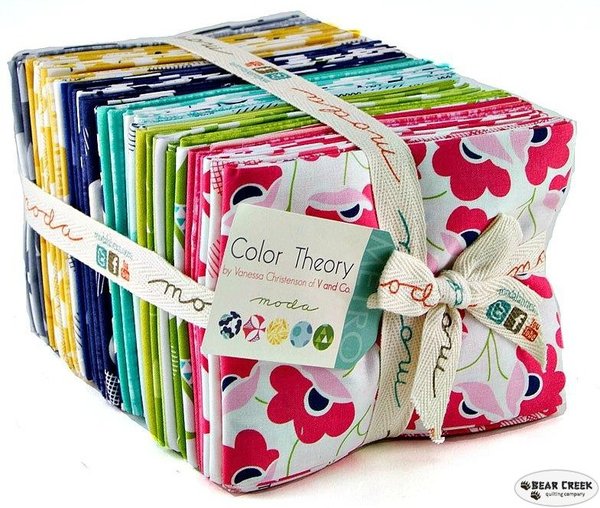
Hello, Friends! I'm visiting again from the Amy Made That! blog, for a brand new 3-part series of posts, featuring Color Theory from V and Co. for Moda.
|
 |
|
I used a fat quarter bundle and one yard of solid fabric, but these projects are also great for layer cakes, charm packs and yardage.
|
 |
|
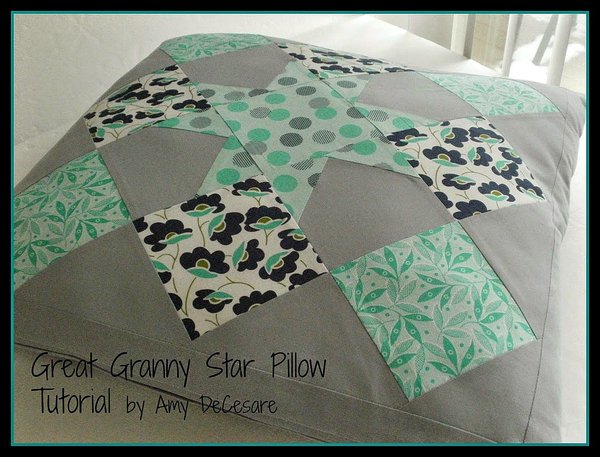
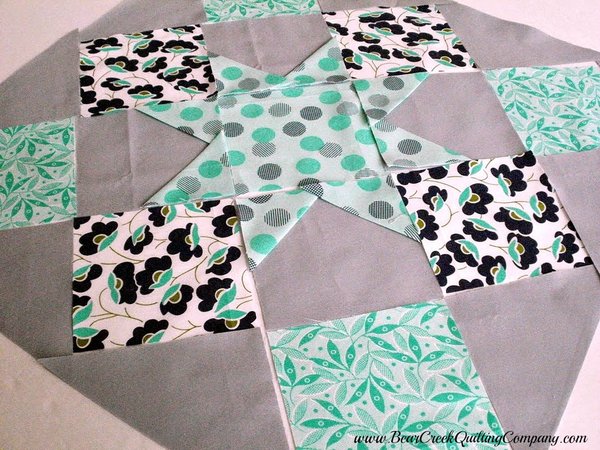
This bundle of colorful beauty inspired me to create a fabulous quilt block that I call the Granny Star. It's a Granny Square block with a star in the middle.
Let's get started making a big 22 1/2" pillow! |
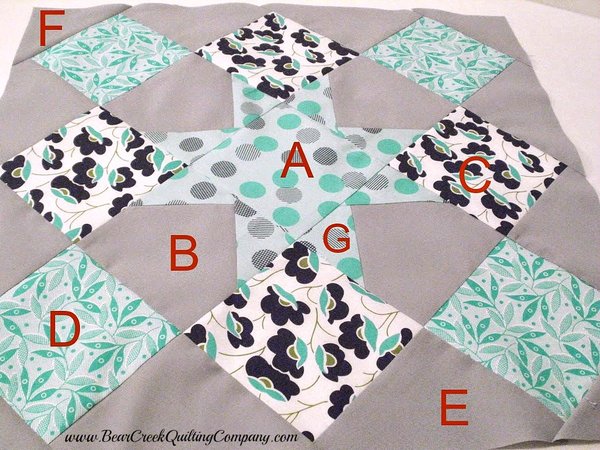 |
| Here is the layout for the block. {Each piece is labeled only once in the photo. They are placed as shown.} |
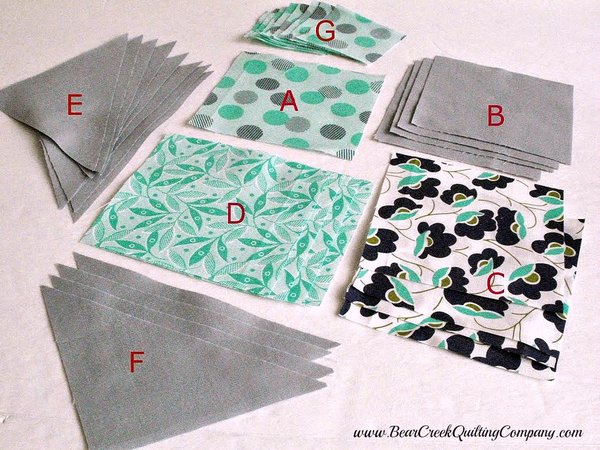 |
| CUTTING: A: (1) 5" x 5" square - center B: (4) 5" x 5" squares C: (4) 5" x 5" squares D: (4) 5" x 5" squares E: (4) 6" x 6" squares, cut diagonally - 8 side triangle pieces F: (2) 5" x 5" squares, cut diagonally - 4 outer corners G: (8) 3" x 3" squares - star points |
 |
| Press the G squares in half diagonally, WRONG sides together, for the star points. TIP: I used a solid gray fabric for the background triangles, E and F. I also chose to use the background solid for my B pieces, so that the star would show up well. Lay out all of the squares of your block, to keep them in the right positions. {You can trade places with some of the 5" squares until you like the layout.} |
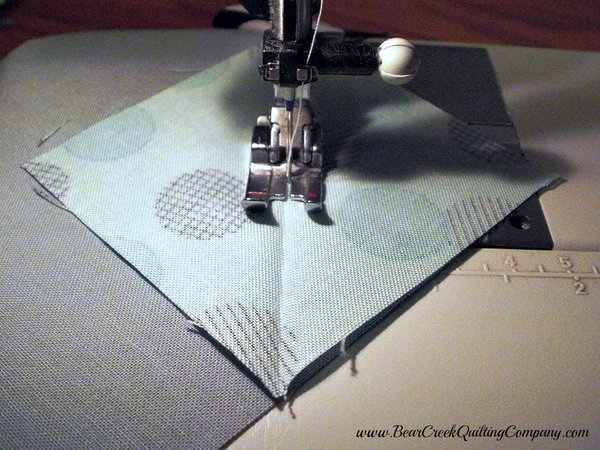 |
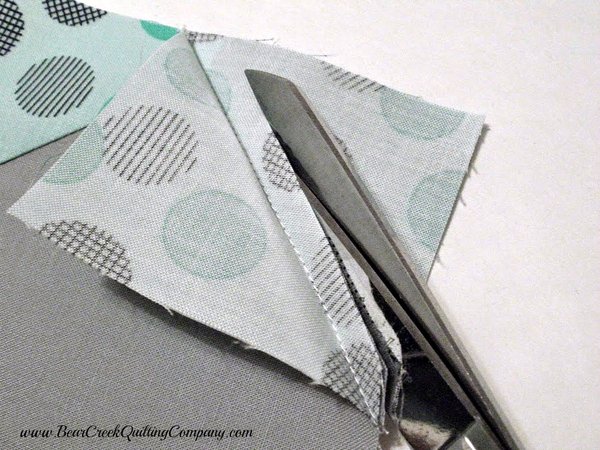
| First construct the center STAR points. Pick up a B square, and line up the edges of a folded G square as shown. Stitch along the fold. I like to chain stitch all 4 B's, then snip them apart. |
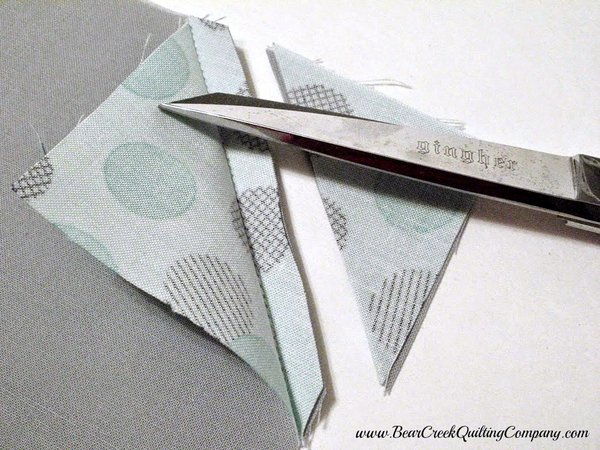 |
| Using scissors, trim away the inside corners as shown, to end with a 5" square with one star point, after pressing. |
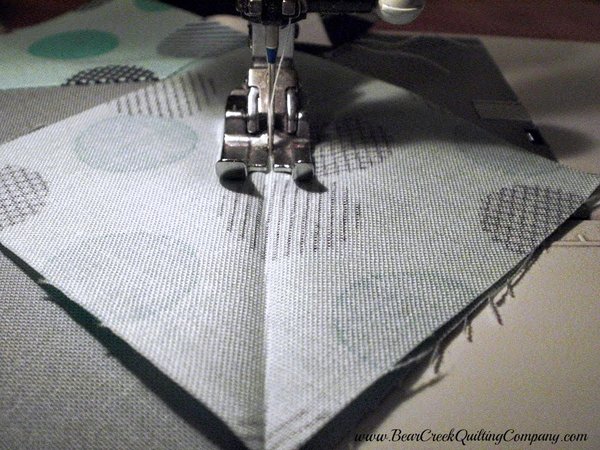 |
| Repeat the process for all of the B units, stitching along the fold of the second star point. |
 |
| Trim with scissors, and again the finished pressed star point block will measure 5". |
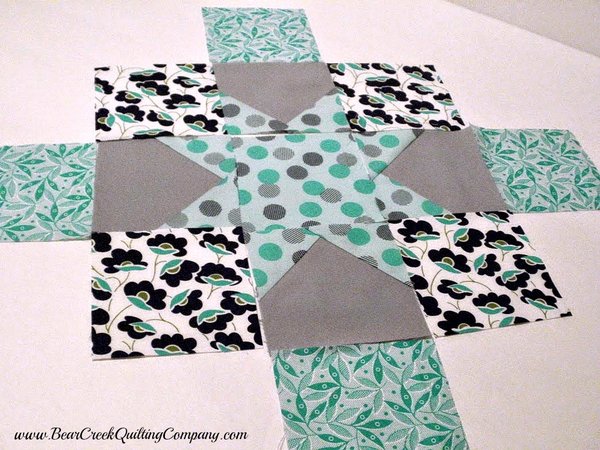 |
| Begin to sew the squares together in rows, without the triangles. Press all seams in the same direction within each row, and alternate the pressing direction for every row. This will allow you to nest the seams for perfect piecing. |
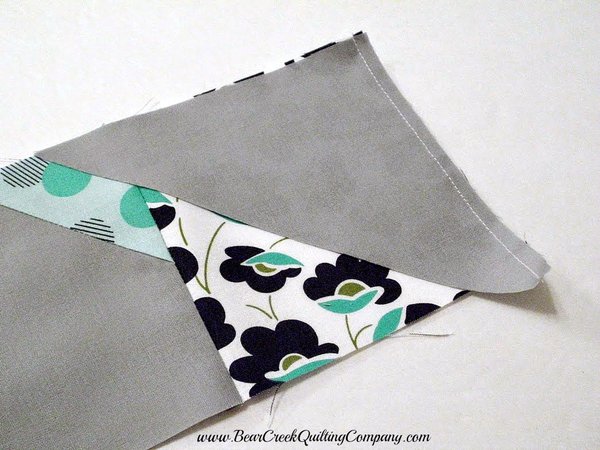 |
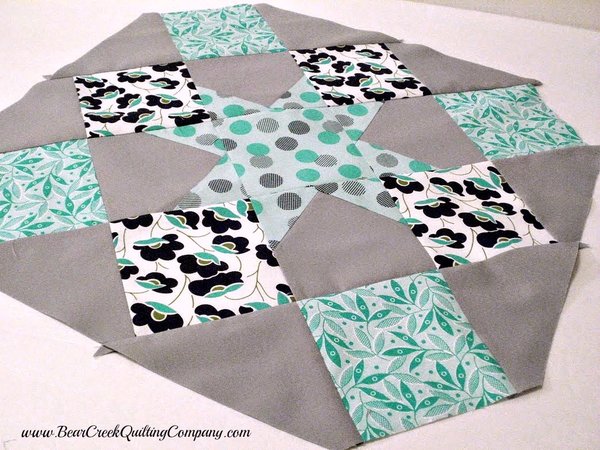
| Next, add the triangle pieces. Be careful they are being attached in the right orientation. Always line up the straight edges for stitching. There will be a lot of fabric overhanging the edges. |
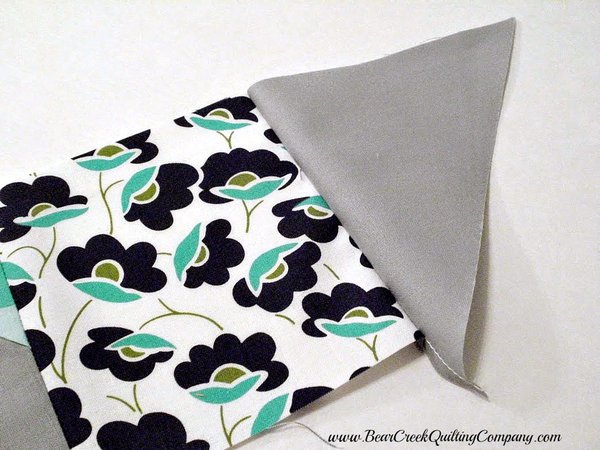 |
| After stitching, press the seam and trim off the excess dog-ear. |
 |
| Now stitch all of the rows together...almost finished! |
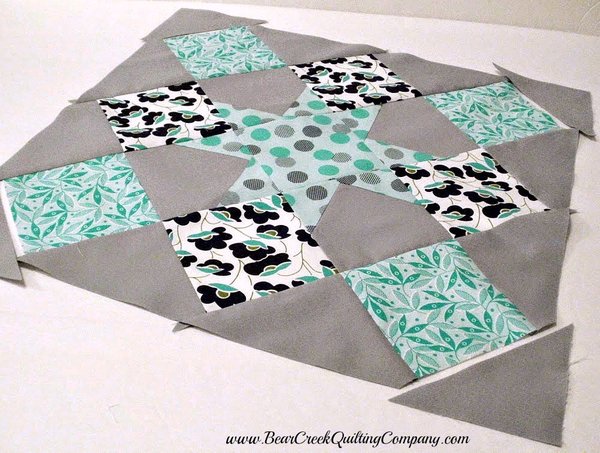 |
| To finish the block, center the corner triangles and stitch them in place. They are a wee bit over-sized. |
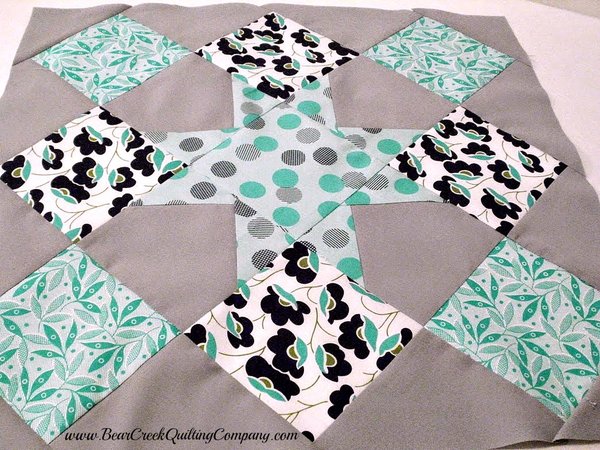 |
| Trim up the block to make a perfect square measuring 20" x 20". Make sure your 10" ruler lines cross the center of the block. Now add borders: Top and Bottom Borders: (2) 2 1/4" x 20" Side Borders: (2) 2 1/4" x 23 1/2" |
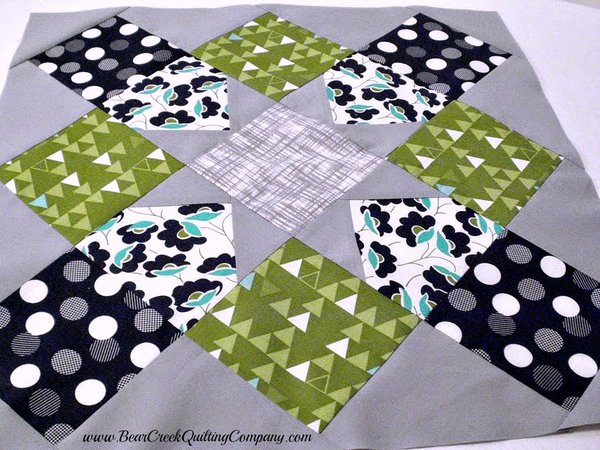 |
| Here's the block I used for the back of my pillow...more of those pretty Color Theory prints! For a reversible floor pillow, make another Great Granny Star block. Alternately you could use a 23 1/2" square of fabric for the pillow back. Add a layer of Pellon ShapeFlex interfacing (SF101) to the back of the finished pillow top. This adds stability and shape. I use it for almost all of my pillows. |
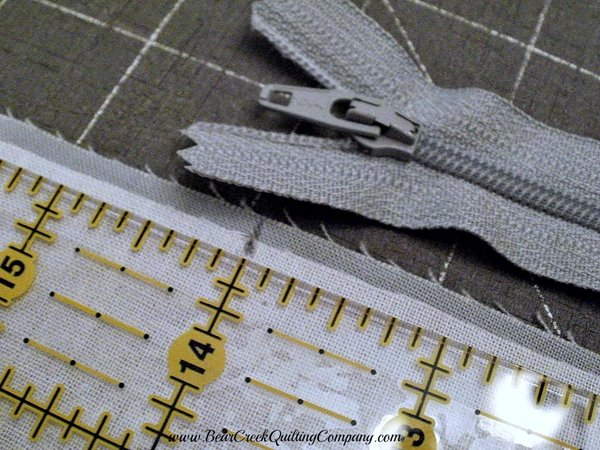 |
| ZIPPERED EDGE OF PILLOW: For the bottom edge of the pillow, use a zipper at least 14" long. {A 16" or 18" zipper will be easier for stuffing, but 14" will work.} Center the zipper along the bottom edge of the pillow front, wrong side up. Make a mark at the beginning of the zipper. |
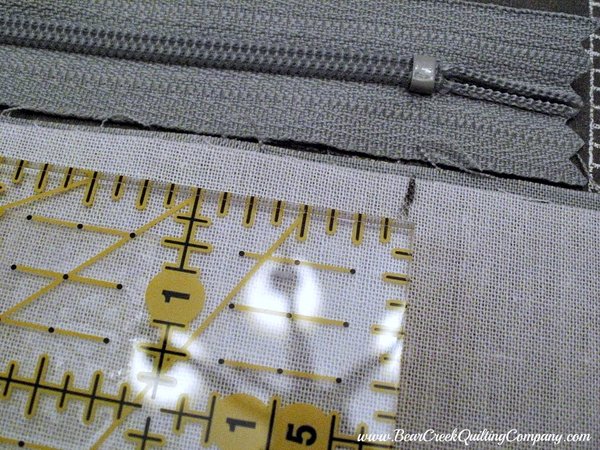 |
| Also mark the end of the zipper. Now pin the pillow front and back together, right sides together. Using a 1/2" seam, backstitch to begin sewing and stop stitching when you reach the first mark. Backstitch to reinforce, then stop at the mark. Switch to the longest stitch length, and baste the area between the two marks. Switch back to the normal stitch length. Backstitch as you continue sewing past the mark, then finish sewing the seam all the way to the edge. Backstitch to lock the finished seam. {The area where the zipper will be placed has now been basted in place.} Press the seam open. |
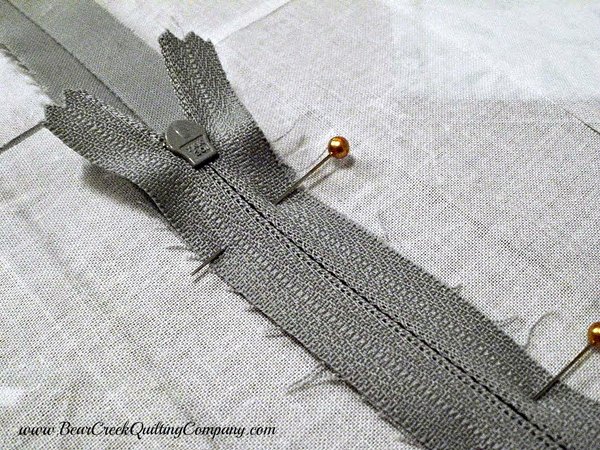 |
| Place pillow on table, with the seam showing. Lay the zipper RIGHT SIDE DOWN on the seam, and pin it into place over the basting. |
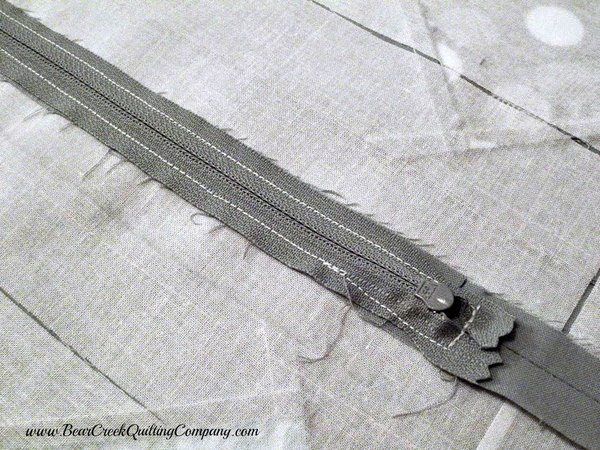 |
| Use a zipper foot to stitch the zipper in place, around all 4 edges. If the tension is right, your zipper will look just great on the right side, too. |
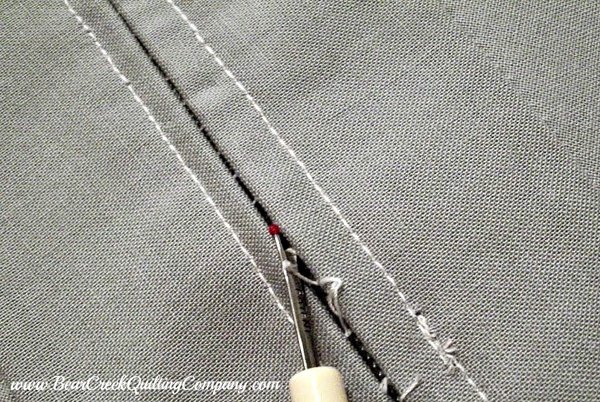 |
| Now for the fun part...turn the pillow to the right side and use the seam ripper to remove ONLY the basting stitches. {I bet you never knew using a seam ripper could be sew much fun!} |
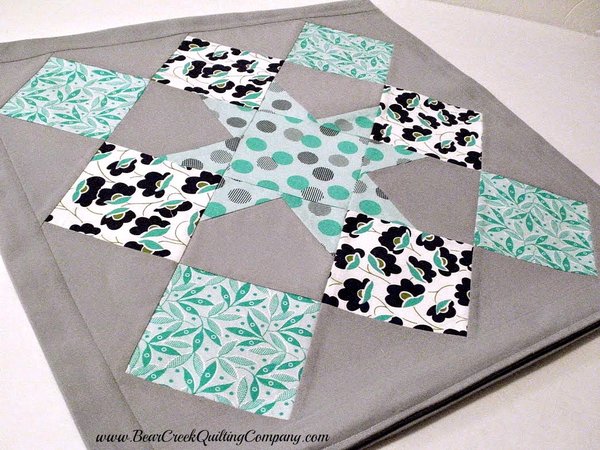 |
| OPEN UP THAT ZIPPER NOW and keep it open for a while. {Did you open that zipper? Just checking...} Pin the pillow front and back, right sides together, around the remaining three sides. Stitch around all three sides, with a regular or triple stitch. Trim corners, and turn pillow right side out. Don't blame me if you didn't open that zipper. ;) Give your pillow cover a nice pressing. |
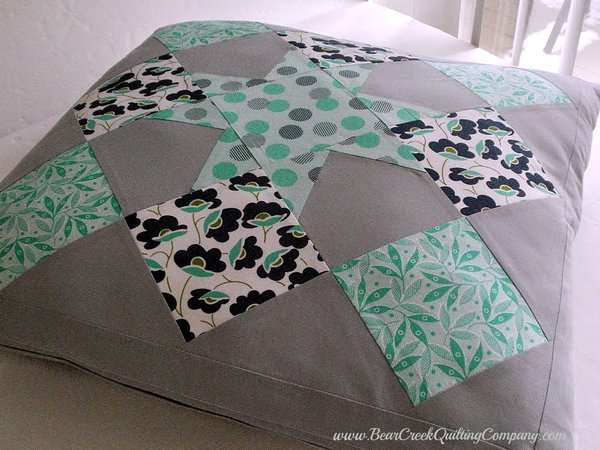 |
| Stuff the pillow with a 24" pillow form. It will be nice and full, ready to snuggle. |
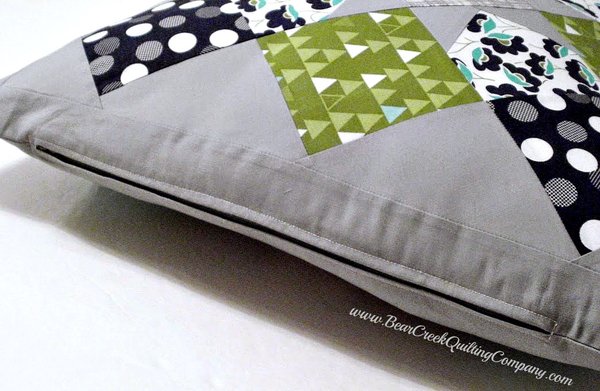 |
| The bottom zippered edge is so neat. |
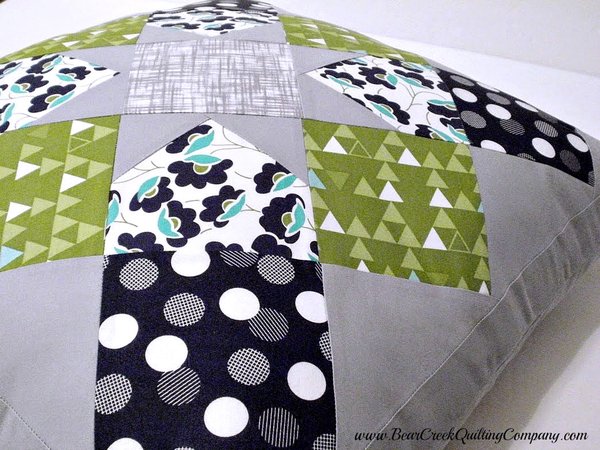 |
| I like both sides...do you? Stop back again soon, and we'll make the Granny Star block in smaller sizes. |
 |
| "Great Granny Star Pillow" Tutorial was designed and created for Bear Creek Quilting Company by Amy from Amy Made That by eamylove. |
| Fabric used in this tutorial is from Color Theory by V and Co. for Moda. |
| Do you love free fabric? Do you love to teach? Want to be a contributor on our blog? Send us an email at web@bearcreekquiltingcompany.com to get started! |


Comments